Last time we looked at the Mission Rose project, I was working on the outer frame.
I still am.
And I’m still pushing for that Christmas finish!
A few readers asked about finishing the twist that I’m using down the middle of the outer frame. It is obviously a much heavier thread than the passing threads and check threads surrounding it. So how do you finish twist at the end of a line? Do you plunge it? And if you do, how?
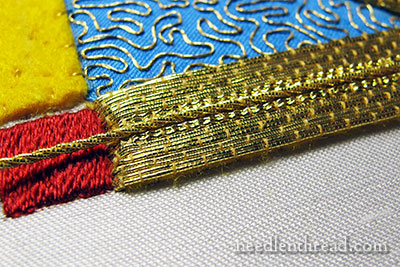
Here’s the area in question, where the twist comes to the end of the gold part of the frame. I’ve already plunged all the threads around it.
Now, twist is decidedly heavier, it’s true, than the other threads. And when working with really heavy threads in goldwork, it’s not always possible to plunge them.
If you consider, for example, the Grecian twist I used to outline the medallion in the Marian Medallion project, there’s no way a thread like that would comfortably plunge. It is simply too heavy. So I showed you how the Grecian twist was finished, by butting up the two ends together and oversewing them with gold colored silk, to secure them.
Grecian twist is about three times heavier than the twist I’m using here on the Mission Rose. I’m using a #2 twist, which you can find through Berlin Embroidery.
Although the twist is somewhat heavy compared to the other threads, I didn’t think it was too heavy to plunge. And so – I plunged!
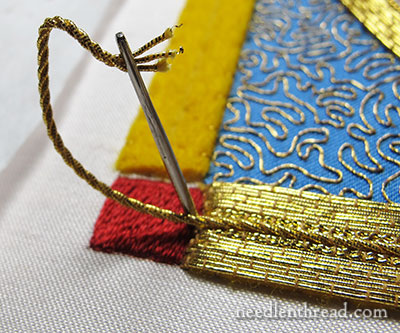
I used a large crewel needle (size 1). A large chenille needle (size 18) would probably work even better in this case, as it has a longer eye, but I didn’t have on hand.
I squished the very ends of the twist, so that they were more or less parallel to each other, and maneuvered them into the eye of the needle, while the needle was situated in the fabric where I wanted the thread to plunge.
A pair of tweezers can be quite handy in a situation like this. They can help pull the end of the thread into the eye, and they can also help hold onto the thread or the needle when you’re working in a tight space.
Once the thread was in the eye, it was a matter of getting that thick thread through the fabric. You can prep the fabric by inserting the large needle (empty) into the place you want the thread plunged and pulling through and wiggling the eye around a bit to open the hole. You can also (carefully) use a stiletto to open the hole further. I just wiggled the needle about.
When it was time to pull the twist through, I pulled the needle until the eye was sunk into the fabric with the twist part way through, and then I just gently rocked the needle back and forth, until the twist pulled through. It takes a little bit of time and persuasion, but if you’re careful and slow – and you have a good grip on the needle – rocking back and forth while you’re pulling it through will help the larger thread pass through the fabric.
Pliers can come in handy in tough spots like this, too. Sounds brutal, doesn’t it? I didn’t need pliers for this bit – it’s really not that thick of a thread.
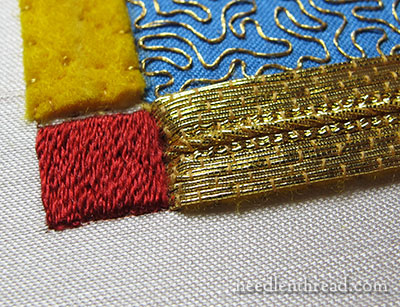
Here’s the end, plunged. I still need to go back over it with my mellor and nudge some of those threads around. One of the passing threads is crossed over another, right on the edge. The mellor is the tool used to nudge goldwork threads – it’s easier on the threads than tweezers, and I should be able to nudge that crossed thread into place without a problem.
Funny, I never saw the crossed threads until I was editing photos! See – taking photos of your work can be really, really helpful!
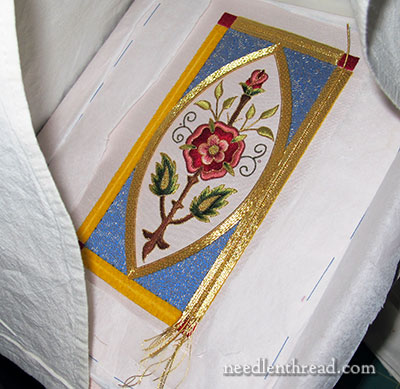
Here’s a parting shot of the Mission Rose on the frame, under its canopy. I keep it covered with a large clean cotton towel when I’m not working on it. At this point when I took the photo, I had two sides finished. I’m on the third side now, and I’m So Excited!
Just a note about the photo directly above: it’s one of the few photos where you can see that the background fabric behind the rose is actually pale pink.
Well, you know what I’m doing this weekend! And we’re expecting a goodly little snow & ice storm over the weekend, which gives me a great excuse to stay home and stitch! And bake. And stitch. And clean. And stitch. And wrap Christmas presents. And stitch. And do laundry. And stitch…
Tomorrow, I’ll announce the winner of the Beam ‘n Read light give-away – if you haven’t signed up for that, today’s your last chance!
Hope you have a terrific weekend – keep warm and safe, or cool and safe, depending on which side of the globe you’re on!
If you’d like to see what the Mission Rose project is all about, you can read the whole backstory on this project and follow its development by visiting the Mission Rose Project Index, where all the articles relating to it are arranged chronologically.

