I’ve been using chain stitch a lot lately!
And there’s good reason for that. First of all, chain stitch is a versatile stitch, great for outlining. But chains stitch also makes a wonderful filling stitch.
Besides its versatility, there’s the whole Easy Thing going on. It’s one of the basic embroidery stitches, easy to work for any level of embroiderer.
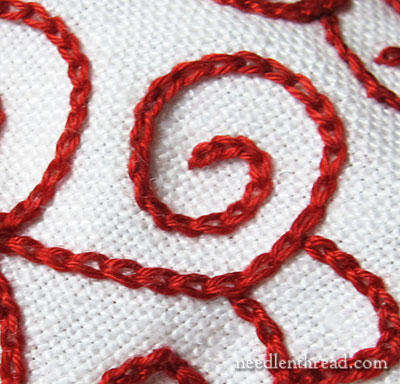
Besides exploring chain stitch in tambour embroidery, I’ve been using the regular surface embroidery stitch called chain stitch (with a needle) on the Hungarian redwork runner that I started eons ago. There’s a lot of chain stitch on that piece – mostly in the form of squiggly or curly lines.
Did you know that you can speed up chain stitch a little bit – especially when working curls and swirls on line patterns – by switching to reverse chain stitch?
Reverse chain stitch looks exactly like chain stitch, but it works up in reverse. Let me show you how:
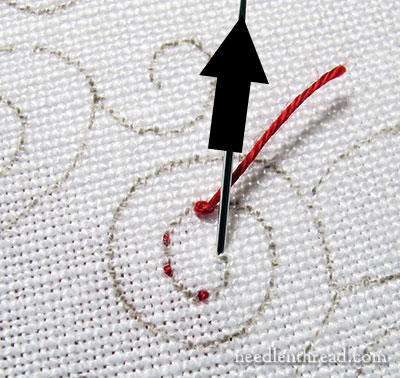
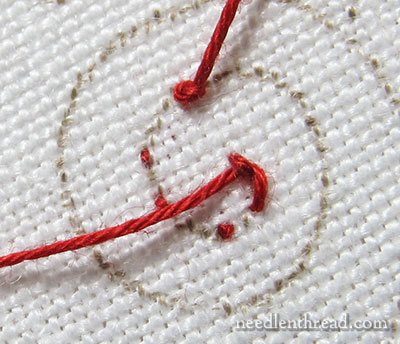
Here, I’m working a curly section on the Hungarian redwork runner, using coton a broder #25.
I started with a waste knot a little way into the curl – you can see it in the photo, just behind the needle.
I wanted my “starting point” for the reverse chain stitch (which would actually be the ending point in regular chain stitch) to be the inside end of that curly section.
So, from my waste knot, I took three tiny, separated backstitches in the fabric towards my starting point. This anchors the thread thoroughly.
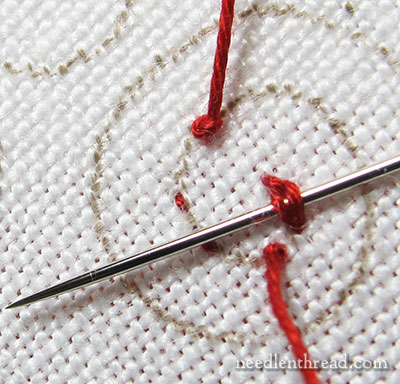
I brought my needle up to the front of the fabric to start the reverse chain stitch right where the end of the inside of the curl.
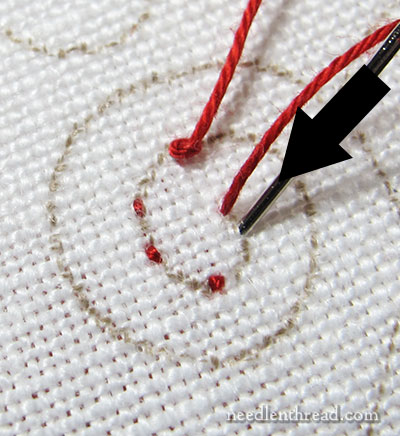
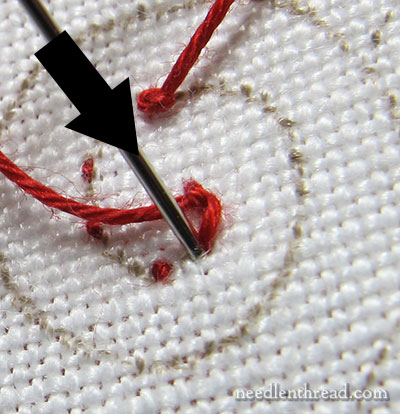
Then, the needle goes down into the fabric a short stitch length away from the starting point, to create a tiny anchor stitch.
The needle comes back up into the fabric a stitch length away from the end of that first little stitch. The stitch length is the length you want the chain stitch to be.
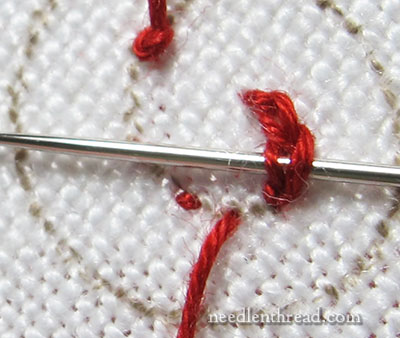
After the working thread is pulled through to the front of the fabric, run the needle underneath that little first anchor stitch, without picking up any fabric.
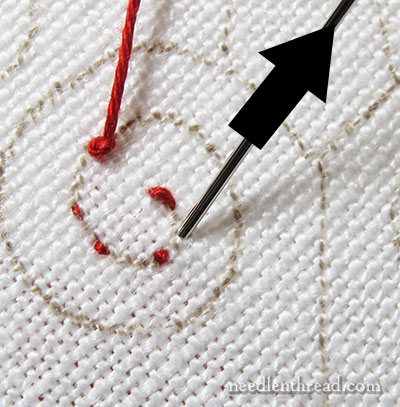
Pull the thread through, and you can see that you have half of a chain stitch!
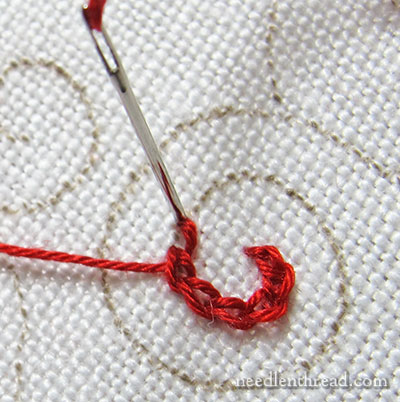
Take the needle down into the same hole where you emerged to begin this stitch.
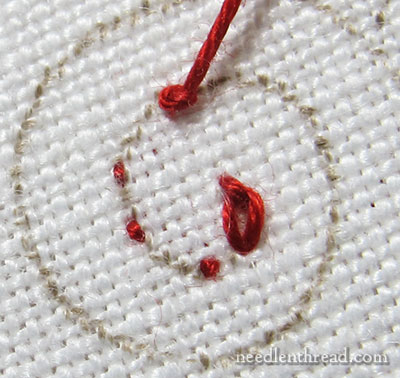
And there’s the chain stitch, already anchored. Now it’s just a matter of continuing along the line…
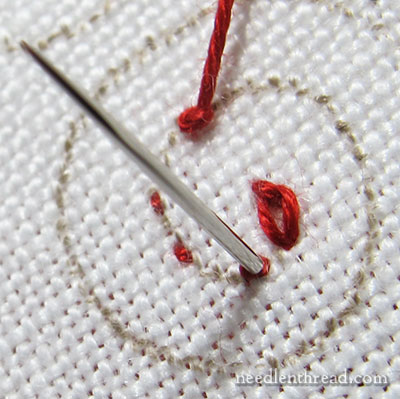
For the next stitch, bring your needle up a stitch length away from the end of the last chain stitch.
In this case, I ended up coming up right through one of the backstitches used to start the thread, and that’s quite ok! Just pretend those little backstitches aren’t there – you can stitch over them or through them, it doesn’t matter.
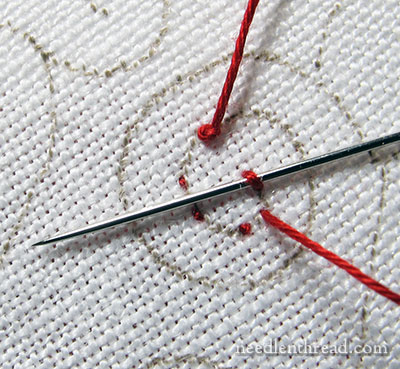
Pull the working thread to the front of the fabric, then take the needle behind the previously worked chain stitch without picking up any fabric, and then head back down into the same hole where this stitch started.
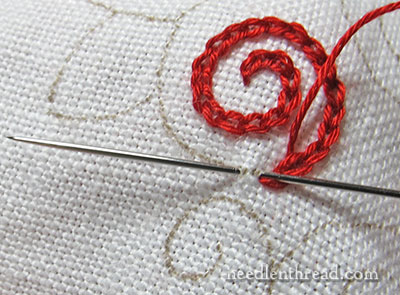
And now we’re working on the third chain stitch here. Notice that I am passing the needle only under one chain stitch – the one previous to the stitch being worked.
Don’t confuse reverse chain stitch with heavy chain stitch, which passes under the last two previous stitches.
As you approach the waste knot, just clip it off and keep going.
With reverse chain stitch, you can also use the “sewing method” of stitching, where your needle never passes all the way to the back of the fabric. Instead, you scoop up a tiny bit of the fabric when moving to the beginning of the next stitch.
This “sewing method” of stitching (as opposed to the “stab” method, where you take your needle and thread all the way to the back of the fabric) is especially quick and easy when working embroidery in the hand, without a hoop or frame.
With the reverse chain stitch, it’s very easy to control the tension of the stitch. I have no problem switching from regular chain stitch to reverse chain stitch in the middle of the Hungarian redwork runner, because I can easily control the tension and create a chain stitch line that looks like a line embroidered with regular chain stitch.
I find the reverse chain stitch works around curves – especially these tighter curly curves in the runner project – much more quickly than regular chain stitch does.
If you’re working a project that involves a lot of chain stitched lines (not filling), give the reverse chain stitch a try! Once you get used to it, you might find it speeds things up a bit!

