The other day, I filled you in on how I’m working the vines on the Secret Garden project, using stem stitch as a filling and shading it gradually by working with two shades of green in the needle at a time.
Today, I’ll show you some more vines and share some stitching tips that will help you with stem stitch filling.
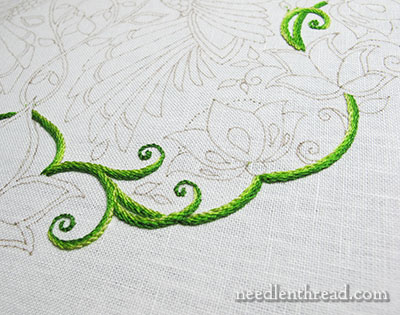
This section of vine is on the lower half of the design area for the Secret Garden Hummingbirds. I’ve embroidered the vines using stem stitch, filling the vine area with shades of green.
If you’re using stem stitch for this area as well, but you’re not quite confident with the stitch, review the stem stitch video a few times, to make sure that you’ve got the whole notion of stitch direction down.
Stem Stitch Filling & Spacing
First, a little about spacing with stem stitch filling.
Here’s the first line of stem stitch on a vine area. Since I want all my vines on this part of the design to have the darkest color towards the lower line of the vine (and on the curl at the end), I started with the darkest shades of green in the needle.
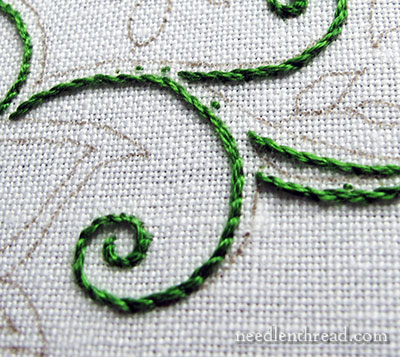
I worked the second line of filling next to the first, in the next lighter shades of green. The second line should be right next to the first, but not crowding into it – just worked next to it. You don’t want the ground fabric showing, but you don’t want the lines jammed so closely together that the stem stitches don’t have a little “elbow room” for their twist.
The stitches in each line are not necessarily right next to the stem stitches in the previous line. I generally off-set the stitches, by ending each stem stitch next to the “dip” where two stitches overlap in the previous line. So the stitches in the new line are not lined up exactly at the starting and ending point of the stitches in the previous line. They’re just slightly off-set.
Occasionally, you might end up with stitches right next to each other – in the scheme of the whole piece, that won’t be noticed. But you’ll find as you stitch the filling that you will naturally want to off-set the stitches in each line, because they just fit together better. You can see how they fit together as you’re stitching – go for that fit, but don’t pack each line in so closely that the stitches lose their shape.
Direction of Stitching & Stem Stitch
I can’t emphasize it enough! Pay attention to the direction of your stitching, when working the stem stitch.
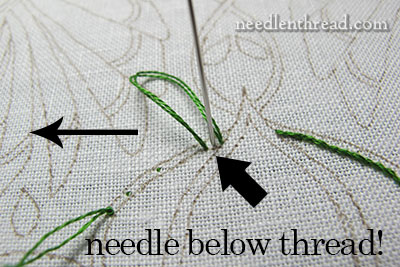
After finishing one line of stem stitch in the darker greens on the lower right half of my design, I moved to the lower left half of the design to do the same thing.
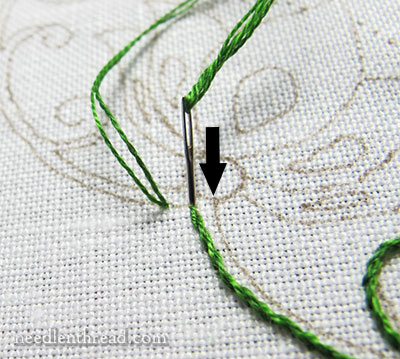
Since I’m working on the left half of the design, from the center of the design towards the left outer edge of the design, my stitch direction is now changing. I’m stitching from right to left, rather than left to right. The straight arrow in the photo above shows you the direction I’m going in, to work the first line of stem stitch.
I’m taking my first stitch on this right-to-left line in the photo. Notice that the needle is below the working thread (the small loop of thread there on the front of the fabric, where I haven’t pulled the stitch all the way through yet).
Normally, with stem stitch, we keep the working thread below the needle (the needle would be above that loop of fabric, if I were stitching in the other direction). But to keep the twist consistent on the stem stitch, when working from left to right, keep the needle below the working thread.
This is very important, because if you do it incorrectly, your stem stitch filling will not blend together as well.
Stem Stitch on Sharp Corners
You can read this article on making sharp corners with stem stitch, or pick up the same information in the stem stitch video.
Here’s a refresher, to show how it works out in this design.
There are a couple areas on the design where the vines are somewhat scalloped.
Work your way to the point of the scallop, and end your stem stitch at the point of the scallop. Bring your needle up in the fabric a stitch length away from the point of the scallop on the intersecting line, and then take your needle down at the point of the scallop where your last stem stitch line ended.
Then proceed with the stem stitch, using this “backstitch” as your first stitch in the new direction.
In this way, you’ll achieve nice, sharp corners with the stem stitch wherever they’re necessary.
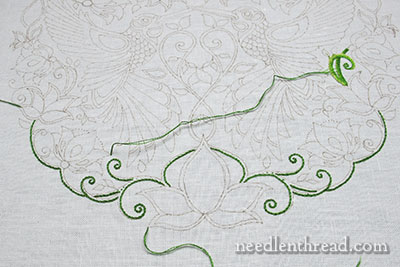
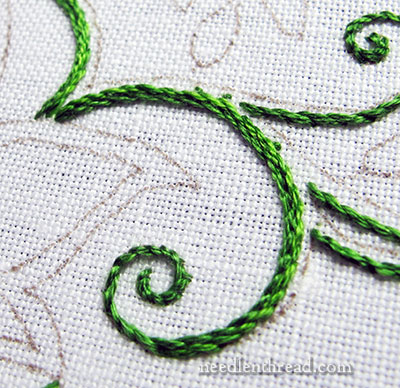
Here, you can see the first line of the darkest green in place on the vines in the lower half of the design.
With these tips, combined with the information on blending two shades in your needle, you should be able to move forward with filling your vines with stem stitch.
A little bit later, we’ll look at a couple tips that will make your stitching more efficient, too, and that will help you keep the back of your work nice and neat.
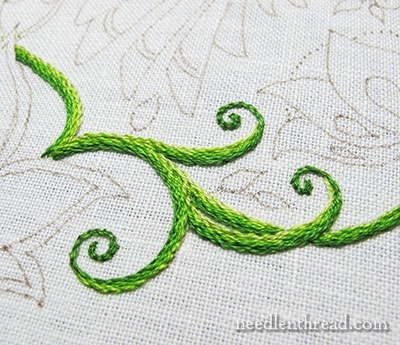
A couple points about my vines:
When I traced the pattern, I did not finish the vines in double lines with little round ends. Instead, I narrowed them to a single line and finished them in curls.
I wanted the majority of the curls on the lower part of the design worked in the darkest green, so I carried my darkest green stem stitch up around the curls. You might want your curls to be lighter. In that case, carry the lightest green up around the curls or around the rounded ends on the vines.
Questions? Comments? Suggestions? Feel free to have your say below!

