After selecting colors and threads to get started with, I was super eager to get into stitching on the Secret Garden project.
You might think that I’d start with the hummingbirds, since they’re in the middle of the project, and they’re the focus of the project. After all, a jeweler starts with the stone before creating the setting, right?
Well, call it backwards, but I’m starting with the setting, and specifically with the vines, because they are the continuous force in the design. They go everywhere. They hold it all together.
Besides, I’m still ruminating on those hummingbirds. I haven’t conquered them yet in my mind, and working on the rest of the project will give them time to work themselves out in my head.
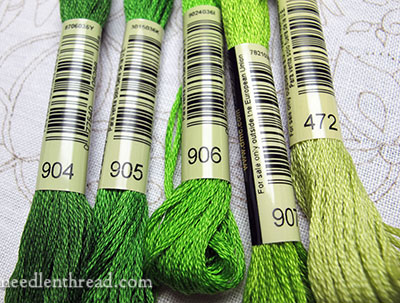
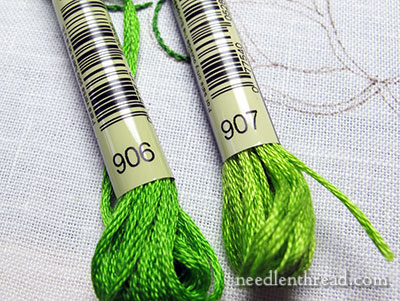
These are the vine colors I’ll be using, in DMC. Notice how they all belong to the same string of numbers (except the last one on the far right), and that the lower the number, the darker the color. This is a very convenient way to pick out shades. I wanted a nice grassy spring green, so I picked 906 out of my thread drawer, and then I selected the colors in the same number family right around 906, knowing they’d give me a good range of shades.
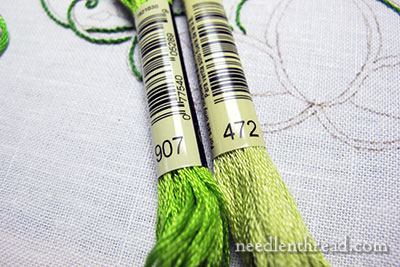
But I needed something that springs out a bit in a lighter yellowy green, so I picked that 472 on the right to top off the greens.
I wasn’t sure if the 472 would work, but why not try it, right?
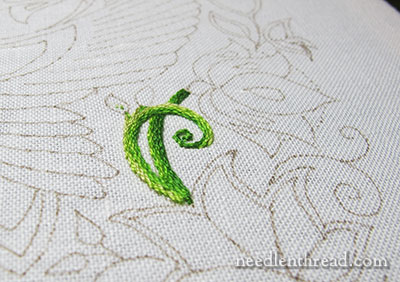
I selected a small area of vines on the project – it’s on the outside to the lower right of center – where I could test some stem stitch shading without having to complete a whole long section of vinery.
I think the 472 works just as I wanted it to work.
The stems are “thickened” quite a bit by the embroidery, but on this version, I’m happy with that – it’s the look I’m after for the 101 version of the project.
Now, you might be looking at that little section of painted vine, thinking, “I thought this was the beginner project. That looks like complex shading.”

It’s not complex shading. It’s simply stem stitch, worked in rows, using two shades of green in the needle.
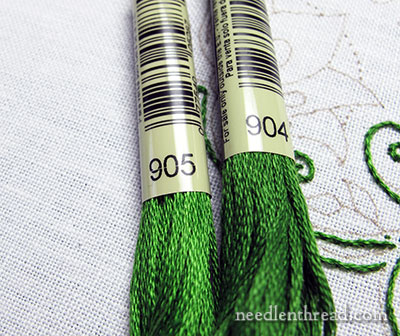
For this section, I started with 904 and 905, one strand of each, in the needle. I worked stem stitch along the lower edge of the farthest back section of the vine (the vine part that doesn’t cross over).
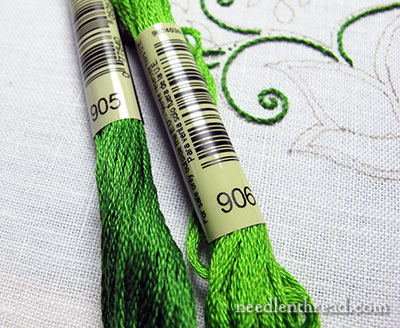
Then I combined 905 and 906 in the needle, one strand of each, and worked that for the next line of stem stitch, right next to the first line, on the farther back part of the vine, and I also used this combination for the inside lower edge of the cross-over vine.
Then I combined 906 and 907 in the needle and continued to fill both vines.
And then I ended with 907 and 472 in the needle, which took me to the other outside edge of the vine, to finish filling.
On the top edge of the vine that crosses over, I finished with one strand of 472 in the needle, because my design line was just barely visible, and I wanted to highlight that top vine with a little brighter color.
Mastering Stem Stitch
I intend to work all the vines in stem stitch, but you might opt for a different stitch.
These are the reasons I like stem stitch for the vines:
1. I can make the line thick or thin very easily, by increasing or decreasing the lines of stem stitch filling.
2. I can shade without doing anything more complex than stitching the stem stitch.
3. Stem stitch has a nice texture. It’s not super-textured, but it’s not smooth and super shiny, either.
4. For beginners, it is much easier to work a stem stitch filling than it is to work a perfect satin stitch or a long and short stitch.
Stem stitch is one of the basic embroidery stitches, but there are some tricks to it that are good to master if you want to create a beautiful stem stitch line.
The first trick is to master the stitch itself, and in order to help you do that, watch the stem stitch video.
The second trick is to understand that there is a difference in the stitch when stitching from left to right or from right to left. The difference is explained on the stem stitch video page and in the stem stitch video.
As you watch the video, notice how the thread position changes in relation to the needle, depending on the direction you’re stitching. That’s what you need to master!
Lefties and Stem Stitch
For left handed stitchers, if you are “stabbing” your stitching rather than “sewing” it (that is, taking the needle and thread all the way to the back of the fabric before bringing it back to the front, as opposed to “scooping” up a piece of the fabric), then you can stitch the stem stitch in the same way a right handed person stitches it.
If you are “sewing” the stitch (scooping the fabric), then you’ll need to watch the video and concentrate on the top part of the rectangle, where the line is traveling from right to left. Notice that the thread is above the needle at that point. That’s the method for lefties – working from right to left, with the thread above the needle, if you are “sewing” the stitch.
Whether you are a right or a left handed stitcher, if your fabric is taut in a hoop or frame, it’s better to stab than to sew, because you won’t distort your fabric, and your stitches will sit up plump and pretty on the top of the fabric.
So that’s my starting point – stem stitch, shaded by working with two shades of green in the needle at one time.
Next time we visit the project, we’ll look at some tricks to help you to stitch efficiently, to keep your stem stitch neat, and to keep the back of your work tidy. In the meantime, a nice thread give-away coming up! Keep an eye out!
Questions? Comments? Suggestions? Feel free to have your say below!
If you want to follow along with the Secret Garden Hummingbirds Project, you can find a list of all the articles relating to the development of this project in the Secret Garden Hummingbirds project index.

