Well, I’ve experienced the first I-Must-Pick-This-Out Moment on the Secret Garden embroidery project.
I’m pretty sure there will be other similar moments, so I’m not fretting over it. There’s no point in fretting over unstitching, because it is bound to happen now and then. If you look at it as part of the process, it’s not as detrimental to your overall stitching morale!
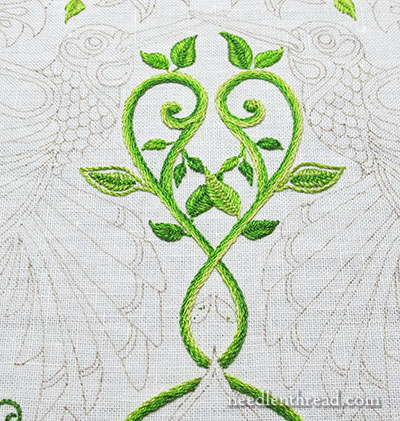
Here’s the central vine part, with all the leaves embroidered except those two little ones on the inside of the vines at the base.
This is quite a conglomeration of leaves and necessarily, there’s a lot of green here. The leaves are stitched, as previously explained, in fishbone stitch, fly stitch, and closed cretan stitch.
You can see that two of the outside leaves on the sides have an outline around them, which happens quite a few times in this whole design.
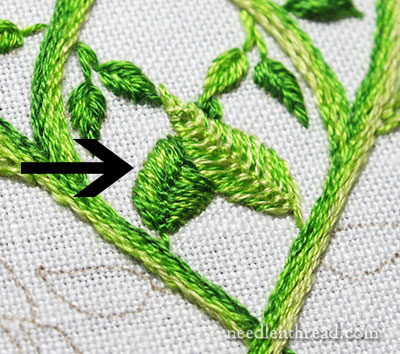
First of all, this leaf in the back has to come out. It is entirely too wonky. I’m not sure how it ended up so wonky – it didn’t look that bad when first stitched (or so I thought!).
When working overlapping elements in this design, I’m embroidering the farthest back element first, and the closest (to the viewer) element last. This helps keep the overlapping elements forward, as they should be.
On this one, I stitched the darker background leaf first, in fly stitch, and then the lighter foreground leaf next, in closed cretan stitch.
Besides that bizarre spine down the background leaf (it took a sharp turn towards Albuquerque at the base of the leaf), the stitches near the overlapping leaf have become displaced. They’re downright scrunched.
So, that’s going to come out. The question is, do I take both leaves out and re-stitch (probably the best approach, to get it absolutely right), or do I just pick out the darker background leaf and make the best of it?
Well, I’m going to do the latter – I’ll pick out the background leaf and work it with the foreground leaf still intact.
Go ahead. Call me a sloth.
Prudent Me is telling Lazy Me that I could be tripling my work here by not taking out the foreground leaf, too.
But Lazy Me is totally winning. (It’s called Leaf Glut.)
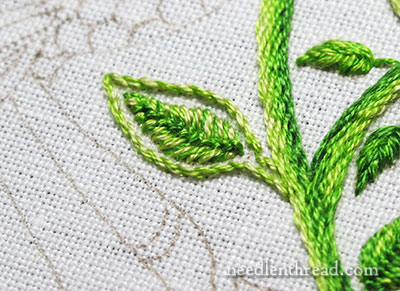
And then, there are these little guys.
Not quite sure about that outline. It seems too heavy. Or too light.
Or too heavy.
It needs reconsidering, in any case.
I don’t want to solidify the areas where there are outlines around leaves, filling in the outlines, because that will draw the whole leaf out to the outline, and I think the outlined leaves would end up looking really thick and chunky. I want the outlines to be outlines.
I’m just not sure what outlines I want them to be. Any thoughts?
I have two ideas I’m going to try, and I’ll let you know the results once I try them. And of course, if you can come up with a Grand Scheme and Solution, I’ll try that, too!
Another point: at first, I didn’t want to go with darker outlines here, because the darker outline would completely separate the leaf on the lighter edge of the vine. But the lighter outlines, in the whole scheme of the area (see the first photo above) almost seem washed out and lost.
So, besides changing the stitch, I believe it is necessary to change the shades of green involved, too.
These minor difficulties I will tackle today. And once I’ve sorted them out, all the small leaves on the vines will be finished.
And then… The Big Leaves. I have a plan for those. It was the one plan I was planning not to plan, but more on that, later.
You know that once the leaves are finished, and then the flowers, the birds are next? And then the project will be finished!
It all sounds so quick and simple, doesn’t it?!
Questions? Comments? Input? Suggestions? Critiques? Observations? Proposals? Opinions? Reactions? Sentiments? I’m all ears! Have your say below!
If you’d like to follow along with the Secret Garden Hummingbirds project, which features a design from “Secret Garden: an Inky Treasure Hunt & Coloring Book” by Johanna Basford, you can find all the articles relating to this project arranged in chronological order in the Secret Garden Project Index. Among the articles, you’ll find plenty of tips and techniques that will help you with your own embroidery projects.

