The larger the leaf, the longer it takes to embroider it. I know that’s just common sense, and I know I should know that.
But when I started the long & short stitch shading on the large leaves at the base of the Secret Garden design, it seemed to take So Much Longer than I had anticipated. And that’s because long & short stitch on a large leaf is not the same as fishbone stitch on a small leaf.
I’m just loaded with all kinds of common sense today, am I not?
In reality, though, the large leaves didn’t take all that long – it’s just a matter of plugging away at them.
So, today, let’s go through the large leaves together, and allay all our fears of long & short stitch shading on these leaves, or anything similar on your own projects.
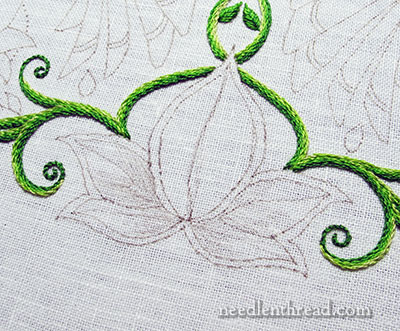
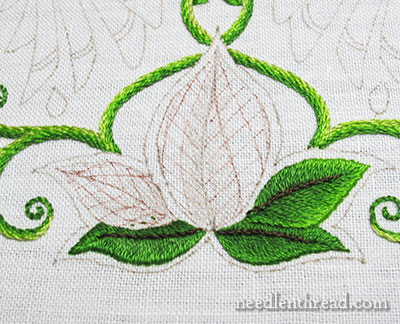
Here are the large leaves at the base of the design. Notice that I’ve sketched in some shading on them. I used a very light pen to do that – the same micron pen I traced the design with. It’s kind of a grayish taupe color, so it’s light. If you decide to make marks all over the insides of the leaves, that’s absolutely fine – they will be covered. Just don’t make them too dark or they can end up being quite distracting while you’re stitching, or confusing if you need to change them.
In any case, work out the shading first on the paper design, then feel free to mark in your shaded areas either with lines that delineate where the shades will approximately change, or with some little sketchy strokes.
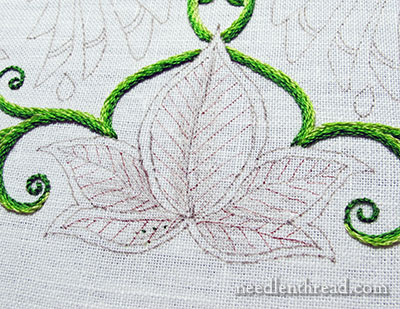
Next: directional lines. You don’t always have to do this, but it does help, especially if you’re new to long & short stitch shading. Mark in some directional lines that will help you keep your stitch direction consistent.
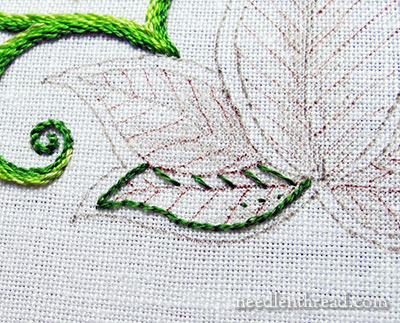
Then, begin with the lower leaves that are farthest back in the design. On my design, these are the darkest leaves, and they are overlapped by slightly lighter leaves.
Using one strand of floss in the darkest green (904), I outlined the lower leaf with split stitch, except where it is overlapped by the next leaf up.
All the long & short stitch is worked with one strand (from the six) of floss, except in the one case noted below, where I use two strands.
I worked in some spaced directional stitches before starting to fill up the area. On the top half of this leaf, the color is solid 904, and pretty much just satin stitch, since the space is so narrow.
I’m only using two shades of green on these lowest leaves – 904 and 905.
On the lower half of the leaf, the outside shade is light – 905 – and so I worked directional lines in 905, and then filling in between them with long & short stitch.
It’s kind of a “divide and conquer” method of long & short stitch, but it works.
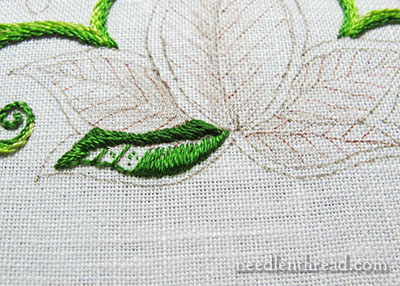
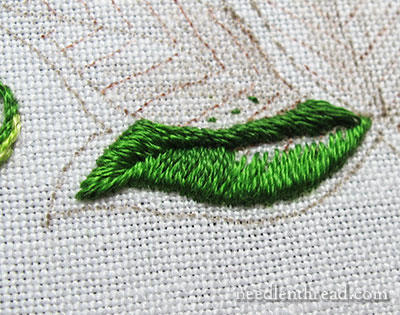
So, above you can see the lighter (905) on the lower half of the leaf, worked in a dense long and short stitch over the split stitch outline.
When working this outer layer of long & short stitch over the split stitch outline, I prefer to bring my needle up inside the leaf and take it down over the split stitch line.
The reason I do it this way is because it’s easier to see exactly where I’m taking my needle over the split stitch outline, and it seems to keep the edge neater.
All the layers of long & short stitch after the first layer on the outside of the object, the needle will come up in the previous long & short stitch layer and go down into the not-yet-filled design area.
Now, the darker green is going into the middle of the lower leaf. Remember, the needle comes up into the previous long & short stitch, and down (in this case) on the spine of the leaf. There’s only room here for two layers of stitching.
The key to this type of shading, if you want it to blend really well without looking too toothy: make the stitches a lot longer than you think, coming up very deeply into the previous layer. Alternate long and short, but not “rigidly.” Make sure you’re spacing the long, deep stitches going into the previous layer, so that they don’t form a ridge of color change.
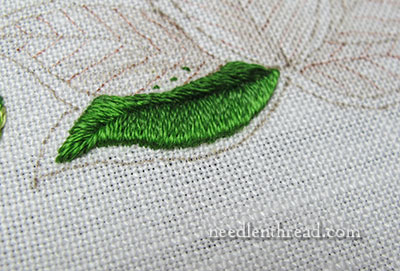
So there’s the first leaf. There’s a little wonky blurble towards the tip, on the spine, but that will be covered up with the stem stitch spine in the end, so it’s ok.
When you’re working the long & short stitch, by the way, don’t hesitate to go back and sneak in some stitches to even things out or smooth things up. It’s a very forgiving stitch! It hides a lot!
After finishing one lower leaf, I jumped over and embroidered the opposite lower leaf in the same manner.
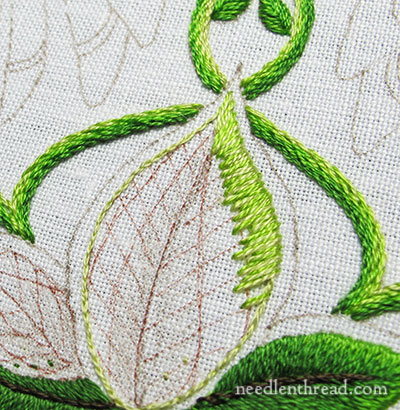
With the next leaf up that overlaps the lower leaves, I worked the split stitch outline in 906, which is the next brighter shade of green, and then began filling in the leaf in the same manner as the previous leaf.
This leaf will be worked with three shades of green, from 906 (the lightest, on the outside) to 904 (the darkest, on the inside).
On the top half of the leaf, though, I only worked the long & short stitch shading with two shades – 906 and 905. There wasn’t enough room to work the darker 904, and it didn’t need it, anyway.
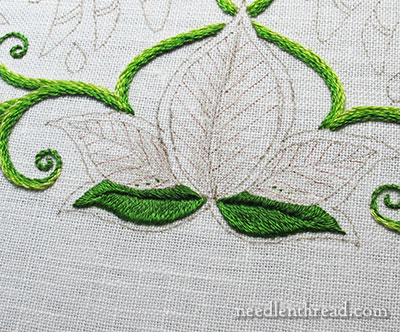
So here you can see three leaves, finished. I’ll talk about the spines below.
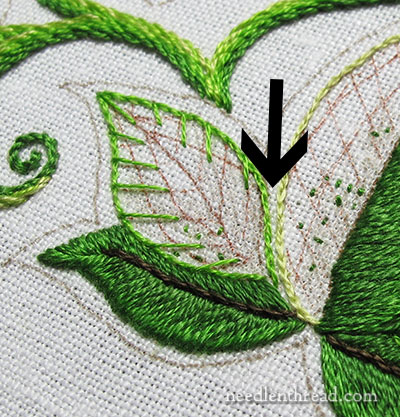
At this point, I moved on to the right half of the large leaf, even though the middle leaf on the left was not worked. It doesn’t matter, because technically (so I thought) these two leaves are separate – the large leaf doesn’t overlap the middle leaf, as there is a border between them.
Once I finished this half of the large leaf, though, I made some adjustments.
In any case, the split stitch outline on the large leaf is worked with 472, the lightest green.
Then, for large leaf, because it is so large, and because I really wanted to have a solid, thick first layer of long and short stitch, and because I wanted a mix of greens here, I used two strands of floss for the first layer (only) of long & short stitch on this leaf. I used 472 and 907 in the needle.
The stitching here tends to look a little rough and thick, but it will all “pull out” when the next layers of long & short stitch are worked into this layer.
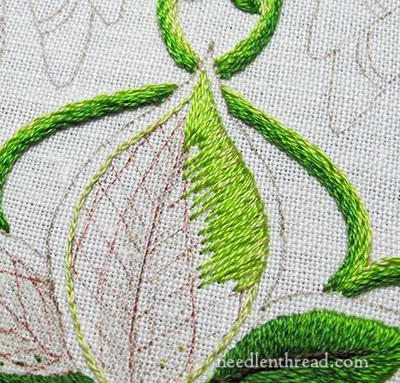
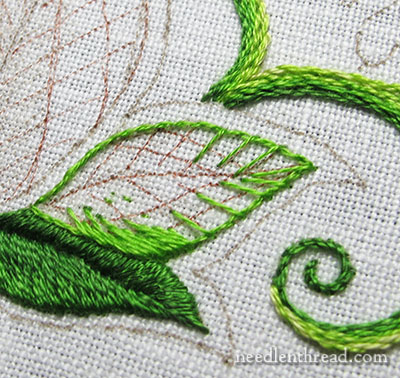
All subsequent layers of long & short stitch on this large leaf are worked with one strand of floss. So here’s the second layer going into the first, in 907.
And then it’s just a matter of continuing the filling with the different shades of green, up the spine of the leaf.
The shade change looks pretty severe in this photo above, but there is an in-between shade of green there. It’s just not picking it up in the lighting.
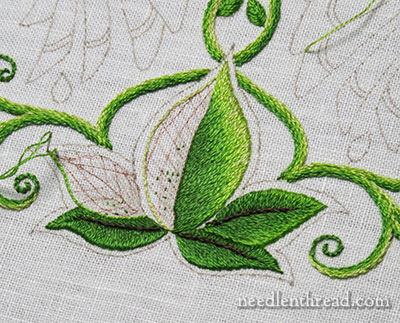
At this point, I moved to the other side of the leaf cluster, to work the second leaf on that side. I extended the outline of the middle leaf, so that the outlines of this leaf and the large top leaf butted up next to each other.
The purpose of this was to eliminate that white space between the two leaves, and to allow the large leaf to slightly “overlap” the lower leaf on the left side.
After finishing the smaller middle leaf on the left, I finished the left half of the large leaf.
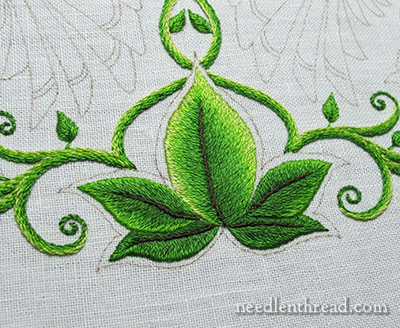
Once the leaves were finished, I worked a stem stitch spine in the center of each, using one strand of dark brown (DMC 3031).
I’ll show you this cluster in context with the rest of the piece next time we visit the project.
If you haven’t tried long & short stitch shading before, take a look at these long & short stitch shading lessons, and this series of videos on long & short stitch. They’ll help!
And a final tip: long & short stitch can be a rather dense filling, and these leaves are grouped together pretty densely, compared to the other elements on the project. Be careful with your thread tension as you work this stitch and the split stitch outlines. This would be a prime place for puckers to form, so make sure your fabric is drum taut in your hoop or frame, and go easy with your stitch tension. (Not too easy, but don’t get tense and make the stitches too tight!)
As always, feel free to ask any questions. leave comments or suggestions and whatnot below.
Enjoy your weekend!
If you’d like to follow along with the Secret Garden Hummingbirds project, which features a design from “Secret Garden: an Inky Treasure Hunt & Coloring Book” by Johanna Basford, you can find all the articles relating to this project arranged in chronological order in the Secret Garden Project Index. Among the articles, you’ll find plenty of tips and techniques that will help you with your own embroidery projects.

