With Christmas a mere two weeks away, you might be thinking it’s a little late to start embroidering an ornament.
And normally, I’d be the first one to agree with you, especially if Said Ornament was a fancy-schmancy one, embroidered with hard-to-find threads and supplies.
But would I do that to you, right before Christmas? No, no, no! This is a fun and quick project, something to relax and enjoy, while making something special.
In this 2014 Christmas Sampler Ornament series, we’ll discover how to embroider a Christmas ornament with whatever we have in our stash, and how to put the ornament together and have it hanging on the tree (or wrapped in a box for gift-giving) well before Christmas arrives!
Today, in Part 1, we’ll talk about materials, setting up the project, and working the first stitches. Then, in subsequent articles, we’ll concentrate on more embroidery ideas and finishing.
The whole idea of this series is to show you how to work up a quick Christmas ornament with fun stitch choices and various thread types.
Working from your stash as much as possible, feel free to make adjustments in the types of stitches and embellishments you want to use on your own ornament. Think of the ornament as a kind of little stitch sampler.
In other words, don’t feel obliged to do the same thing I do. You’re free to improvise!
To begin, let’s talk about embroidery supplies.
Supplies for an Embroidered Ornament
- Fabric: a piece of high-count, firmly woven linen, in whatever color you want as the main color of your ornament. I’m using white, Alba Maxima linen. To embroider both sides of the ornament, you’ll need a piece about 5″ x 8″ (with room for hooping or framing up). If you only want to embroider one side and back the ornament with decorative fabric, you’ll just need about a 5″ square of fabric, with room for hooping or framing up.
- Threads: any colors you want in any threads you want to use. I’m using a combination of cotton threads (perle cotton in various weights and cotton floss) and some wool threads. I’ve chosen a color scheme of Christmas red, pinks, white, and bright green. I might throw in some accent colors along the way.
- Embellishments: any beads, specialty beads, buttons, charms, silk ribbon, metal or metallic threads, specialty threads and the like that you might want to add to your ornament. I’ll be using beads, some specialty threads, and perhaps a touch of ribbon here and there.
- Tools: hoop or frame, scissors, needles of various sizes and types
To prepare for working the ornament, I grabbed an empty photo box and went through my stash, pulling threads, ribbons, beads, and anything else I thought might come in handy, that fit the color scheme and theme I have in mind for the ornament, and I threw it all in the box.
I probably won’t use everything I pulled, but it’s all there in one box, so I don’t have to go digging for it elsewhere. The box also gives me a place to tuck everything away at the end of a work session, so I don’t end up with another disorganized mess on my table!
Fabric Set Up
Once you have your supplies gathered, it’s time to set up your fabric and start stitching!
To set up the fabric, you just need to hoop it up or frame it up, so that it’s drum tight and ready for stitching. Use whichever you prefer – a hoop or a frame will work. Because the ornament I’m making will involve many different types of embroidery techniques and stitches, I used a frame because it’s easier for me to have both hands free using a small frame on my floor stand.
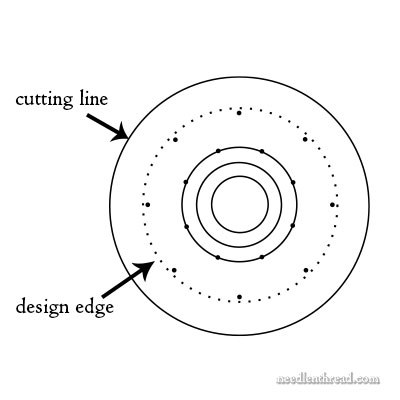
Then, transfer your design – which, in this case, is just a series of concentric circles, but you can use any type of shape you want with the same techniques. Don’t feel like you’re limited to a circle! I’ve included a printable PDF below with two circle sizes on it, a star shape, and a heart shape, in case you want to use any of those.
I transferred my design using this embroidery design transfer method we talked about yesterday.
The outside line of the circle, as shown above, is the cutting line. The second line in is the design edge and the first stitching line. The dark dots are there so I can work a wavy line in that area using DMC Memory Thread. The large dots mark the crest and trough of the waves. You don’t have to transfer them, but it’ll help keep things spaced evenly if you want to couch a wavy line on your ornament, too.
Once the design is transferred, you’re ready to start stitching!
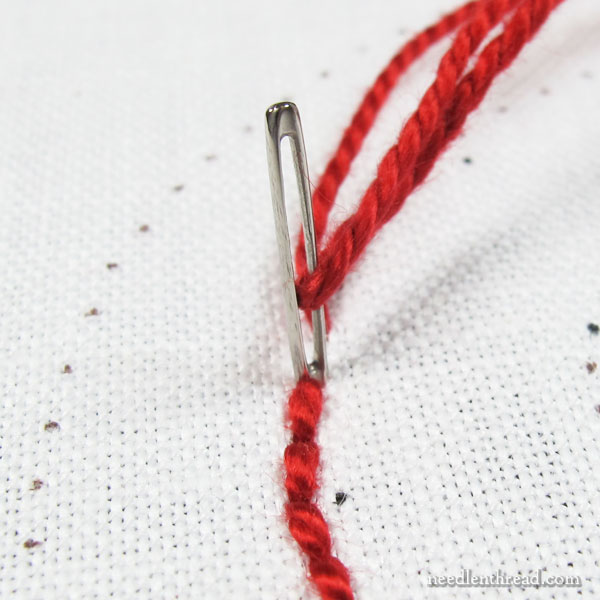
For the simple finishing technique I’m going to use on this ornament, a backstitch line along the design edge is essential.
So, I started out by working the backstitch along the design line (the second line in on the circle). It just so happens that the dots in the design are spaced just right for backstitch in a #3 cotton perle. When I transferred the design using the prick-and-pen transfer method I talked about yesterday, I pierced each dot on the dotted design line, so that I could space my backstitches accurately.
To work the backstitch in a #3 perle cotton on this type of closely woven linen, a chenille needle works well. I used a size 18 chenille needle.
When working the backstitch, make sure to pull the stitches snug to the surface of the fabric. You don’t want the stitches bulging up loosely from the fabric, because this will affect the finish of the ornament.
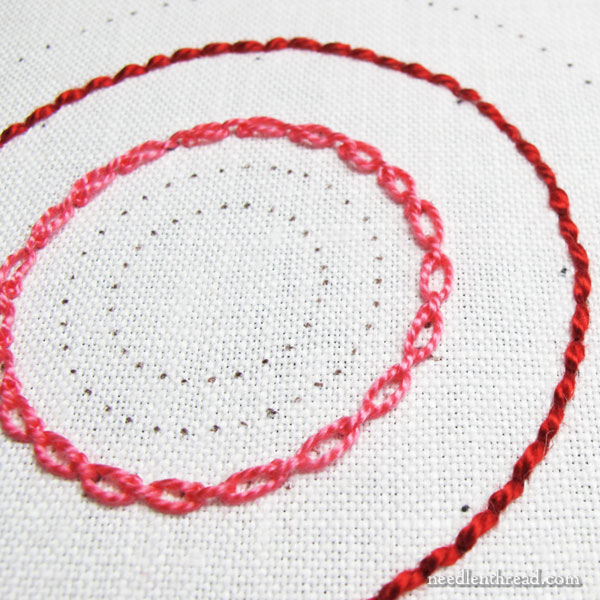
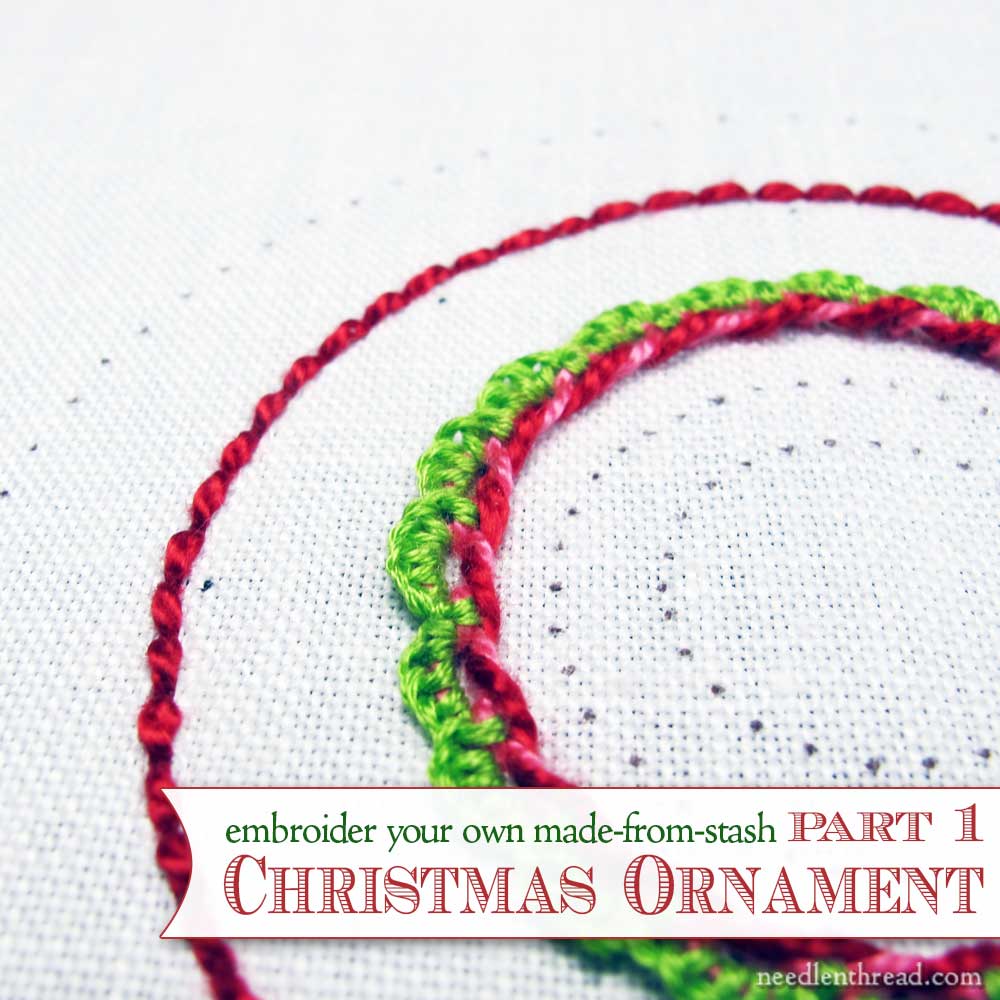
For the next circle in on the design, I worked a cable chain stitch around the circle in a bright, light pink perle cotton #5.
Can you guess where I’m going with this?
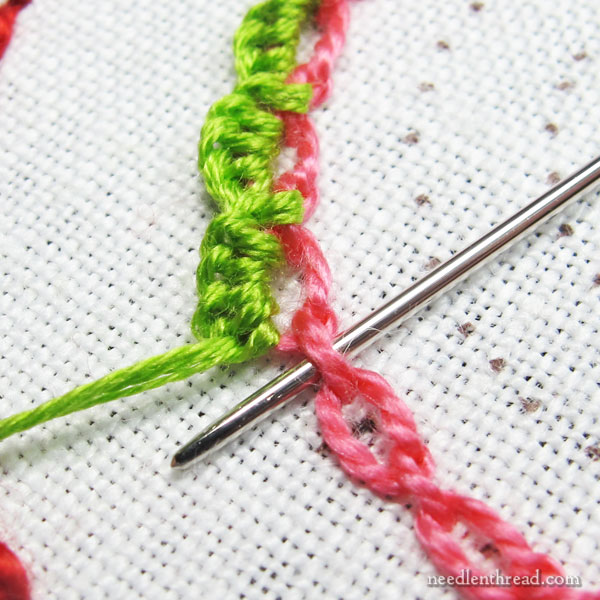
Over the outside loop of the cable chain stitch, I worked a buttonhole scallop using four strands of regular cotton embroidery floss in bright green.
This is the same technique I used for this tutorial on the buttonholed cable chain stitch, with two differences:
1. I worked one buttonhole stitch over the straight link between each chain, as shown in the photo above.
2. I only buttonholed the outside loop around the circle, instead of both sides of the chain stitch.
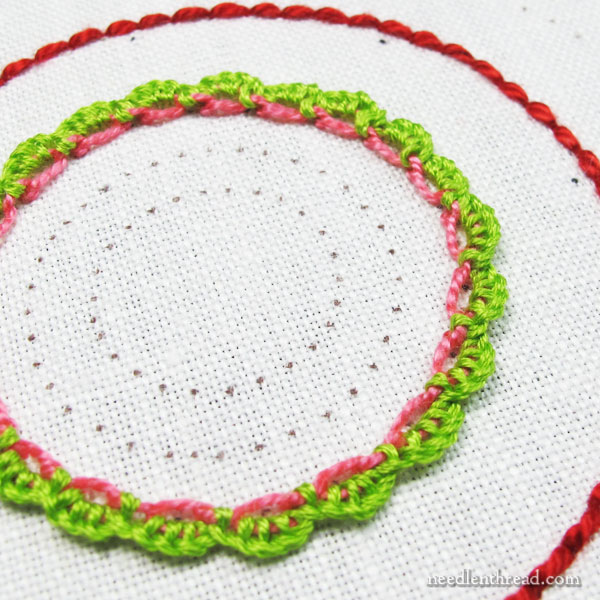
Here’s the completed circle, with the buttonhole scallops worked over the outside loops of the cable chain stitch.

To finish this decorative circle on the ornament, I threaded the #3 red perle cotton into a #18 tapestry needle, and I whipped the inside loops of the chain stitch, all around the circle.
You can see how to whip embroidery stitches in the first half of this video on whipped backstitch. You can also learn more about lacing and whipping embroidery stitches here, to get a good idea of how to go about doing this.
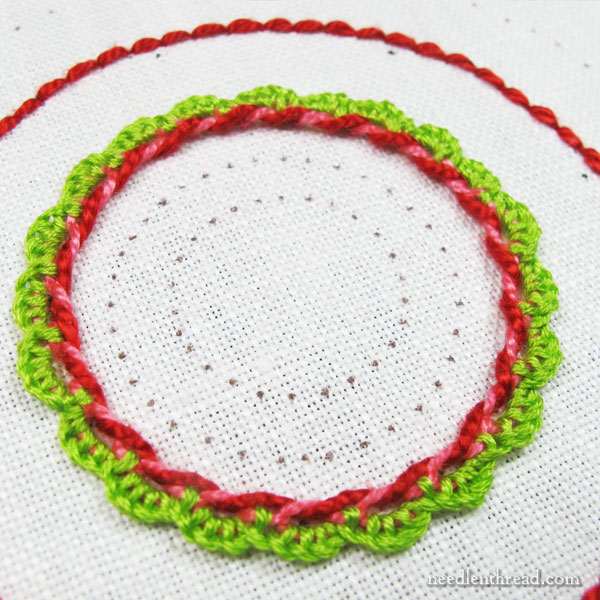
So here’s the first part of the embroidery on the ornament, finished. It includes the design line stitched in backstitch, and the first inner circle stitched in a composite of buttonholed cable stitch, whipped on one side. Total stitching time: about 40 minutes.
Christmas Sampler Ornament Pattern Printable
The following PDF includes a star shape, a heart shape, and two circles, all of which are suitable for making Christmas Sampler Ornaments. If you print at 100% (or choose “no scaling” in your printer options), they’ll print the same size as the ornament I’m making. The large circle will finish at 3″ round.
2014 Christmas Sampler Ornament Patterns – PDF
Over to You…
In the next article on this project, we’ll continue with the embroidery on the inside of the ornament.
In the meantime, any questions? Comments? Suggestions? Feel free to have your say below!

