Just over a week ago, we began a mini series on how to make a hand embroidered Christmas ornament from embroidery supplies in your stash.
Even though time was ticking quickly towards Christmas, I proposed that we still had plenty of time to embroider an ornament – a fun ornament! – and have it hanging on the tree or wrapped as a gift before Christmas.
In the first article, I showed you how I set up my ornament and began the embroidery. In the second article, we looked at the embroidery techniques I used on the front of the ornament.
Today, I’ll show you how I finished embroidering the front and the back of my ornament, and tomorrow, I’ll show you how to finish the ornament – a simple but effective finish, that takes about ten minutes. I promise! Only ten minutes!
Don’t forget you can click on any of the photos in the article to view them larger.
For this Christmas ornament, I really wanted to use only supplies that I had on hand – I wanted the entire thing to be made from stash.
If you’re making a similar ornament, use what you have on hand. Make substitutions for the threads I’m using, if you want. In fact, threads, colors, and stitches are all fair game for making substitutions! The point is to have fun making the ornament, with any stitch, color, or thread type that grabs your fancy.
The Stitch Fun series here on Needle ‘n Thread features a bunch of fun embroidery stitch tutorials for composite stitches, complex stitches, or just jolly good fun stitches. You can find plenty of stitch inspiration there to make your own ornament unique.
When we last visited the front side of the ornament, I had worked a red buttonhole stitch around the rouched pink silk ribbon wreath. I didn’t like the effect so much, so I changed it to a ribbed spider web stitch in the area just outside the ribbon wreath, in white perle cotton #5.
To set up the foundation stitches for the ribbed spider web, I started by dividing the area into four…
…and then I split up each section, trying to keep the spacing relatively even, since I was doing it by eye.
The spacing is not perfect, but once the ribbed spider webbing is worked over the foundation stitches, any minor irregularities in spacing won’t be as noticeable.
This video tutorial for the ribbed spider web stitch will help you, if you’re not familiar with how to work the stitch.

So, this is one side of the ornament, finished.
Now, on to the other side!
Of course, if you don’t want to work two sides, you can cut the project time in half by backing the ornament with a nice coordinating fabric.
But… I figured I might as well go whole hog and do both sides!
I set up the second side of the ornament exactly the same way I set up the first side.
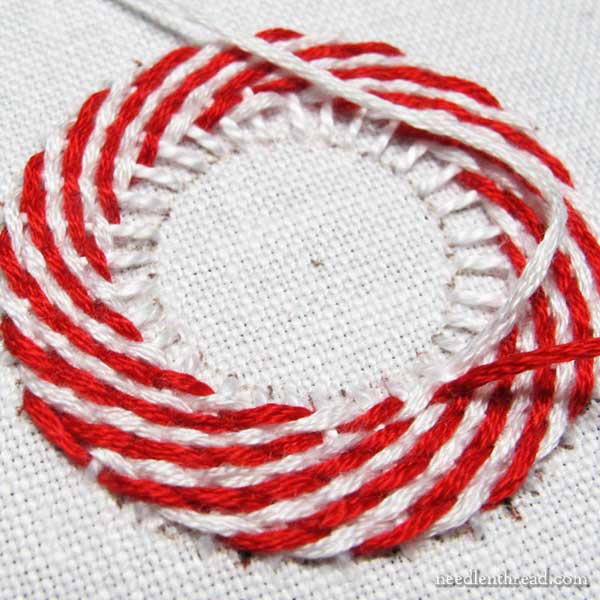
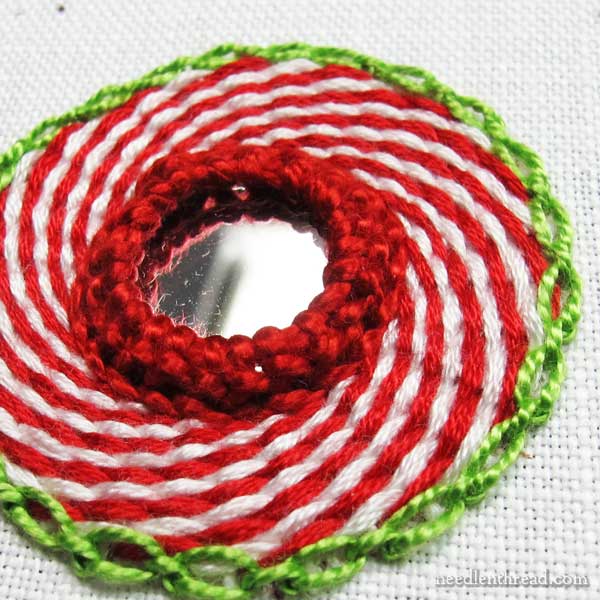
Filling the space of the two thin rings around the center ring, I used the same technique used to create a diagonally striped raised band, only I worked it around in a circle.
There’s only one trick you have to pay attention to, if you want to end up with a circular striped swirl: the foundation stitches around the circle must be odd in number. If you have an even number of foundation stitches, you won’t get the swirled effect.
Besides that one point, there’s no difference in the method of working this diagonally striped band around a circle or in a straight line. You’re welcome to refer to this tutorial for the diagonally striped raised band, if you’re interested in using this technique. Just make sure your spokes are odd in number!
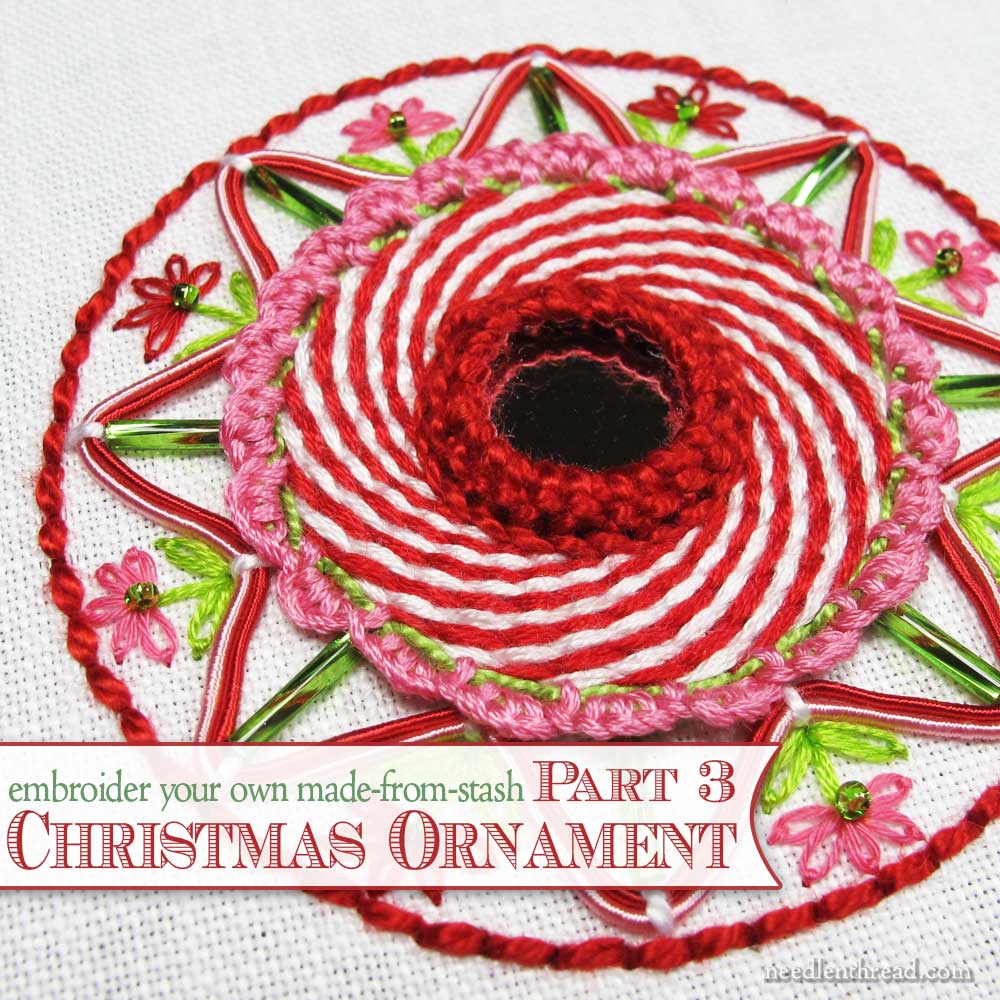
I started with a #5 perle cotton in white for the foundation stitches around the circle, and then, for the stripes, I used a full six strands of regular DMC cotton floss in 321 (red) and white, working from the outside of the circle inwards, filling up the foundation stitches until they were completely covered.
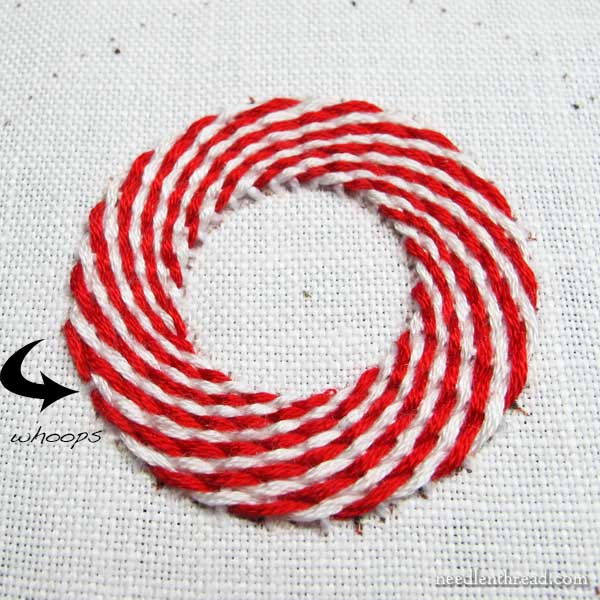
There’s the completed peppermint swirl.
I did make one wee mistake – it was with the first white stitch around the outside of the circle. But I didn’t notice it until I was halfway finished. Since I knew I’d be covering the edges of the peppermint swirl, I left it.
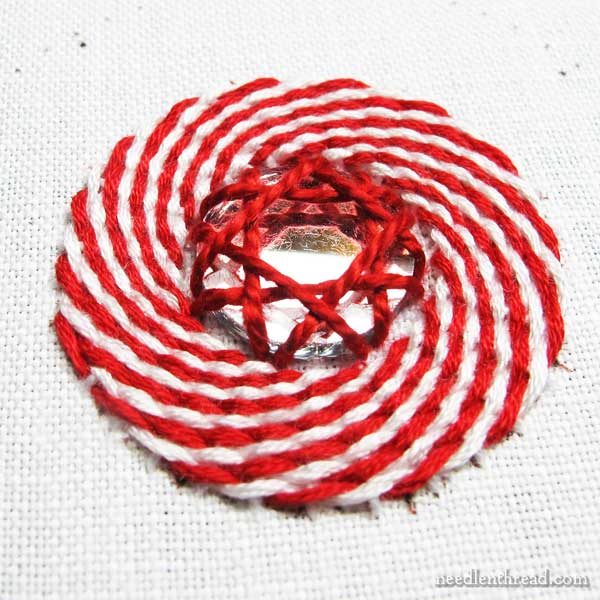
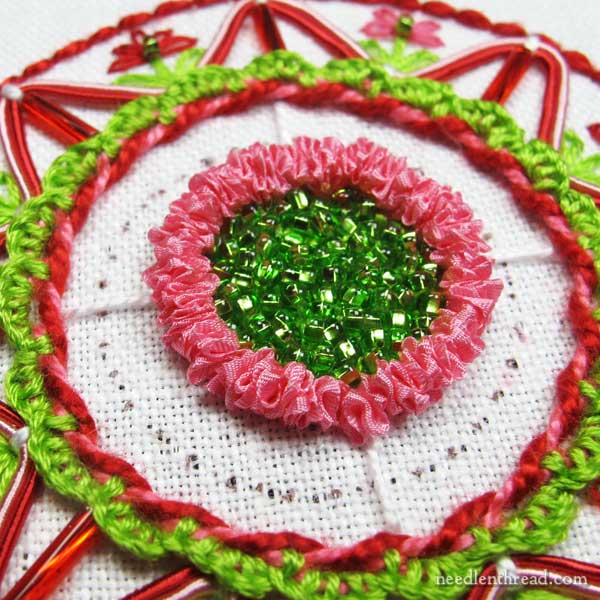
In the very center of the ornament, I fixed a shisha mirror to the fabric using #3 perle cotton.
You can find a complete step-by-step photo tutorial for shisha embroidery here.
If you like the technique, but you don’t have a mirror, you can still use it. I’ve used shisha embroidery to fix circles of decorative card stock to fabric, and it works great! As long as the piece isn’t going to be laundered, you can use paper. You can also substitute other items, like buttons, shells, beetle wings, and so forth.
Here’s the mirror, attached with the shisha stitch. I like the dimension it adds.
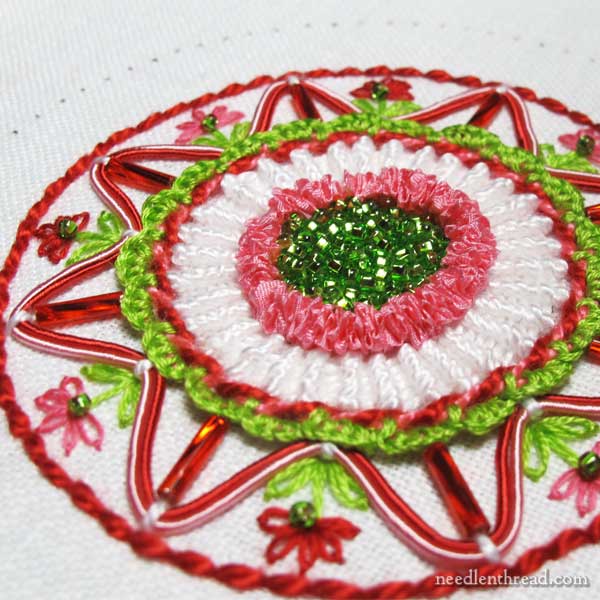
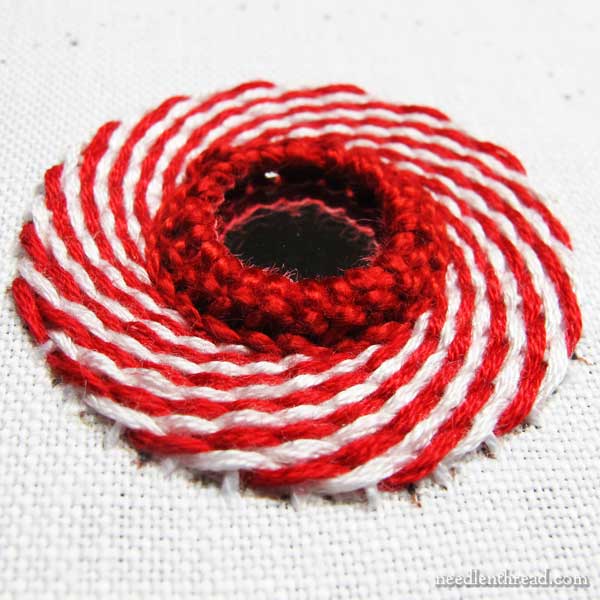
Next step, a cable chain stitch circle around the outside of the peppermint swirl, in a #5 perle cotton in bright green.
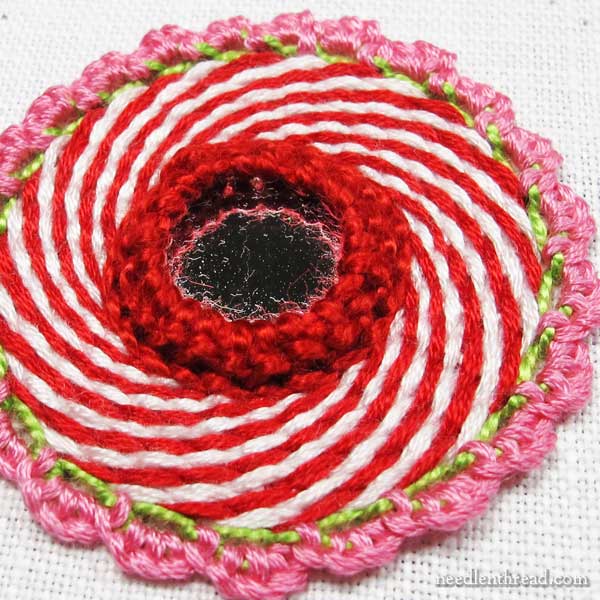
I worked the buttonhole stitch scallops in 6 strands of pink DMC floss over the cable chain stitch, just as I did with the same area on the front of the ornament.
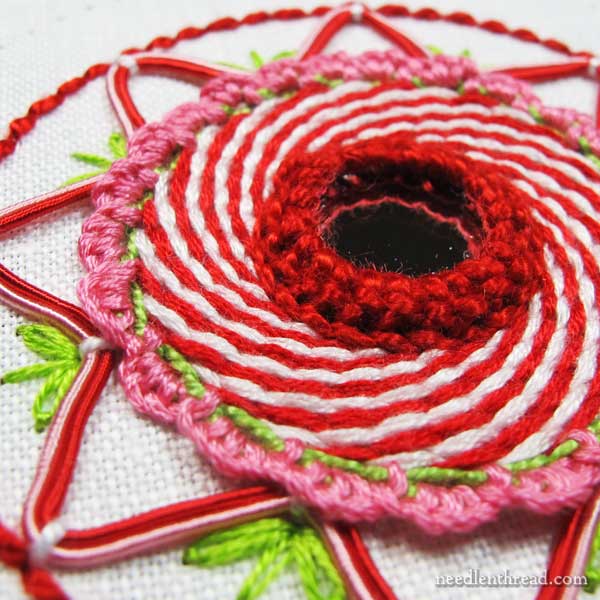
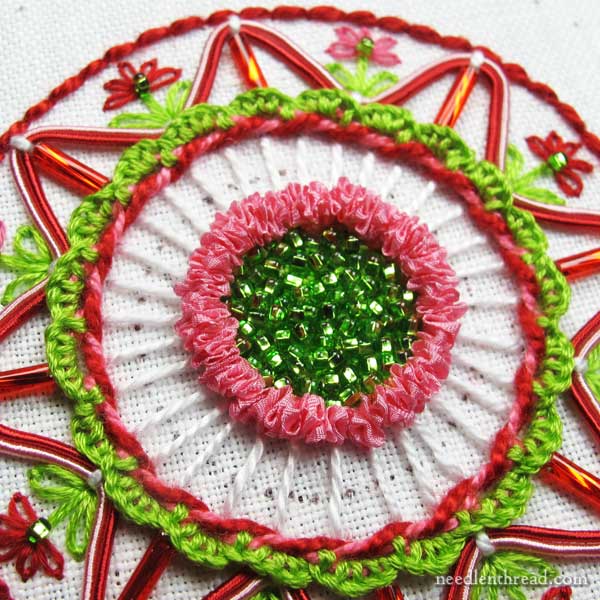
Then it was time for DMC Memory Thread, using the same couching method and design I used on the front of the ornament, only I reversed the position of the pink and red Memory Thread.
Once the Memory Thread was couched on, I worked the same green straight stitch stems and daisy stitch leaves (using three strands of DMC floss), just like on the front of the ornament, working the flowers in each “trough” of the Memory Thread waves.
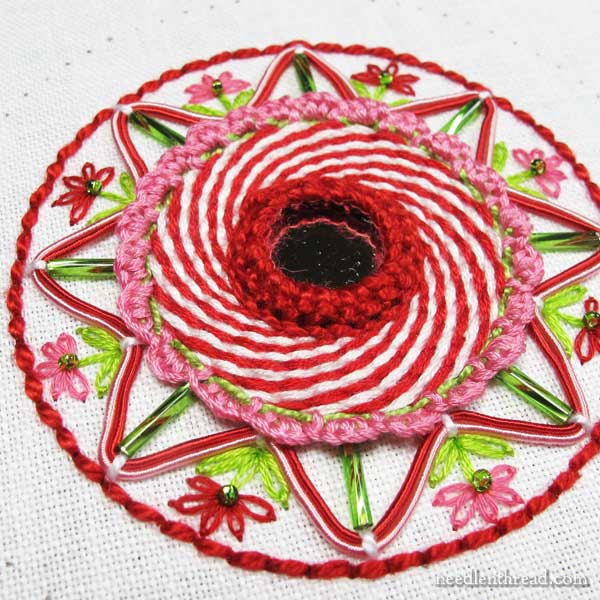
The flowers are daisy stitch as well, just like the flowers on the front of the ornament, with a green seed bead in the center of each.
And in each wave, I attached a twisted bugle bead, just like on the front, but this time in bright green.
The whole ornament was outlined in backstitch using #3 perle cotton in red, just like I backstitched around the perimeter of the first side of the ornament, except that I added the backstitch here almost last.
The backstitch outline is very important – it should be the same on both sides of the ornament.
And that’s the end of the second side!
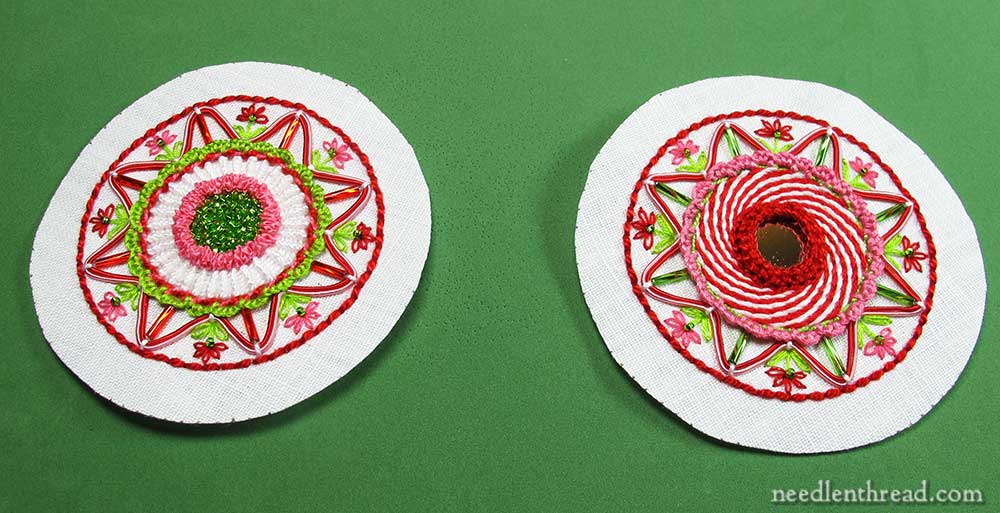
Above, you can see the two side cut out, ready for finishing.
Since I set these up on a frame, I didn’t need to block them when I cut them out. They’re smooth and very stiff, thanks to the type of linen and the amount of embroidery on the linen. I don’t need to do anything else to the pieces before doing the finish work.
If you use a hoop, though, you might need to block and damp stretch the embroidery before cutting it out.
I purposely echoed a similar design layout on the front and back of the ornament, because I wanted some continuity between the front and the back. If you’re embroidering both sides, though, this might not matter to you. Feel free to mix things up!
You can find the rest of this series on making your own hand embroidered Christmas ornament through the following links:
Part 1: Setting up the Christmas ornament and starting the embroidery
Part 2: The embroidery on the front of the ornament
Tomorrow, we’ll finish the ornament up so it’s ready for the tree! Can’t wait!
If you have any questions, comments, suggestions, do feel free to leave a comment below! I always enjoy the chatter…

