I know. It’s Monday morning. And that says it all, doesn’t it?
To help you get through the start of the week, here’s an awesome piece of inspiration – a beautiful pearl, gemstone, and goldwork embroidered icon frame, featuring an interesting and effective approach to high relief embroidery.
Several years ago, Larissa Borodich shared this pearl embroidered frame with us, surrounding an intricate cross stitch featuring an angel. Since then, she’s been exploring bead embroidery, including high relief embroidery.
Let’s look at Larissa’s latest masterpiece and then we’ll chat a bit about how she managed the high relief form for the padded elements of pearl embroidery.
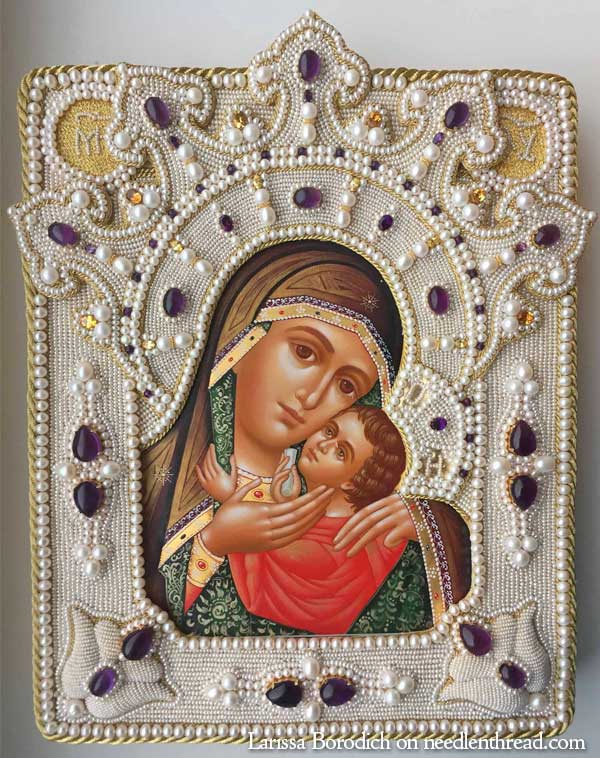
Here’s the icon frame completely embroidered with pearls and goldwork threads, and accented with cabochons.
The two flowers in the lower corners are padded and raised, and then embroidered over with pearls. We’ll look at those closer below, along with the padding technique Larissa used.
First, though, some close-ups of the rest of the piece!
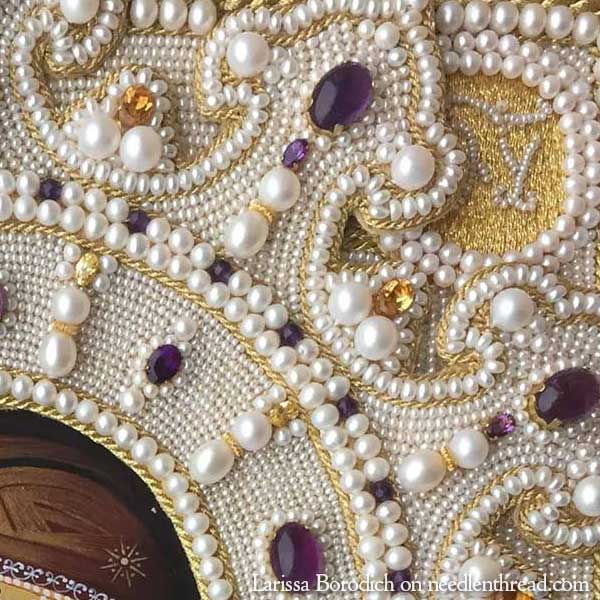
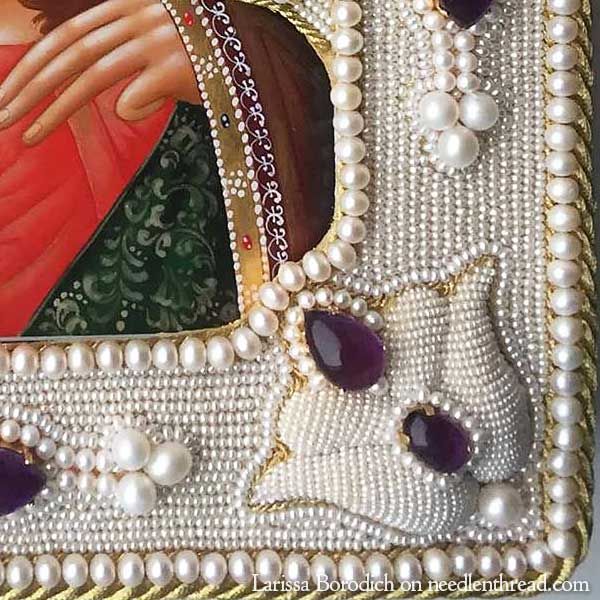
This is the top right corner. Don’t forget to click on the photo for a larger image!
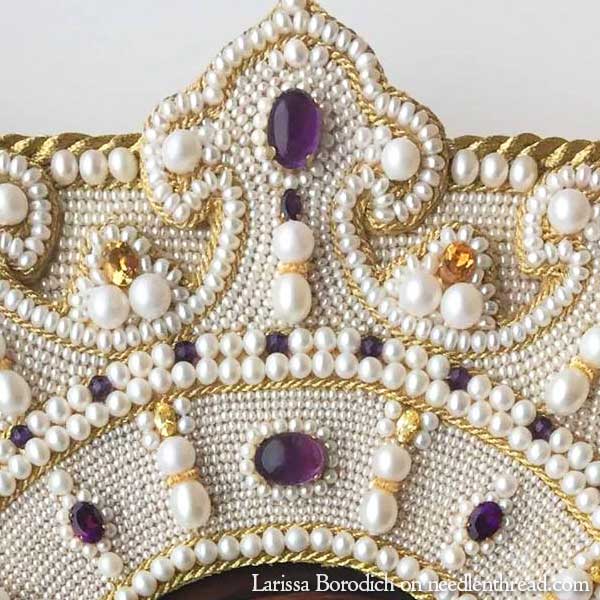
This is the top center of the frame, the tip of the crown-like halo around the Virgin’s head.
I love the combination of the gold and the pearls, and the choice of gemstones for the accents! It’s very striking.
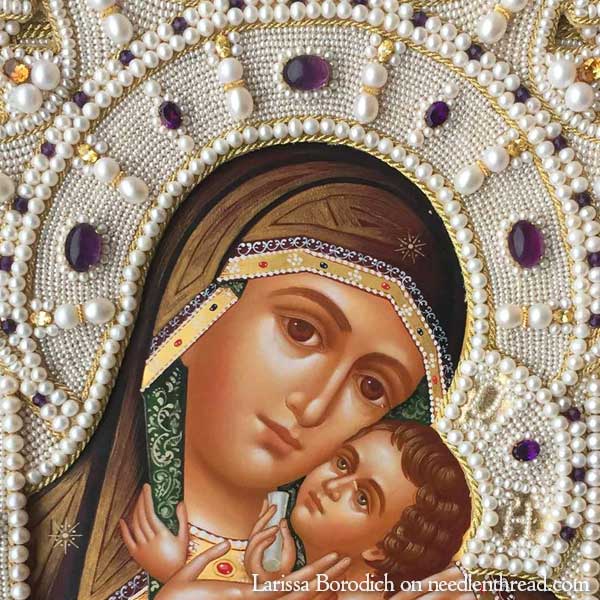
And here we have the two halos cut around the icon itself.
It’s a beautiful icon, too! The detail in the painting is exquisite and quite delicate. The faces retain the structural elements of an icon, but are considerably softer.
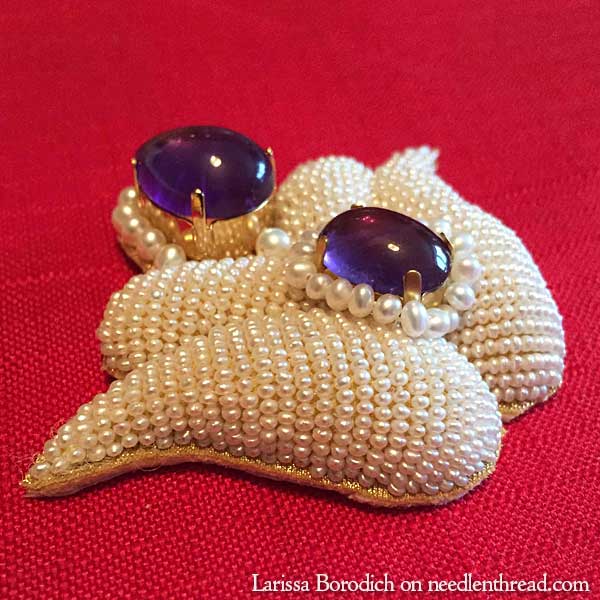
Here’s the padded tulip-like flower in the lower right corner of the frame. The tulip sits about 1/3″ – 1/2″ higher than the surrounding main section of the frame.
The tulips were embroidered separately, cut out, and finished as appliqué slips, and then applied to the frame.
So, how did Larissa raise the tulips so high?
Well, that’s the fun part!
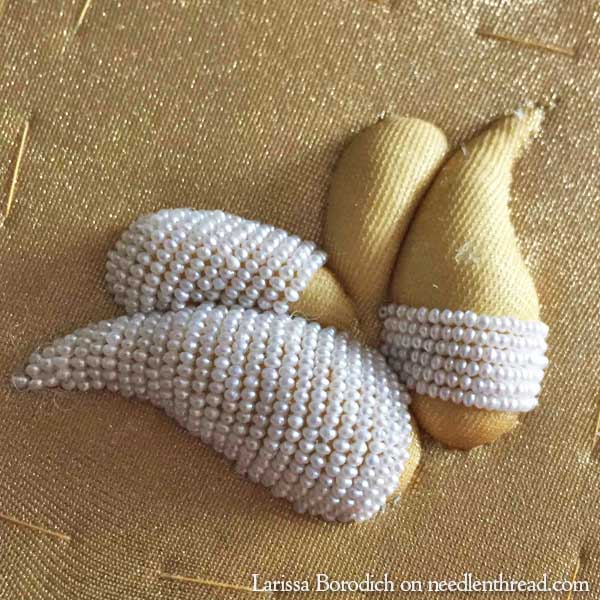
The piece begins with two layers of linen topped with a layer of iron-on, non-woven stabilizer for sturdiness. Over this, for the tulips, she sewed down a small piece of stretch fabric (like fabric used for dancing costumes and the like – probably a lycra or something similar) in gold.
While attaching the lycra to the base fabric, she stretched it fairly well, so that, when she began stuffing the area for the tulips, the fabric wouldn’t stretch too much, creating too high of a relief.
Then she placed a piece of tracing paper over the lycra layer, with the tulip shape drawn on the tracing paper, and, using a gold colored sewing thread, she stitched over all the outlines of the tulip design.

Then, turning the work over, she made slits in the back of the tulip petals through the linen and stabilizer, and stuffed the petals with polyester filling, until they were firm and plump and full. She used a small wooden skewer to push the filling into all the tips.
Larissa noted that it’s important to fill the petals full and tight with the filling – and this is the reason why it’s important to stretch the fabric well first, when tacking it over the foundation fabric (otherwise, the petals would keep stretching and stretching!)
Once the petals were full, the back slits were closed, and, with all the embroidery on top and the stitching through all the layers, the filling doesn’t shift.
With the embroidery finished, the tulip is cut out and the edges turned under. The stabilizer and the layers of linen would make the whole element quite sturdy and stiff.
You can see in the photo above how full and raised the whole tulip actually is.
Exquisite, and brilliantly done!

This high relief embroidery is something I’ve wanted to try for a long time.
When I deconstructed this piece of goldwork – and especially the Lamb in the center – my whole purpose was to examine how the embroiderer achieved the high relief. The method was slightly different (layers of felt padding were built up, then covered with linen), but the outcome is essentially the same.
Larissa’s approach reminds me of a combination of trapunto quilting and making embroidered slips. I think it’s very effective, and it would be fun to try!
Thanks, Larissa, for sharing the photos and the technical details!
So, there’s your Monday morning inspiration! Have you ever worked any high relief embroidery? If so, what method did you use to achieve the padded height you were after? Do you have any questions about the techniques used here? Feel free to chime in below!

