Some stitchers following along with the Secret Garden project have written to ask for tips on how to simplify the embroidery on their versions of the project, especially with regards to long & short stitch fillings.
At times like this, I wish I were an octopus… or a double-octopus (a sedecipus?). With 16 hands, I could embroider all the possibilities for every follow-along project on Needle ‘n Thread. Just imagine! And that way, I could answer so many questions visually, which would be easier all around.
But, since I only have two hands, we’ll have to settle for a few general tips. You can apply these to any surface embroidery project, not just the Secret Garden project.
To that end, here are some suggestions and thoughts on simplifying embroidery projects to make them more accessible to your own particular levels and likes.
So, you don’t want to tackle long & short stitch for the leaves, but you do want them filled and shaded?
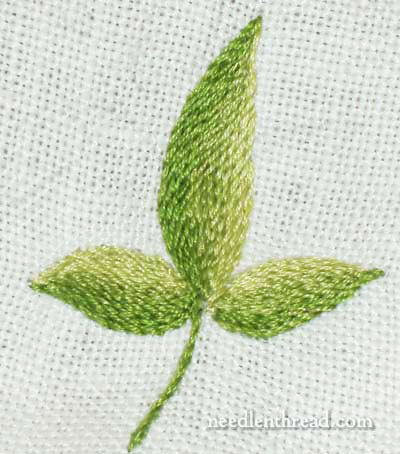
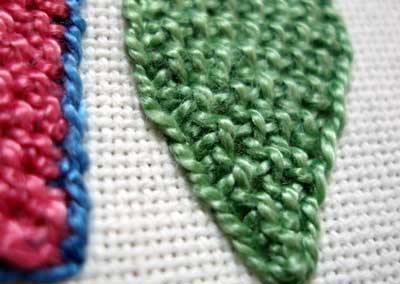
You can try shading with stem stitch. Following the same concept that we worked through embroidering the vines on the Secret Garden, apply the concept to the leaves. The leaf above is shaded with stem stitch in the same way, using two strands of floss in the needle.
You can find further explanation of how the leaf above was shaded in this article on color control in embroidery for beginners.
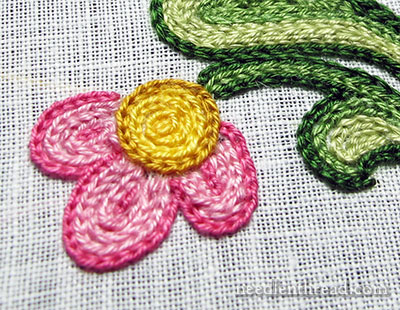
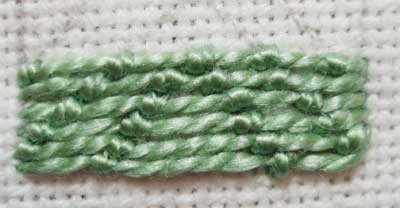
Another option – use chain stitch as a filling.
Although this example is technically tambour embroidery, the concept is precisely the same. Tambour embroidery is chain stitch, and you can accomplish the same type of filling with chain stitch and a regular needle.
Chain stitch makes a nice filling! And by manipulating the placement of your greens on the leaves, you can create subtle shading, or very bold color changes – or somewhere in between.
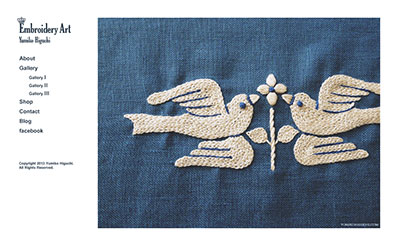
If you want to see some examples of very effective chain stitch filling, visit the website of Yumiko Higuchi, Embroidery Artist. In this gallery of embroidery art especially, scroll through the photos. You’ll see how the simple chain stitch can be used for beautiful filling.
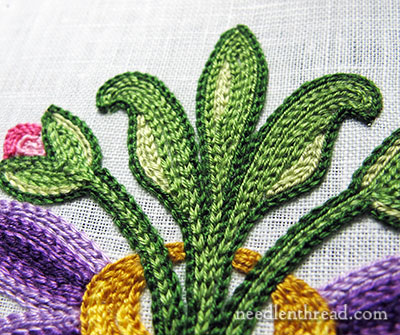
The piece above was just a trial. It’s not on the actual Secret Garden project – it’s on a little scrap of fabric I keep on hand to test ideas. Never fear to test ideas! Keeping a doodle cloth on hand is a good way to do that.
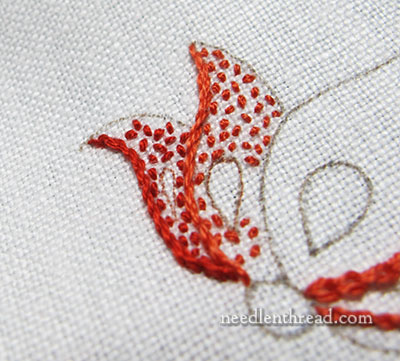
This filling technique is the simple, simple seed stitch. (Excuse the old video in that link! One of these days, I’m going to update that one!)
Seed stitch is a tiny straight stitch. Sometimes, it might be two tiny straight stitches right next to, and parallel to, each other.
By grouping seed stitches closer together and spacing them farther apart, you can achieve a sense of shading. You can also change the shade of your thread as you fill an area with seed stitch.
Seed stitched areas need some kind of outline, and a bold line using any kind of line stitch works well.
With seed stitch, it’s easy to impart a sense of colored filling, without any real technical difficulty as far as the stitch is concerned.
You can see more examples of seed stitch used as a filling for larger areas in this article about a Sunbonnet Sue Quilt Square that I embroidered eons ago for a fundraising quilt.
Certain types of self-couching stitches – like Bokhara couching and Romanian couching – could also be used to fill the larger leaves. With Bokhara couching, you can create a pattern of veins on the leaves with the couching stitches.
The difficulty with Bokhara and Romanian couching is that they are very “linear” looking fillings, and shading can be problematic. If you don’t want the large leaves shaded, though, they’re both good options for filling larger spaces with solid color.
You could go for a much more textured filling with something like detached buttonhole filling. You could work it as a solid filling, or you could space the buttonhole stitches and end up with a lighter, lacier filling.
In this much older article on the uses of buttonhole stitch, you’ll see a section on buttonhole shading. That’s also an option for filling, using a familiar and easy-to-master stitch.
Both options – detached buttonhole or buttonhole shading – will yield a good bit of texture. You can shade with both by changing out your threads. The shading will be linear, following the stitch direction, but it can work.
Normally, neither of those stitches work so well when stitching on top of them, though, so if you wanted to work veins down your leaves, these probably aren’t the best option.
Not an Exhaustive List – Explore!
This is not an exhaustive list of filling stitches that could be used – it’s just a few examples. A good stitch dictionary will give you a good springboard for exploring other options. If you don’t have a good stitch dictionary to use as a reference, consider investing in one. There are many reviews for stitch dictionaries on my Needlework Books page.
Experimenting & Expending Effort
With embroidery, I think that more (and better) learning happens when we experiment and try things ourselves.
It’s the whole motivation-effort-ease-learning relationship. It goes like this:
With the right motivation – for example: “I really want to learn this well so I can master this technique and move on to this more difficult technique that I’m just dying to do” – we expend more personal effort to learn.
Luckily, because it’s something we’re highly motivated to do and it’s something we like doing, expending the effort seems easier to us. “I don’t mind trying this and picking it out if it doesn’t work, because I know it’s going to make me a better embroiderer. I tried it. I don’t like it. I picked it out. That was no big deal.”
And finally, because we expend all that effort, we learn better, and what we learn sticks with us longer.
Fortunately, we’re talking about embroidery here and not calculus. This is not a dry, abstract subject. The tactile, creative, pleasurable nature of embroidery carries us through the “tough” spots more easily. And because we can see results right away with embroidery, it’s easier to keep the levels of motivation high. And that helps us learn more!
In any case, I hope these examples give you some alternate ideas for your Secret Garden project, if you have an aversion to long & short stitch. But, again, just like the learning scenario above, if you’re motivated enough to learn the long & short stitch, with a little trial and error and effort, absolute beginners can learn it.
Another thing: Don’t be intimidated by techniques just because you see them done by professional embroiderers, trained embroiderers, and so forth. There’s no law, written or unwritten, that says you have to reach a certain “level” before you attempt long & short stitch.
Which brings me to a Typical (and True) Teacherism: all the above being said, no one else can learn it for you. If you want to learn it, eventually you have to do it. That’s the only way you’ll learn.
Questions? Comments? Suggestions? Input? Are you stitching the Secret Garden project and using different stitches for your leaves? If so, what stitches? Any ideas or tips you want to share for filling areas larger elements without using long and short stitch? Have your say below!
If you’d like to follow along with the Secret Garden Embroidery Project, you can find all the information pertaining to this project, including resources, materials, and stitching tips, in the Secret Garden Project Index.

