I’ve been working on the two larger, single leaves that hang above the hummingbirds on the Secret Garden embroidery project. It seems as if I’ve been working on those two leaves, in fact, forever!
In fact, I only worked on them in one late afternoon, up to a point where a little mishap stalled me in my tracks.
These are the leaves:
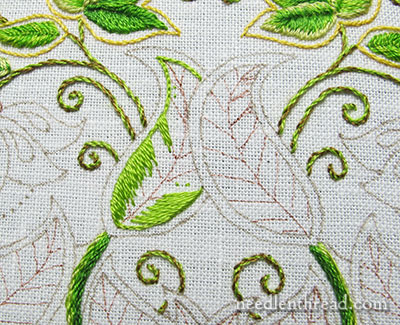
Like all the other large leaves on the project, these two are getting the long & short stitch treatment. But they posed an interesting problem, in the way that they curve – not only in accommodating the curves on the leaves, but also because they felt so different while stitching them.
They curve in opposite directions, and after stitching the back leaf, I found myself having to re-think while I was stitching the front leaf. I felt as if I were stitching backwards altogether by the time I started the front leaf. It was an odd sensation!
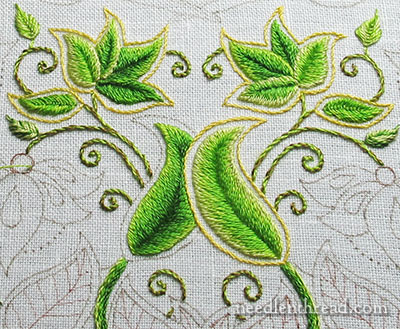
In any case, I started by outlining the back leaf in split stitch, except where it is overlapped by the front leaf, and then I worked the long and short stitch in 901, which is the second lightest green.
I tend to work my long & short stitch in chunks, as you can see in the photo above. This helps me keep the stitch direction, and it also imparts a sense of accomplishment – think of it as dividing and conquering. If you divide up small sections and fill them, the whole does not seem altogether as large!
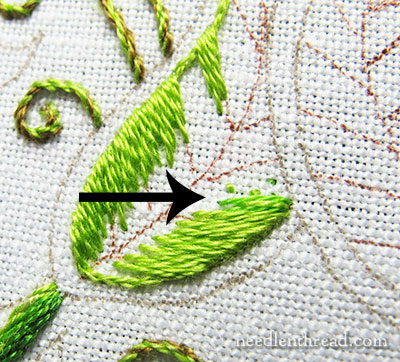
Starting towards the area of the underlap on the leaves, I switched to the next darkest green, which is 906.
I started working in the 906 before I got to the actual underlap.
Or overlap. But since it’s under the overlap, I call it an underlap. Is underlap even a word?
In any case, on the approach to the underlap, I alternated with the two greens. This is a good opportunity to practice parking your embroidery threads, because you’re taking one stitch in the first color, the next in the second color, and then going back to the first color. There’s no point in ending the threads, but to keep them out of each other’s way while alternating, it’s a good idea to park the threads in an unobtrusive way.
On the underlapping leaf, where the arrow is pointing, I got a little extreme in my stitch slant, in order to work the color down that narrow passage.
It worked out ok. Much better to take a single long stitch or so down at an extreme slant through a passage like this, than to try to work tiny satin stitches in there at a more graduate slant. The tiny satin stitches would hug next to the fabric and look tight compared to the other stitches in the leaf.
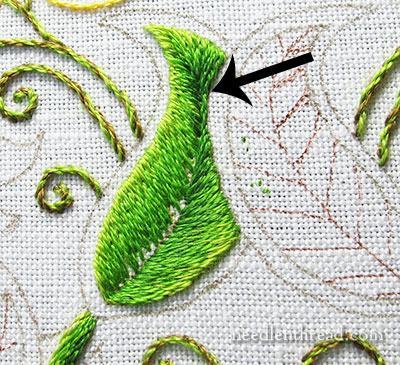
I ended in the middle of the leaf with the second-to-the-darkest green, 905.
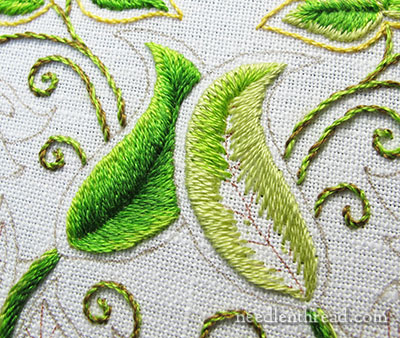
The overlapping leaf began with the lightest green, 472, and I only used three shades on this leaf – 472, 907 and 906.
This is the leaf I found difficult to stitch. While the underlapping leaf seemed more natural in its curve, this one did not. The right side of the overlapping leaf bothered me the whole time.
Still, it came off ok, though the lower edge on the left side of the overlapping leaf needs a touch more blending in there. I may go back and add one more shade of darker green into that leaf.
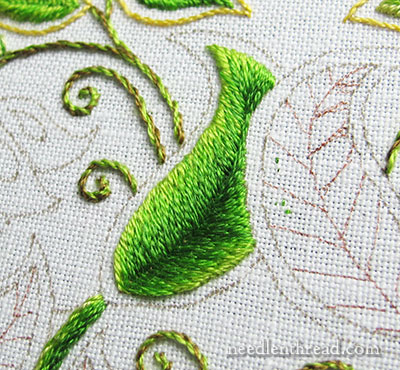
At this point, I was ready to finish the yellow outlines, eager to see how they would look, and excited to move on to a different clump of leaves!
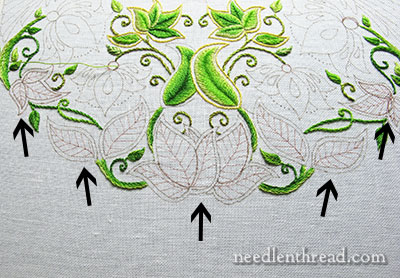
in fact, these five are the remaining leaf areas on the project. Although it was 9:00 pm and the distant call of my pillow was beginning to lure me elsewhere, I was sure I could get all the outlines on the rest of the leaf clumps finished before I quit!
I was all geared up to do get at it when…
When….
I snipped my working thread right close to the fabric, and ….
and…
…whew! No. I didn’t snip my fabric! What a relief! I would’ve died!
It wasn’t that bad!
Instead, I just snipped a little chunk off the end of my thumb.
And that seemed as good a sign as any that it was definitely quitting time!
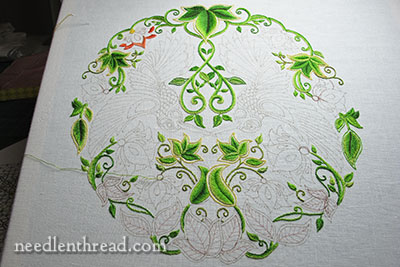
And here we are, thus far. I’ll be stitching on this off and on all week, so that, when we meet again on the Secret Garden project, I hope to show you all the leaves, complete.
And then…color!!
If you’d like to follow along with the Secret Garden Hummingbirds project, which features a design from “Secret Garden: an Inky Treasure Hunt & Coloring Book” by Johanna Basford, you can find all the articles relating to this project arranged in chronological order in the Secret Garden Project Index. Among the articles, you’ll find plenty of tips and techniques that will help you with your own embroidery projects.

