The hand embroidery stitch called the pistil stitch (or the elongated French knot) comes in really handy when stitching flowers. The reason is obvious – it looks like its namesake, the pistil on the inside of a flower.
The pistil stitch is an easy stitch to master, and it works well inside all kinds of flowers or even on its own, in completely un-flower-related circumstances.
I’ve been using the pistil stitch on the Secret Garden project, on the flowers. Some reader’s have asked for pointers on working this stitch, so here’s a handy tutorial to show you how to work the pistil stitch.
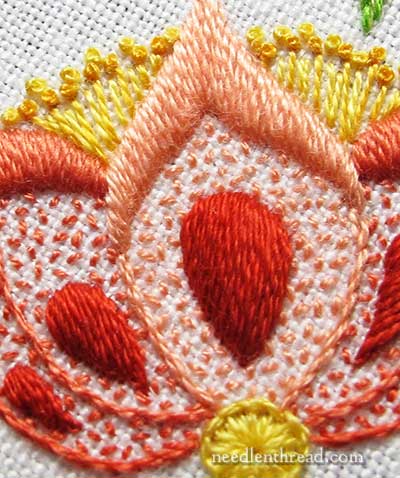
See the yellow “pistils” in these stylized flowers? Some of them – but not all – are pistil stitch. Some are simply straight stitches. Some are straight stitches topped with French knots. Whether I used a pistil stitch or just a straight stitch was determined by how much I wanted to fill the stalk area (where the straight stitches are), and whether or not adding another French knot in there or a pistil stitch would crowd the line too much.
In any case, here’s how the pistil stitch is worked:
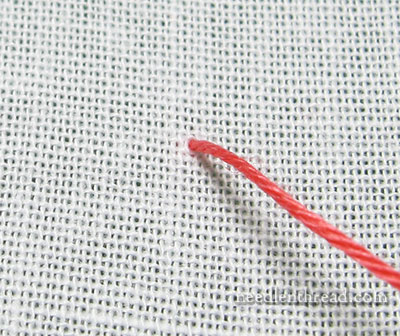
Bring the needle to the front of the fabric at the base of the pistil stitch – that is, the end of the stitch that does not have a knot on it.
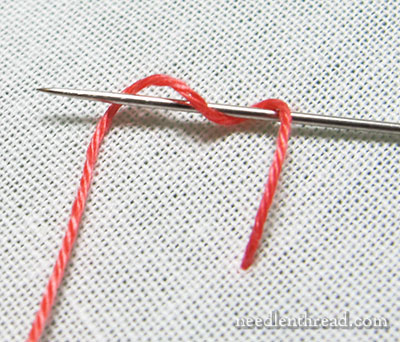
Wrap your thread around your needle, just as you would with a regular French knot.
I’m a Two-Wrap-French-Knot kind of gal, myself. Some people use three wraps, some people only use one (I find one wrap too small), and some people ask about using four or more.
I can see using three wraps when you’re attempting to get a really heavy knot, but the more wraps you put on the needle for a French knot, the more unruly the knot is going to be. I’d say three is the maximum threshold for a “ruly” knot, while four or more will tend more towards unruly.
Remember, there’s only one thread on one side of the knot holding the knot in place and in shape, so the more wraps you have flinging around unanchored except on the one side, the greater the chance the knot will fall out of shape, get snagged, or encounter other knotty problems.
In any case, back to the pistil stitch. Before I so rudely interrupted myself, we had some wraps on the needle…
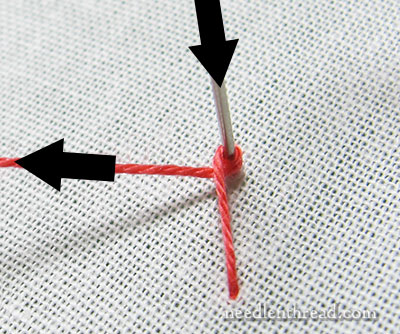
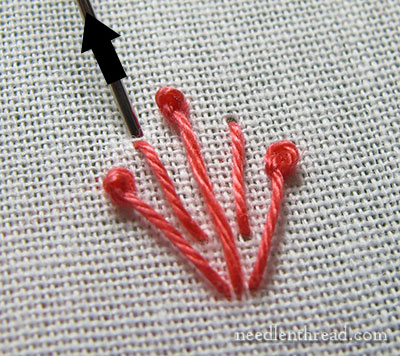
Keeping tension on the working thread (that’s the thread going off to the left in the photo above), take the needle down into the fabric wherever you want the knot on your pistil stitch to be. This will be at least a little distance away from where you began the stitch, so that, essentially, you end up with a straight stitch tail on the knot.
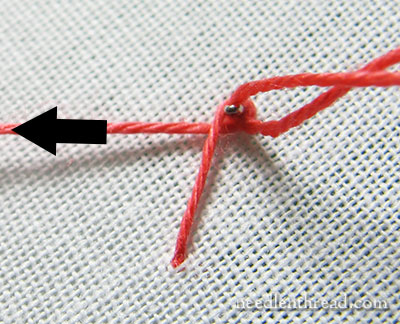
Pull the needle slowly down through the wraps, the whole while keeping tension on that working thread (where the arrow is pointing to the left in the photo above).
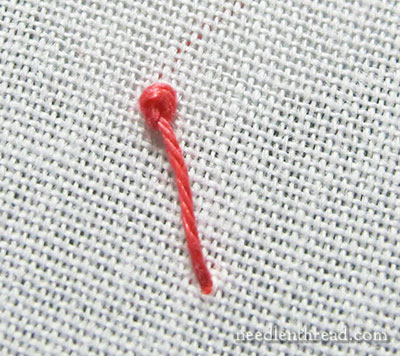
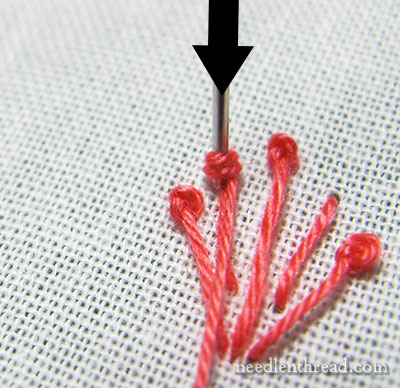
While still pulling the thread slowing through the fabric, let go of the working thread as your knot approaches completion.
The knot and tail won’t sit perfectly straight until you’ve begun your next stitch, or ended this one by anchoring the thread in the back of the fabric. In the photo above, the stitch is still a little loose, but once I start the next stitch, it will pull straight and snug.
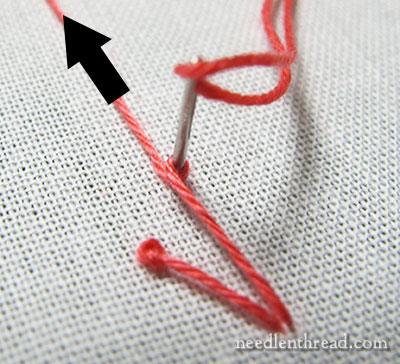
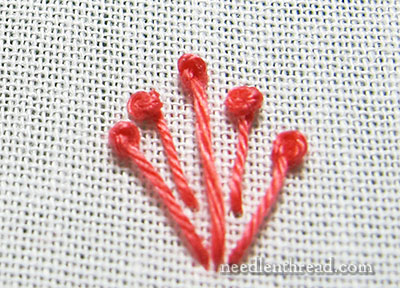
Here, I’m working on another pistil stitch. This time, I’m keeping tension on the working thread, pulling it up above the stitch. This will slightly change (but not much!) the orientation and look of the knot.
With the last pistil stitch on the right, I pulled the working thread all around to the right, and kept tension on it from the right side of the hoop. You can see that the knot on the right is slightly larger, because pulling the working thread all the way around to the right puts another half of a wrap into the knot.
So you can play around with where you hold your working thread when working a pistil stitch. It can make a slight difference in the look of the stitch, and you might like one approach better than another.
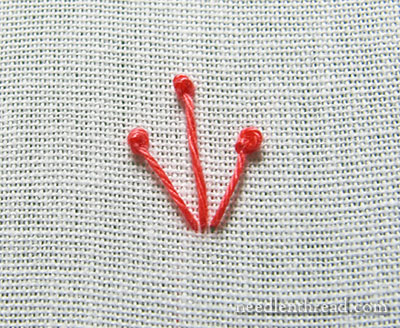
Here, I’ve worked two straight stitches between the pistil stitch.
I’m going to tip those with French knots. I’ve brought my needle up just one fabric thread away from the top of the straight stitch…
…and after making the wraps for the French knot, I’m taking it down into the fabric, in the same hole the straight stitch ended in.
Here, you can see the two straight stitched tipped with French knots, between the three pistil stitches.
The French knots are a little plumper when they’re stitched this way. The pistil stitch knots look a little smaller, but overall, there’s not a huge difference in the look. You can easily swap between the two approaches to stitching flower pistils, or you can opt for whichever approach is easier for you.
I hope that helps clear up any difficulties you might have with the pistil stitch!
You can find plenty of hand embroidery stitch tutorials here on Needle ‘n Thread – over 75 how-to embroidery stitch videos will take you through many basic and more complicated stitches. You can also check out the A-Z stitch dictionary where you’ll find stitches arranged by name with links to all the embroidery stitch videos, plus links to all the photo tutorials for various embroidery stitches here on Needle ‘n Thread. Finally, in the Stitch Fun Series, you’ll find weird and wonderful combinations of embroidery stitches and stitch combinations.

