The last time we looked at the Secret Garden embroidery project, I had finished (for the time being) with the hummingbird’s upper body.
The Next Step: Tackle the the Top of the Tail!
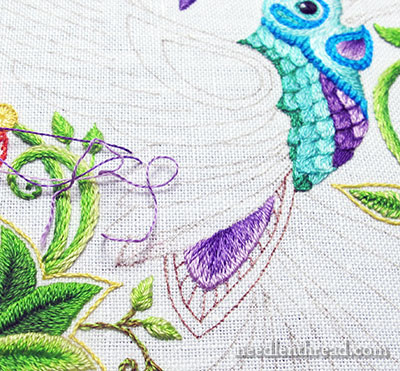
I began with the little short tail area protruding from under the wing, and embroidered the center open section in long & short stitch in three shades of purple.
Using a micron pen, I portioned off the center section of this area into small, relatively-evenly spaced blocks that radiate outwards around the long & short stitch.
In the original drawing, there are circles inside this middle area of the tail. I liked the idea of some sort of design variation in there, but not circles. The space is really too small to satin stitch nice circles, and I didn’t want to use knots here.
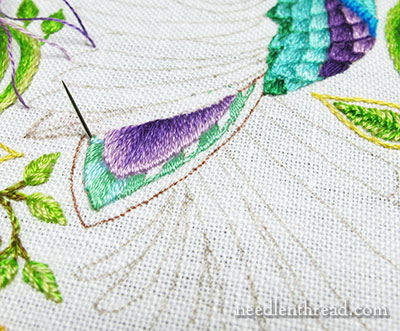
So instead, I used satin stitch to fill the small block areas, using satin stitch in a pale blue and a pale bluish green (these are colors that are used in the long & short stitch on the bird’s head).
There’s not much contrast between the two colors; I wanted just a subtle difference – nothing that looked distinctly striped.
Once I finished the satin stitched area in the center, I worked a chain stitch in the medium bright blue, just inside the remaining little area on the tail.
You’re probably thinking that it looks weird, and it does! The purple long & short stitch seems to be sitting higher than the satin stitch, which is heavier than the chain stitch, and the chain stitch doesn’t fill that whole outer level.
But stay with me here…
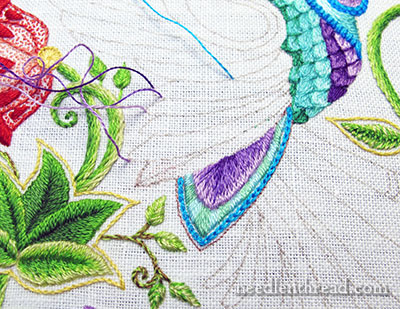
With the chain stitch foundation in place, I then used the darker brilliant blue and worked a buttonhole stitch directly over the chain stitch, leaving space about the length of a chain stitch between each buttonhole stitch.
The outer twisted edge of the buttonhole stitch is just on the design line.
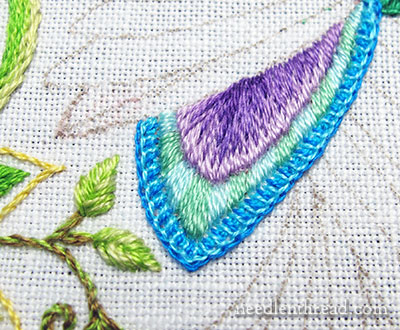
And then I took the lighter shade of the bright blue, and worked another layer of buttonhole stitch over the chain stitch, just inside the first layer of buttonhole stitch, so that the light stitches fall between the dark buttonhole stitches.
The light buttonhole stitches don’t completely cover the chain stitch, but almost. If there were no chain stitch in the background, you’d see little glints of white fabric.
Not quite finished yet…

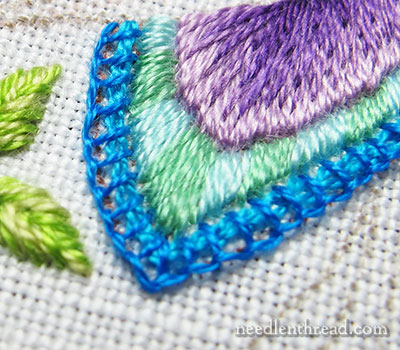
To further define the edges of each color section, I used the bright blue and outlined both sides of the center striped section using stem stitch. Basically, I stem stitched “in the ditch” where each color section merges.
And now let’s look at it from farther away:
I’m not 100% certain I’ll leave the stem stitch in that particular color of blue – I might switch that out a little later to something with a little more contrast, or whip stitch around the stem stitch with something to add some contrast or depth there.
For now, though, I’ll leave it.
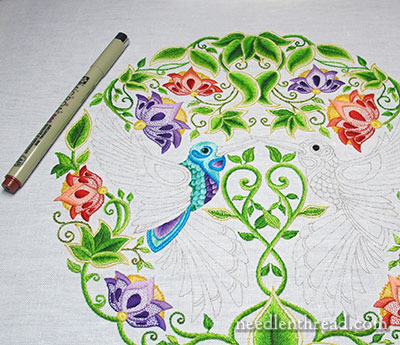
The micron pen and the embroidery scissors in the photos above are to give you a sense of perspective on the size of the embroidery.
So, that’s where I am at the moment. My mind is presently turning towards the wings. I’m looking forward to testing some ideas there!
If you’d like to follow along with the Secret Garden Hummingbirds project, you can find all the articles relating to this project arranged in chronological order in the Secret Garden Project Index.

