I mean that literally. I’m winging it on the Secret Garden embroidery project right now – just testing some approaches on the wings, trying this and that, and changing my mind and starting over.
It’s not necessarily the best approach in the world, if you’re trying to be an efficient embroiderer!
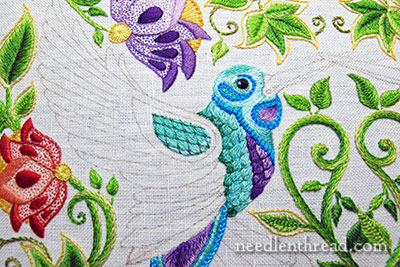
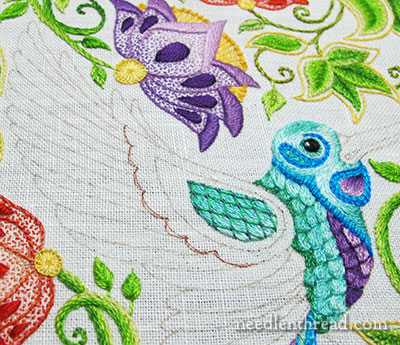
That little center part on the wing there has been stitched three times – in chain stitch, in a series of open buttonhole stitch configurations, and finally, as you see it above.
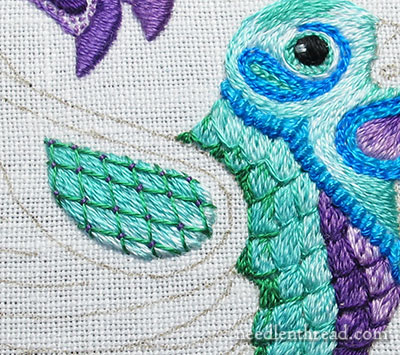
This is long & short stitch, starting at the tip (the upper left tip) in a darker blue-green, and working towards the front of the wing (the round part) in lighter shades.
Then, using the emerald green, I worked a lattice over the top of the long & short stitch filling and couched the lattice with a bright purple.
I liked it much better than the two previous approaches, which I regrettably did not photograph.
Once I realized I had completely missed the opportunity to take photos of some really lousy embroidery interpretations, I made a better effort to keep the camera close at hand! After all, half the fun is seeing the mistakes, too, right? And it’s always good, I think, to discuss why we think something doesn’t work and why we make changes.
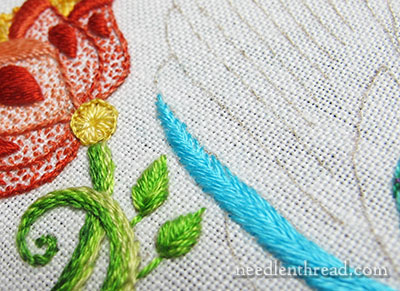
After I finished that little inside section on the wing, I moved on to dabble with a feather.
And I really liked this feather! It’s embroidered with fishbone stitch, which works fantastically for feathers!
After working the fishbone stitch in the bright blue, I tipped out one side of the feather with some really pale blue (the same pale blue used on the hummingbird’s head – it almost looks white here).
I liked it “ok” – but it didn’t work out quite as I pictured it.

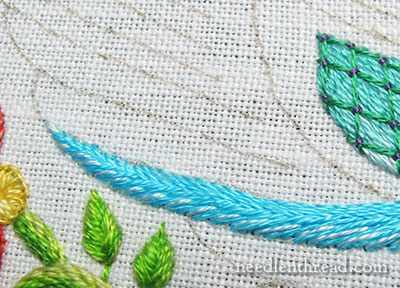
What I really didn’t like was the way the feather worked into the main part of the wing. In fact, I started thinking that maybe there should be a more defined break between the feathers and the front of the wing.
So I decided to sketch in some scallops, to break up the wing a bit.
I’m not sure if I like the scallops or not. I’ve stitched them once so far, but the attempt was dreadful – and I’ll show it to you next time, along with the fix.
I haven’t finished the fix yet – I’m not sure I even like the fix. So I might have to show you the first attempt, the fix, and the fix of the fix. Sometimes, I wonder about myself…
Now, by the way, is a Really Good Time to reiterate my absolute love of good linen for hand embroidery. No other fabric would be as resilient, when it comes to all the frogging (ripping out) I’ve been doing. The linen still looks great and performs great. Cotton would have succumbed by now, as would silk or synthetics.
Hip hip hooray for linen! Three cheers for that Fabulous Flaxen Fabric!
I’ll have a better update for you, with a little more embroidery on that fabric next time we visit the project. But I did want you to know that I am working on it! It’s just that, lately, more stitches are coming out than staying in!
Questions, comments, suggestions? Feel free to leave them below!
If you’d like to follow along with the Secret Garden Hummingbirds project, you can find all the articles relating to this project arranged in chronological order in the Secret Garden Project Index.

