What do you get when you cross bullion knots with stem stitches?
Right. There’s no punch line!
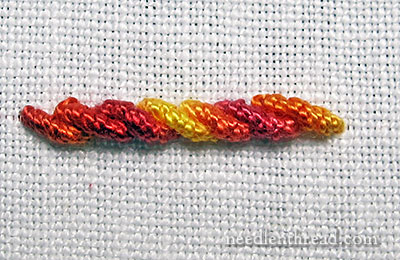
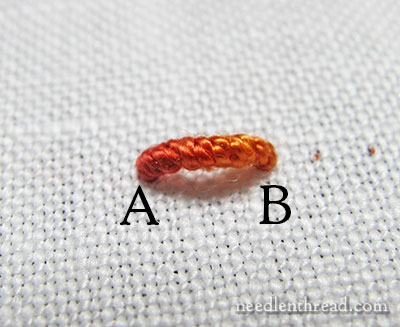
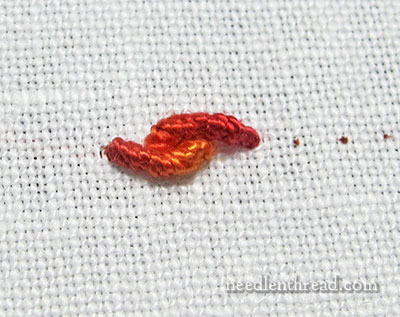
It’s kind of obvious – you get a stem stitch line made with bullion knots.
It looks like this:
It’s been a long time since I’ve written a Stitch Fun tutorial for Needle ‘n Thread – I miss Stitch Fun! So I’ll be rolling out quite a few Stitch Fun tutorials over the next several months. I have a whole list of stitches, composites, combinations that are lots of fun to add to your embroidery projects. And, of course, if you have any specific requests, I’m always open to suggestions!
Today, we’re going to look at the bullion stem stitch, which is simply stem stitch worked with bullion knots, or bullion knots arranged like stem stitch.
The Bullion Knot
If you’re not familiar with working the bullion knot, it might help to take a look at my bullion knot video tutorial, which will show you the by-far-easiest way to make bullion knots, especially if you’re working in a hoop or on a frame.
Materials Used in this Tutorial
For today’s Stitch Fun feature, I’m working on Alba Maxima, which is a beautiful linen with a close weave, with about 40 threads per inch (though it’s not an even weave). It’s a perfect fabric for general surface embroidery when you want an excellent ground fabric. For thread, I’m using a #8 over-dyed perle cotton from Colour Complements, and a #5 milliner needle.
How To Work the Bullion Stem Stitch
Here’s how to work the bullion stem stitch:
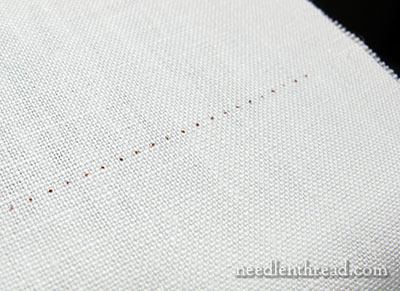
To make matters easy while practicing this stitch, you might mark out a dotted line on your fabric. My dots here are 1/8″ apart. The actual stitch will be 1/4″ long, so for each bullion I make, I’m skipping one dot.
I won’t go through the specifics on how to make a bullion knot here – the bullion knot video will show you that – but we’ll look at the major movements of it, anyway.
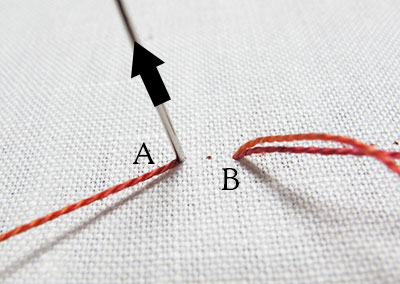
First, I brought my thread up to the surface at A and pulled all the way through.
Then, skipping one dot on the fabric, I took my needle down at B, but I left the majority of the thread on the surface of the fabric (I didn’t pull through).
Then, with the majority of thread still on the surface of the fabric, I brought the needle back to the front at A again, in the same hole.
Now we’re ready to take the working thread (which is still on the front of the fabric) and wrap it around the needle to create the bullion stitch.
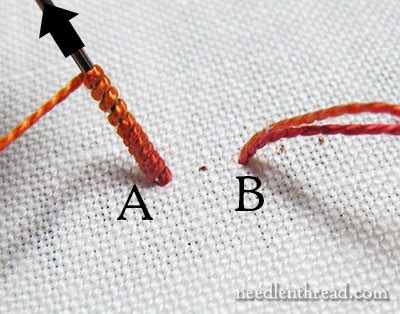
And there are the wraps!
For the bullion stem stitch, I like to wrap the thread around the needle enough times to cover the space between A and B, and then add one more wrap, so that the knot has a little bit of lift and movement.
Remember to hold the wraps on the needle when you pull the needle through them!
For this exercise, using #8 perle cotton and covering 1/4″, there are 11 wraps on the needle.
And there’s the knot. Notice how it sits up off the fabric a little bit. That’s a good thing for this stitch.
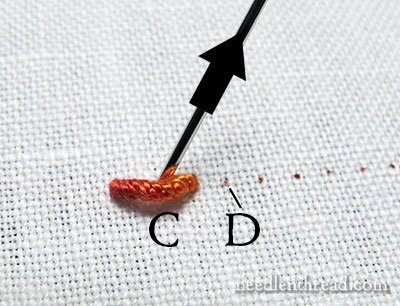
For the next stitch, the needle comes up at C, which is the dot between A and B (at the midpoint in the first bullion we just made), and the end of the stitch is the next dot down the line, which I have affectionately named D.
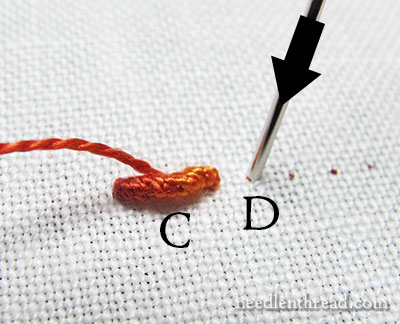
We’ll do the same thing for this stitch that we did for the first stitch: Up at C, down at D without pulling the working thread through…
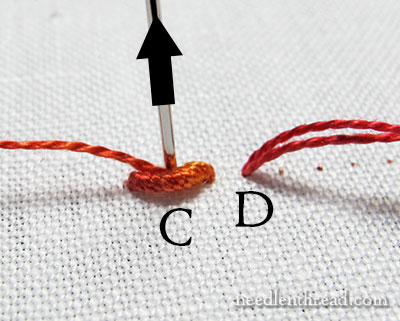
…then back up at C, where we will make the wraps on the needle and then, holding onto the wraps as we pull the needle through, we’ll finish the stitch.
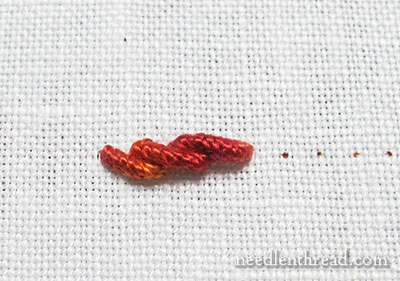
It will look like this:
Bizarre. Weird. Not very attractive.
No worries! When we get stitch #3 into place, all will come together as planned!
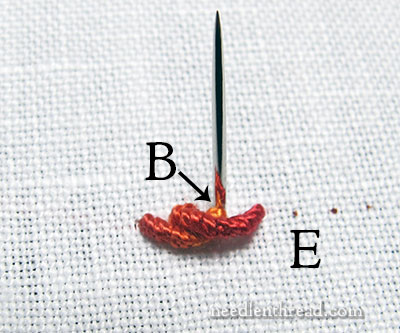
To begin stitch #3, bring the needle up at B, which you probably recall is where the first bullion stitch ended. And feel free to share the same hole!
The end of stitch #3 will be at E, which is the next dot down the line past the end of stitch #2.
You can see that stitch #3 put stitches #1 and #2 in their place. All looks well.
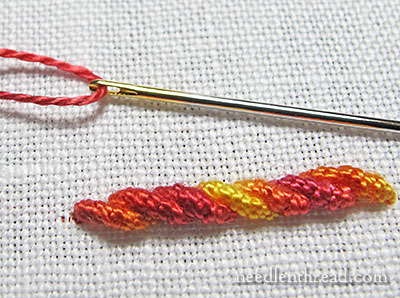
And so it continues! Just work your way down the line, making these overlapping bullions, which will morph into a very nice, ropey, dimensional line.
The bullion stem stitch can be used in all kinds of surface embroidery – anywhere you want a chunky line of stem stitch that has quite a bit of body to it.
It would make terrific stems for dimensional flowers, but it would also make a beautiful, rope-like edging or heavy outlines.
The key to working any bullion-related stitch easily? The milliner needle!
The eye of the milliner needle is more rounded than most needle eyes, and its shaft is straight, from the eye down. That lack of eye-bulge makes it very easy to pass a milliner needle through the bullion wraps. Also, the needle is long, which makes it easy to work plenty of wraps around the needle.
So, go for it! Try the bullion stem stitch – I think you’ll like it!
And if you have any Stitch Fun suggestions, feel free to leave them below!
You can find plenty of other hand embroidery stitch tutorials here on Needle ‘n Thread. You’ll find how-to videos for over 75 embroidery stitches, plus over 60 Stitch Fun tutorials that explore more obscure stitches, combinations, composites, and little tips and techniques to make stitching certain stitches easier. You can also find an alphabetical index of embroidery stitches available here.

