Despite the proliferation of articles here on Needle ‘n Thread about embroidery design transfer methods, the question of what to use to transfer an embroidery design is still by far my most frequently asked question.
I always know there’s something new going on out there in the embroidery world – a beginner’s class, maybe, or a popular blog post that’s been circulated – when all of a sudden, my inbox is flooded with questions that are about the same subject.
So, today, I’m going to tackle two questions. One represents the repeated questions I’ve been getting lately about Frixion pens, and the other is an isolated question – a very fairly put question about design transfer from a beginner.
Finally, I’m going to ask you to chime in at the end. If you do something different from what’s covered here, and you’ve discovered it’s a no-fail method with certain types of embroidery, tell us about it!
First, let’s tackle Frixion pens for embroidery design transfer. I should title this section, “Why I Don’t Use Frixion Pens for Transferring Embroidery Designs.”
In fact, I think I will:
Why I Don’t Use Frixion Pens for Transferring Embroidery Designs
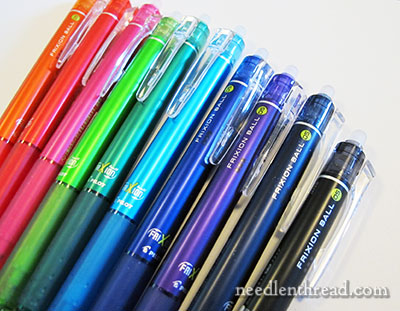
In the last few days, I’ve received at least 10 emails asking about Frixion pens for transferring embroidery designs.
I’m not telling you not to use them. I’m simply going to explain why I don’t use them.
If you want to use them, or if you have an instructor who’s telling you they’re the best thing to use for what you’ll be doing, go for it! I’m not trying to start an argument or step on anyone’s toes. I’m just going to explain my view on the Frixion Pen Approach to transferring embroidery patterns, and as always, you can take it or leave it.
First, what are you embroidering? An heirloom piece that you want to hand down for generations? Or a flour sack towel that’s going to go through the wash a hundred times? Are you practicing embroidery, or creating your Life’s Masterpiece? Did the supplies cost you $2.82? Or did they cost you $282.00?
Answer those questions, and you’ll be able to gauge better the risks you’re willing to take with your work.
Frixion pens are gel pens, with ink that disappears with the application of heat, either through friction (rubbing) or through the presence of high heat (for example, ironing).
A couple years ago, I wrote a short blurb about Frixion pens in this article about using soluble ink pens for embroidery design transfer.
You can read that article for more detail on my thoughts about these types of pens, if you like. To recap the points about Frixion pens:
1. Yes, the lines erase with heat. So you can iron them and the ink lines will magically disappear!
2. But they can come back in cold conditions. And that means the ink itself is not really gone.
3. They leave a “ghost” line – you can still see the line on the fabric, even after application of the iron. This can change color over time. I’ve read of reports of a grey color coming about over time. What I’ve seen for myself is a kind of yellowy brown color. That may change depending on the color of pen used.
4. How will the chemicals left on the fabric affect the fabric and threads over time? This, I don’t know. I’d be interested to know, but only time will tell.
If You Are Going to Use Them…
If you’re going to use Frixion pens for transferring your embroidery designs, keep these points in mind:
1. Try to purchase the finest tip Frixions available – the 05 pictured above. These will give you the finest line, making it easier to cover the line completely. This size Frixion isn’t widely sold in the US, but you’ll find the 05 Frixion pens available through Amazon, if you really want them.
2. When you trace your design, trace very carefully, making sure not to “sketch.” You want smooth, fine lines that are easy to cover.
3. Occasionally, blot your pen. Gel ink can build up and blotch.
3. Don’t use them on something you won’t be able to iron. So, for example, goldwork is out of the question! But if you’re embroidering flour sack towels that will go through the laundry, you can cover the lines all the way, and you’re not concerned about ghosting, then by all means, if you want to use them, use them!
My Design Transfer Preferences
So, a beginner wrote and asked a very fair question: I’ve read all your articles on transferring patterns. What I want to know is what methods you use regularly that work.
I use a few methods to transfer patterns, depending on the type of project I’m working on.
Tracing Embroidery Designs
Probably the most common method of transferring designs that I use is tracing.
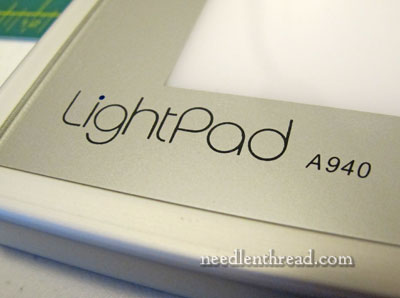
I have a LightPad that comes in very handy for tracing. You can read my review of this particular LightPad here.
I use one of two things to trace the design:
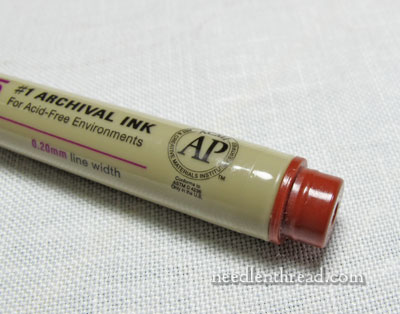
A Micron Pen (by Sakura) in brown, sepia, or even black in size 005 on the cap (that’s .20mm, I believe) is a great tool to use for tracing, if you are covering all your lines.
After tracing with a micron pen, I iron the ground fabric (with the design traced on it), face down. So, I iron the back of the fabric.
I’ve never had a problem with micron pen ink running or anything like that, but I always heat set it with the iron after I trace it. Keep in mind that Sakura does not guarantee their pens to be colorfast on fabric, just on paper. They are archival quality pens, and permanent.
By far the best pen I ever used for tracing designs was Martha Stewart’s archival craft pen, in size .20mm, in the color “moonstone.” If you can find those in moonstone, they create a nice line that’s not too dark and not too light. Unfortunately, the pens aren’t sold individually anymore, and they’re harder and harder to find in that color.
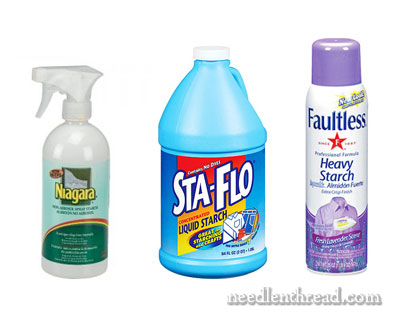
For embroidery on linen where the lines may not be covered all the way, and where the piece can be washed (completely submerged and soaked in water after embroidery – meaning the fabric and the threads are colorfast), then I use spray starch and pencil for tracing.
First, I spray starch the fabric thoroughly (using aerosol starch – the kind in the can on the right side of the photo above) front and back and iron it. Then, I trace it using a regular #2 mechanical pencil. I use a light hand with the pencil, drawing in continuous lines (not “sketching” in a hairy way), and putting only enough pressure on the pencil to get a line I can see, without it being too dark.
The pencil marks will release pretty easily with washing, thanks to the coating of spray starch.
Prick and Pounce Embroidery Design Transfer
For larger, more permanent embroidery projects that will take a lot of time, that would be difficult to trace accurately without making mistakes (think: ecclesiastical embroidery projects), I use the prick and pounce method of transferring designs.
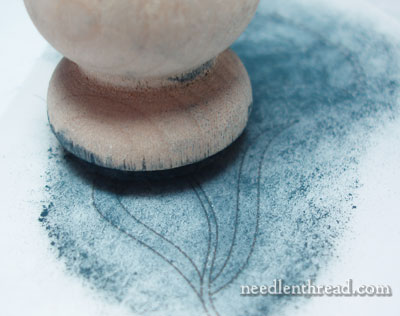
I have some tutorials that can help you with this method of design transfer:
1. How to Transfer an Embroidery Design Using Prick and Pounce
2. An Economic Choice for Pounce Powder (if you use this method a lot)
3. Making Your Own Light Pounce Powder (for dark fabrics)
3. Making Your Own Pounce Tool
To connect the dots after pouncing, I use either watercolor paint and a very fine paint brush, a micron pen, or, on dark fabrics, a white ceramic pencil or white or yellow paint.
Wax-Free Carbon Transfer
For some embroidery projects, I’ve used with good success Saral wax-free “carbon” transfer paper or Dritz’s dressmaker’s carbon.
This stuff is used just like the carbon paper of old. You put your fabric down first, position the transfer paper on top of it, chalky side down, and then your pattern on top of that, and trace over your pattern with a stylus or a ball point pen.
I’ve used the white transfer paper on gold colored silk to achieve a nice clean design in white lines that are visible under my stitching lamp but not really visible otherwise. This whole silk-on-silk embroidery project was transferred this way.
I use this method rarely, but in a pinch, I’ll use it. It works. I’d probably opt for prick and pounce over this method now, because it’s hard to get the positioning right, and keep it right when transferring a large design.
Another version of this method, without using the carbon paper, is this quick & easy design transfer method for small embroidery projects.
Transfer-Eze and Water Soluble, Printable Transfer Paper
Sulky makes a product called Fabri-Solvy that you can put through your inkjet printer to print the design on it, then stick the product on your fabric, stitch over it, and then soak the fabric to remove the product.
There’s another product called Transfer-Eze that does the same thing.
Here are some articles on using Transfer-Eze. I’ve used both it and Fabri-Solvy interchangeably with beginners, and they both work satisfactorily.
Playing Around with Transfer-Eze
Transfer-Eze Finish
I don’t really use either product in my own stitching, but I do use it when I’m teaching kids or youth if they’re working on flour sack towels or something similar. They’re both good short-cut products for this type of stitching. I wouldn’t use them on anything particularly fine.
What’s Your Tried & True Method?
What’s your tried & true method of transferring embroidery designs? Feel free to chime in below! It’s always good to have options!
If you’re looking for other information on transferring embroidery designs, this article lists many ways to transfer designs and links up to several tutorials. You can also benefit from reading the comments at the end of the article.

