The other day, I showed you the finished embroidery on the wing and central feathers on the Secret Garden Hummingbirds.
There was one spot in particular that still bugged me – right where the last feather rested above the already embroidered tail section.
Today, I want to show you how just a few stitches can make a subtle difference, transforming a bothersome area to something better.
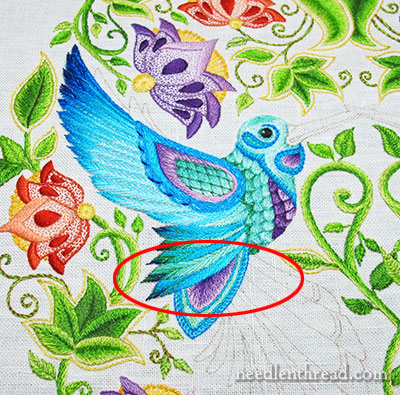
Here’s the area that I thought still needed some improving touches. I needed to add just a little stitching that would lift the upper feather over that tail section a little. Right now, the line between them is too stark, too flat.
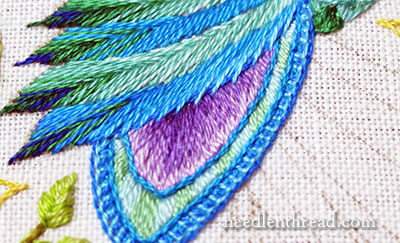
So, to lift the feather, I started with the dark blue (820) and split stitched a thin line between the feather and the tail section. You can’t see a solid dark line here, but if you look between the lighter, sketchier stitches, you can see where the edge is a darker blue.
Then, I added some sketchy stitches in lighter shades of blue. I used split stitch, coming up in the previously stitched feather, following the slant of those previous stitches, taking the stitches over the dark blue line and down into the tail section.
This created a kind of “hairy” or spiked edge to the feather, when looking at it close up:

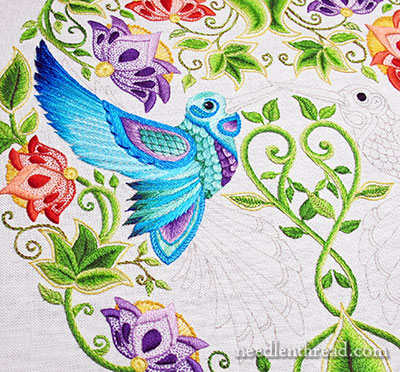
But when looking at it farther away, that spikiness is not as noticeable:
So, why a dark line and the light stitches?
In embroidery, it’s easy to create the illusion of a shadow with a dark line. A dark line stitched on the edge of an embroidered element can make it pop out, even if it’s fairly two-dimensional and flat. This trick of using dark lines to create the illusion that one element is above another is seen often in ecclesiastical embroidery.
But, it’s still somewhat two-dimensional. And in this case, a plain dark line along the lower feather would only serve as a divider – kind of like a dark line in a coloring book picture. It would just separate the two elements, instead of lifting that feather up and placing it noticeably above the tail section.
So what I needed to do was something that would not only lift the feather, but also join the two elements by extending that feather over the tail. It’s the extension of the lighter stitches over that shadow created by the dark line and into the tail area that joins the two elements and makes the feather look like it is over the tail.
Here’s the before and after, side-by-side. If you click on the photo below, you’ll get a larger version:
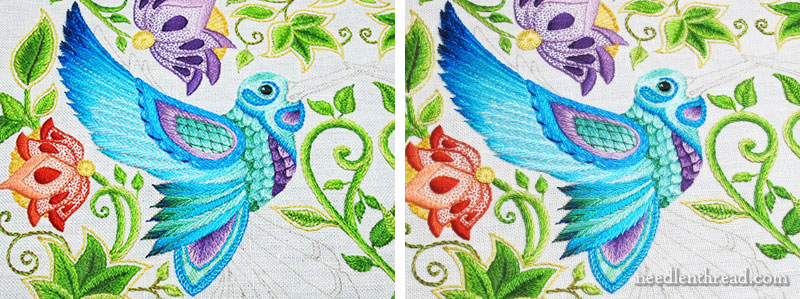
It’s not a huge difference, admittedly, but I think it’s just enough of a subtle difference, to improve that area.
And now, I’m abandoning the wings. Later on, I may go back and touch up a few other areas that might benefit from some accent stitching, but for now, it’s time to move on to the main tail feathers!
Questions, comments, suggestions – I’m all ears! Have your say below!
If you’d like to follow along with the Secret Garden Hummingbirds project, you can find all the articles relating to this project arranged in chronological order in the Secret Garden Project Index.

