Do you ever yearn to embroider some of those really complicated, rich, braid-like bands, but just find the stitch sequence too complicated to master quickly?
Sometimes, complicated looking embroidery stitches are not as complex as they really seem!
Today’s Stitch Fun tutorial is a good example of that.
That’s not to say this stitch isn’t slightly complicated, but once you understand the sequence, everything else about this embroidery stitch is super simple!
And the result? A nice, heavy, braided band stitch, great for outlines, heavy stems, or anywhere you want a strip of texture and dimension on your embroidery surface. It works up great as straight lines and as slightly curved lines.
I’ve included lots of photos to make the stitch tutorial as clear as possible.
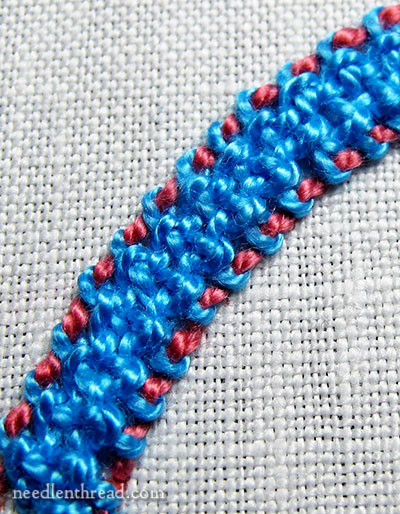
So this is the stitch.
Once upon a time, many years ago (ok, four years ago) I embroidered this stitch on a spot sampler. I remember loving it! And the other day, I was pouring over that sampler looking for ideas to share with you, when lo! This stitch beckoned me!
Unfortunately, I have no idea what this stitch is called. I don’t remember where I learned it, or if it was just a matter of putzing around with needle and thread.
Considering the movement of the stitch, I’m going to call it a double knotted herringbone band. It’s a slightly raised band, worked between two lines of backstitch.
In this tutorial, I’m using #5 perle cotton for both threads colors, on linen, with a #3 crewel needle and a #20 tapestry needle.
Ready? Let’s go!
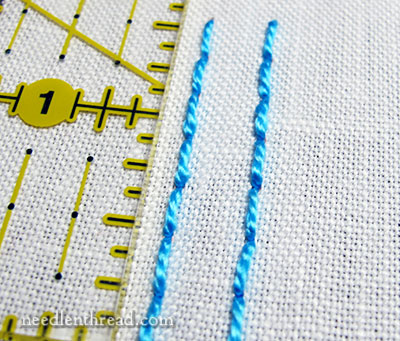
Start with two parallel lines of backstitch. They should be worked as evenly as possible, so that the stitches line up with each other on each side of the band.
For this tutorial, I’m making the backstitches 1/4″ long and the two lines are just over 1/4″ apart, but that’s only because I’m exaggerating the stitch size to make the movements clear.
If you’re working with perle cotton #5 or #8 or any similar thread, 1/8″ stitches will give you a tighter band than the one produced in this tutorial.
The stitch will look different worked in different threads. You’ll have to adjust the length of the backstitches and the width of the line, depending on the thickness of the thread you use. Play around with the stitch! Try it with different threads to discover the look you like best!
Use a crewel needle (with a sharp tip) for your backstitches.
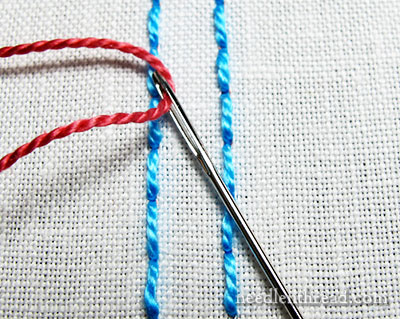
After you’ve stitched your backstitch lines, switch to a new thread (the same color or contrasting, depending on the look you want) and to a tapestry needle.

Bring the new thread to the front of the fabric at the top center of the two parallel lines of backstitch.
The First Knotted Cluster
Take the needle underneath the first backstitch at the top of the right line, and over the working thread. Do not pick up any fabric.
Every movement of the stitch in this band is taken over the working thread like this. I’ll remind you as we move through the tutorial, but if you remember to always bring your needle out over the working thread, you’ll have the whole stitch down in no time flat!
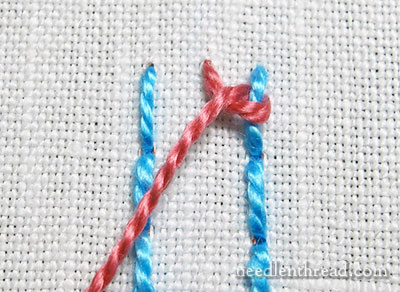
When you pull your thread snug, this is what the stitch will look like so far.
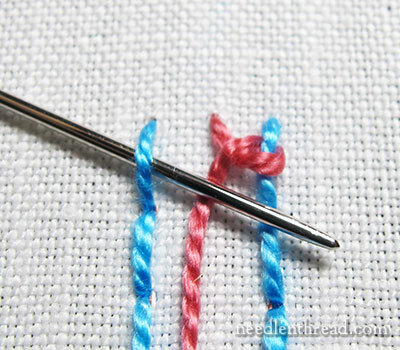
Now move to the opposite backstitch on the left line and take your needle under the backstitch from the outside towards the inside, and over the working thread, as shown.

Pull it through and snug it up!
You don’t need to pull through too hard on these stitches – just enough to snug the thread up around the backstitch.
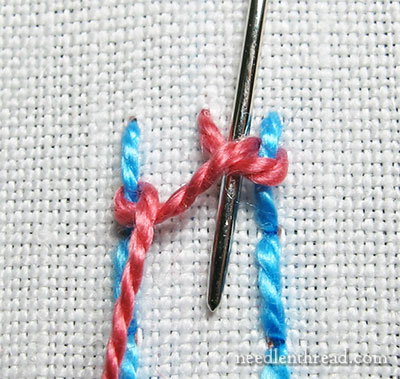
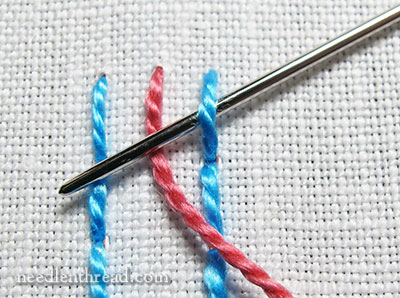
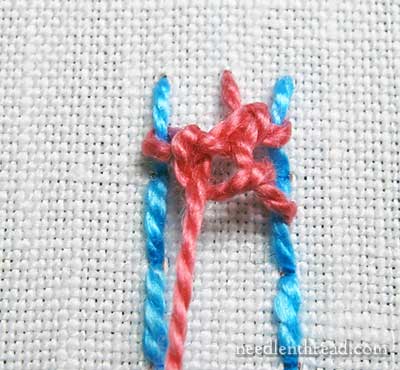
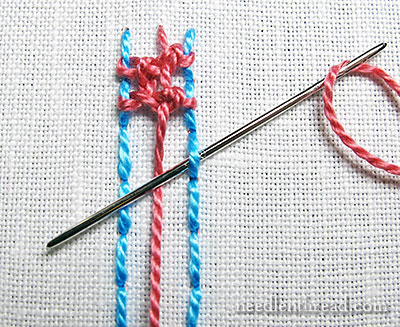
Now, pass the needle from the top downwards, underneath the first cross-over twist in the thread on the right side, just inside the backstitch line.
Don’t forget to come out over the working thread!
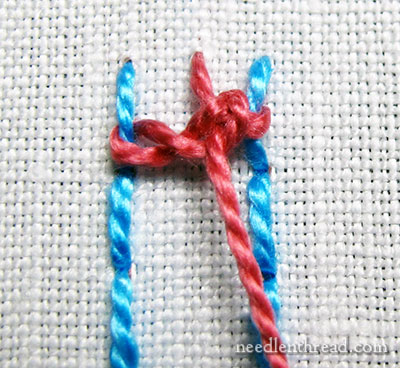
Snug it up!
And that is the end of the first knotted cluster.
Subsequent Knotted Clusters
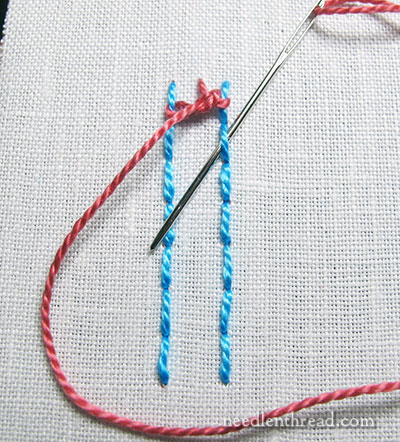
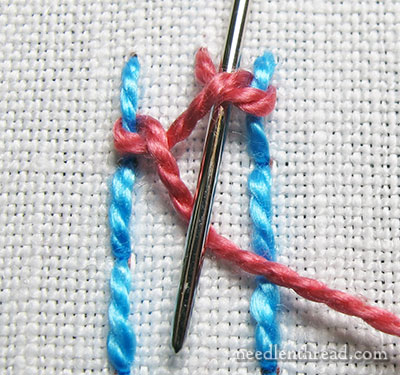
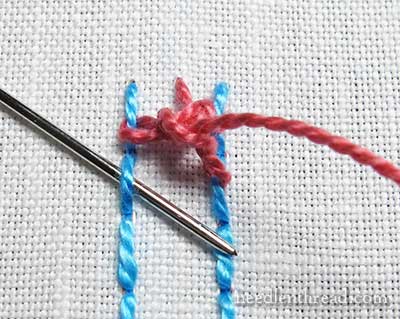
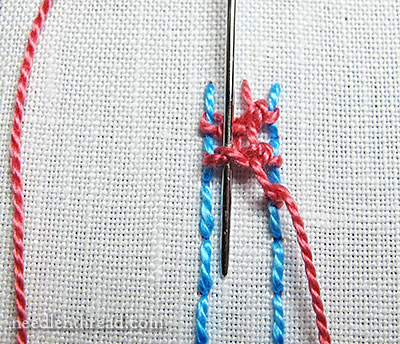
Now, pass the needle from the outside in, underneath the next backstitch down on the right side.
As long as your needle comes up inside the loop of your working thread, you can just grab the needle and pull the thread through to snug up the stitch.
It’s faster to come up inside the loop of your working thread like this, rather than tucking the working thread directly under the needle with every stitch.
Pull through to snug it up!
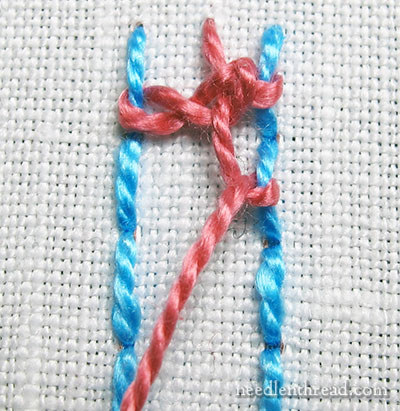
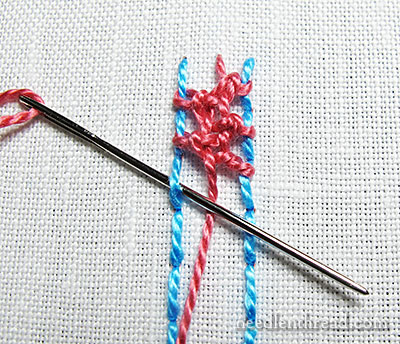
Now, bring the needle from the top down, underneath the twisted cross-over on the left side of the inside of the band, as shown in the photo above.
Come up inside the loop of the working thread (or over the working thread) and pull the stitch snug.
This is what the stitch will look like at this point. It’s not exactly beautiful – it looks a little confusing – but keep going!
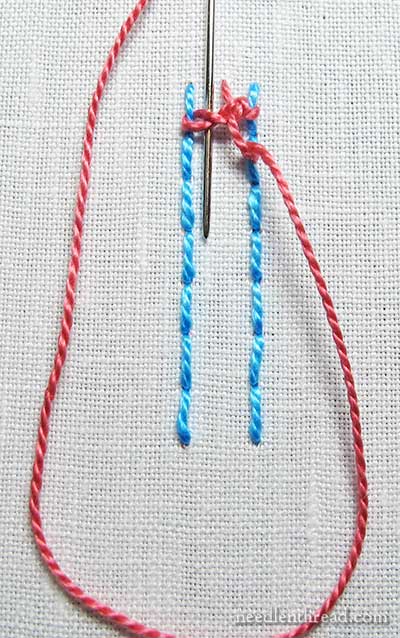
Pass under the next backstitch down on the left, from outside to inside, and over the working thread.
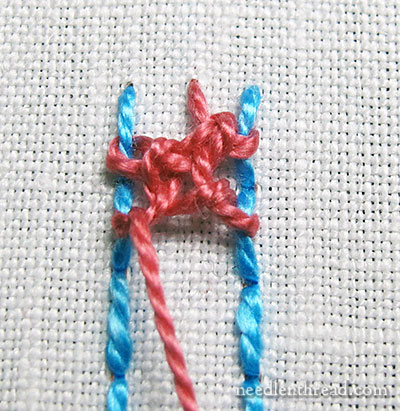
Pull it snug!
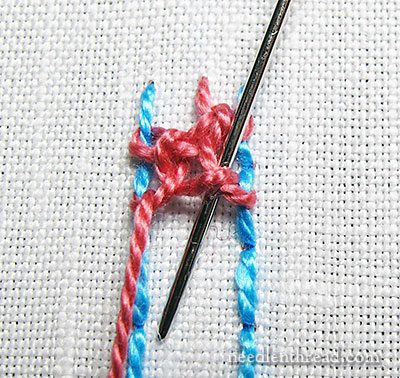
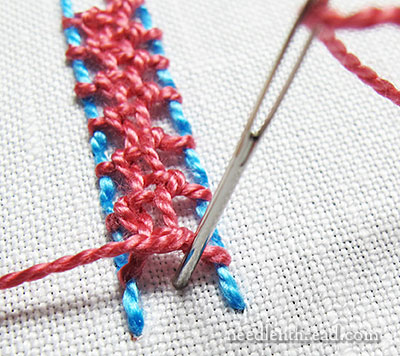
And now you’ll take the needle down from the top, underneath the twisted crossover on the inside of the right backstitch, emerge over the working thread, and pull the stitch snug.
That’s the end of the second knotted cluster!
To start the next knotted cluster, move down the backstitch line again, passing under the next backstitch down on the right, out over the working thread, and pull the stitch snug.
Then, pass to the left to go under the twisted cross-over on the left side, out over the working thread, and pull snug.
Pass under the next backstitch on the left… and keep on going!
Continue this process, moving down the line between the backstitches, until the band is filled up.
The Stitch Sequence
After you’ve completed the first knotted cluster (which is a little different from the rest), the stitch sequence goes like this:
1. Pass under the backstitch on the right line, moving from outside in, and out over the working thread. Pull the stitch snug.
2. Move the inside of the left backstitch line, and pass downwards under the twisted crossover just inside the left backstitch line, out over the working thread, and pull the stitch snug.
3. Pass under the backstitch on the left line, moving from outside in, and out over the working thread. Pull the stitch snug.
4. Move to the inside of the right backstitch line, and pass downwards under the twisted crossover just inside the right backstitch line, out over the working thread, and snug the stitch up.
Repeat steps 1-4, moving down the line.
Ending the Stitched Band
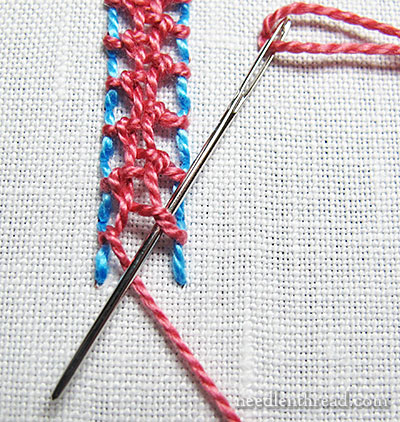
When you want to end the band, do so after passing under the last cross-over on the right, coming out over the working thread and tightening the stitch, and then…
…take the needle straight down into the fabric after snugging up that thread.
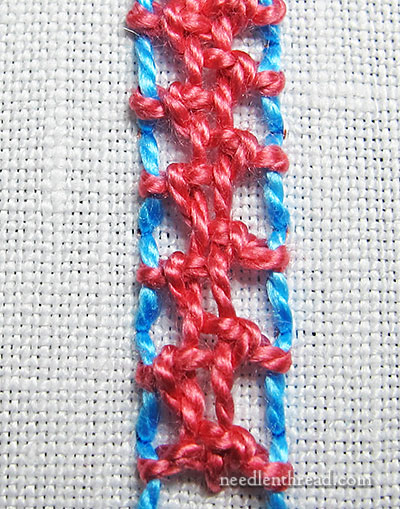
This is the stitch, worked open between parallel lines of large backstitches.
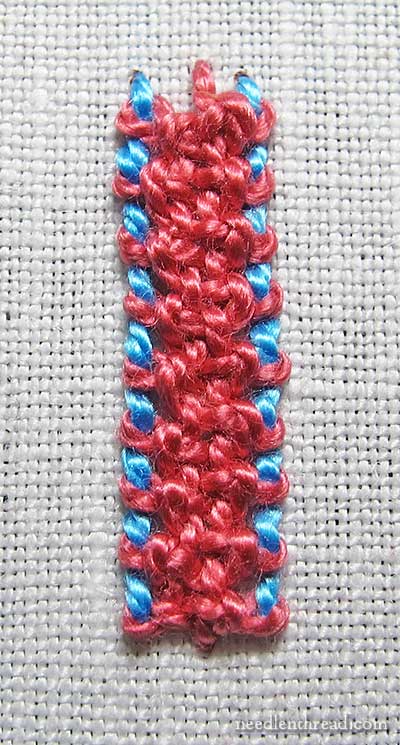
And this is a band worked with the same perle cotton #5, but the backstitches are 1/8″ long instead of 1/4″ long.
Now, I know all those steps look complicated, but once you try the stitch, you’ll find that it’s super easy, it has a great rhythm to it, it works up really fast, and it’s probably one of the easiest complicated-looking stitches that you’ll ever work!
Try it!
If anyone has seen this stitch documented and knows the official name for it, feel free to mention it below.
Stitch Fun is a series of embroidery stitch tutorials tutorials here on Needle ‘n Thread, where we explore fun stitches, composite stitches and stitch combinations, so that you can add them to your surface embroidery projects. You can find all these stitch tutorials listed in the Stitch Fun Index. You can also find them – as well as all my how-to videos for embroidery – listed alphabetically in my online stitch dictionary.
If you have a particular stitch that you’d like to see worked out, either in step-by-step tutorials or on video, just drop me a line! I’ll add it to the list!

