Well, I tried several different approaches and several different stitches on the tail feathers for the Secret Garden Hummingbirds, each resulting in a little more un-stitching.
Finally, I succumbed to the fishbone stitch, which is the same stitch I used to embroider the hummingbird’s wings.
So, today, a little update on the Secret Garden Hummingbird Project, just so you know I haven’t abandoned it!
I’ll also share some tips on how to gradually change shades with the fishbone stitch.
You can click on the photo above for a slightly larger version, if you wish.
If you recall, the last time we visited this project, I was testing the fly stitch for the tail feathers. I didn’t like it at all. I didn’t like the thickness the fly stitch created, or the crowded look to the feather.
And on top of it, as many of you pointed out… the stitches were going in the wrong direction!
Boy, that was a V-8 moment!
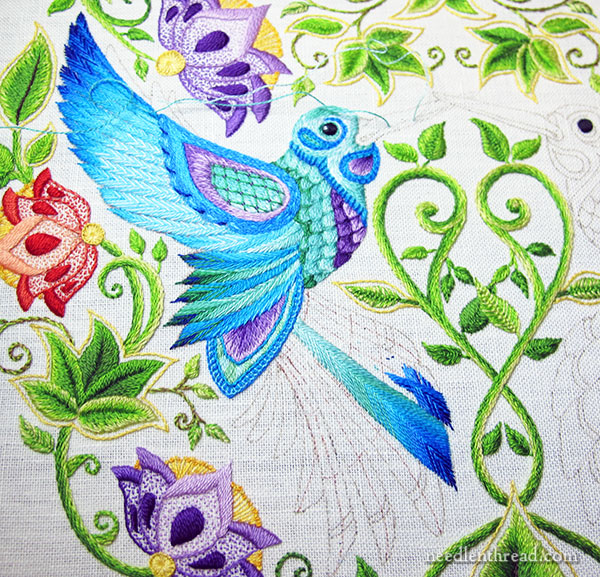
On the new tail feather above, you might notice that there’s something missing. I didn’t include the little accent band at the end of the feather.
In the previous version of the embroidered feather, I was going to stitch that in purple. But I decided not to add it on this version (after trying it out several times), for a couple reasons:
1. The angle of stitching on the fishbone stitch here is quite extreme, especially on the right side of the feather, where I have to get around the squared corner. Throwing in a purple band up there made the feather look lopsided, with an extreme angle on one side, and a not-so-extreme angle on the other.
2. The purple interfered right where I wanted to change shades, and it broke up the blending of the feather.
So, I decided to skip it altogether.
Oh, I forgot the third reason: it was the easy way. You know, there are times when it’s ok to take the simple approach!
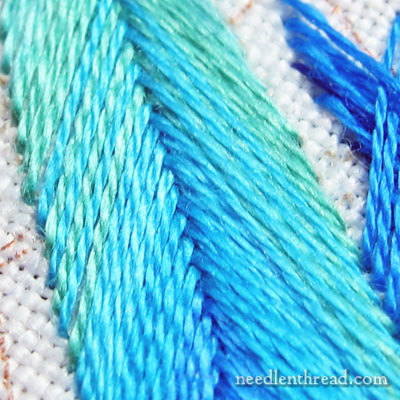
Here’s a close up on the tail feather, where I’m merging two colors. The idea here was to create a gradual change-over to another color, so that the feather doesn’t sport super-distinct color bands.
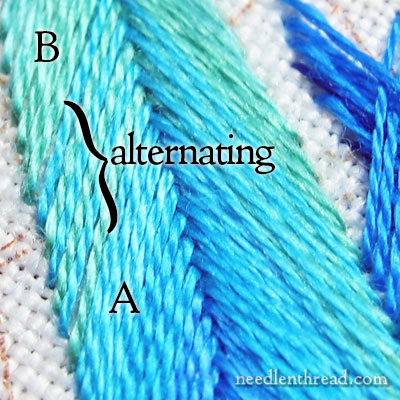
Color A is a lighter bright blue, and color B is a lighter green. To blend the colors so that they don’t meet abruptly, I embroidered a transitional area, where A and B alternate from stitch to stitch for about three pairs of stitches.
If you want to think in terms of stitch sequence, coming down from the tip of the feather towards the body, the sequence for this color transition goes like this:
…AAAA (stitches in the light blue), B A B A B A (the transition), BBBB…
Alternating colors like this is the only way to “shade” or to create a gradual color transition when working the fishbone stitch or stitches similar to it.
And that’s the update on this project! Next time, I’ll show you the finished tail.
You’re welcome to chime in below with commentary, questions, suggestions, severe reprimands – or just a howdy.
Enjoy your Wednesday! See you tomorrow with… shhhhhhhhhhhhhh…. don’t tell anyone. I’m giving away a rare embroidery book!
If you’d like to follow along with the Secret Garden hand embroidery project, you can find all the articles relating to this project arranged in chronological order in the Secret Garden Project Index. If you’d like to see photos of other Secret Garden embroidery projects, you can check out the Secret Garden Flickr Group, where quite a few gorgeous works are in progress or already finished!

