Long, long ago and far, far away (so it seems), I began an embroidery and sewing project that had every indication that it would eventually turn into a tote bag with an embroidered pocket on it.
You can read the backstory on this particular resurrected project in two previous articles on Needle ‘n Thread – this article on twill and duck fabric, and this article on the stitching progress on the twill.
Due to I-Can’t-Remember-What, the project got side swiped by something else, and I never got back to it…until yesterday.
So, why yesterday? Well, two of my sisters are visiting from out of town, and one of them – Susie – is a sewer-extraordinaire (Sewer doesn’t come across well in writing, does it? Let’s say she’s a sewist extraordinaire), especially when it comes to sewing tote bags, quilts, and pretty much any kind of sewing stuff.
Unlike her and her sewing machine, I and my sewing machine have not quite established a loving, friendly, attached relationship. It exists to sew around the edges of embroidery fabric so I can embroider. Until yesterday, I’ve never used it for much of anything else.
Yesterday, thanks to the assistance of my sister, I made a pillowcase.
It actually turned out.
This is a milestone, I assure you. I discovered I can actually change a bobbin, thread the sewing machine needle, and sew an almost-straight seam.
Making the pillowcase recalled to mind the tote, and I thought, Why not? I figure it’s time to put my newly-found sweet sewing skills to use!
And if the going gets rough, my sister will save me. That’s what sisters are for, after all.
But before I can fulfill that plan, I have to finish the embroidery on this pocket.
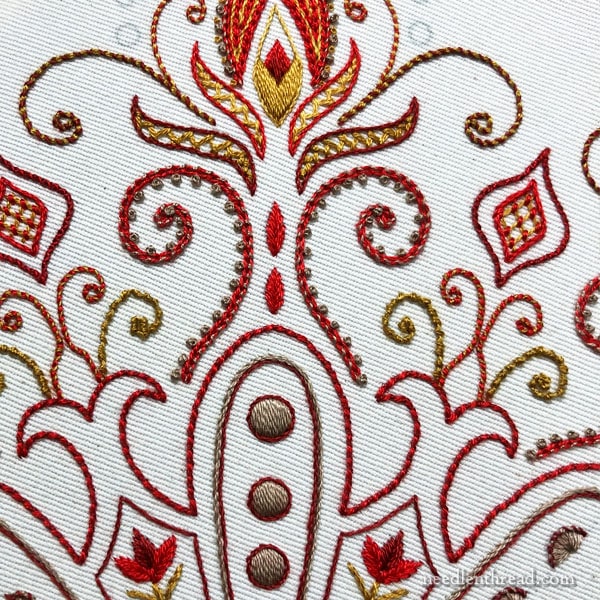
There’s not much left to stitch on it – just some bits up the side (which may end up being covered slightly by the handle overlap… I forgot about that when planning this thing) and some small dots at the top of the design.
When Susie first saw the pocket in person, she was a little surprised. Being (I’m sure?) an avid reader of Needle ‘n Thread, she has only seen the pictures of the pocket from the previous articles mentioned in the introduction above.
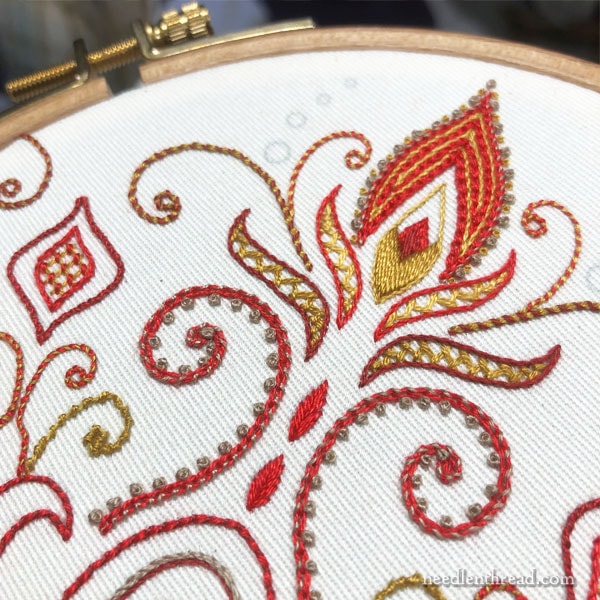
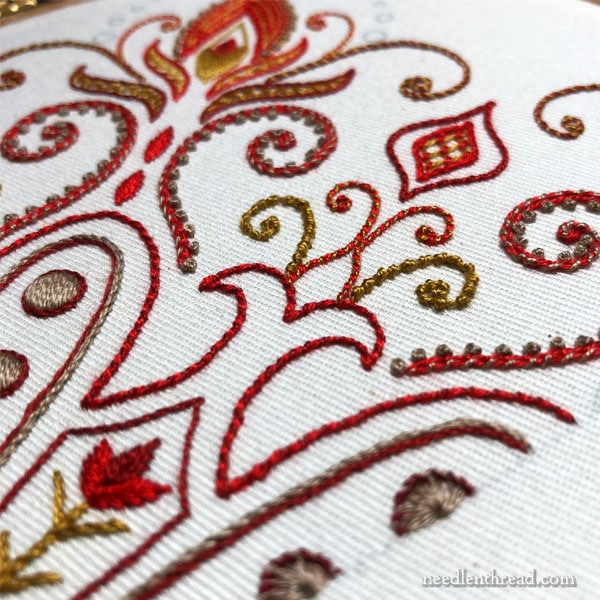
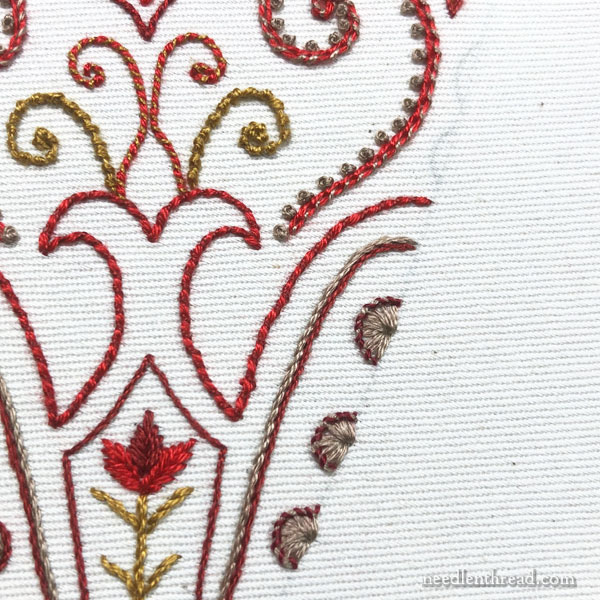
The pictures show the stitches and design up close. It’s hard to give you a sense of the true size of the stitching. I’m using two strands of floss to stitch much of the design, and in some places one strand, so even if the stitching looks chunky and bold, it’s not really. It’s somewhat fine and airy.
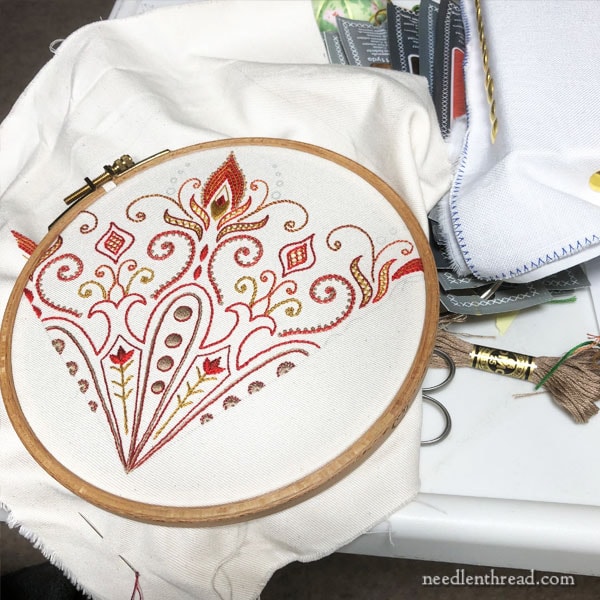
Here’s a photo of the design in a six-inch hoop, sitting on my table next to me. You can see a skein of DMC sticking out there, and the handles on my embroidery scissors. This might give you a better idea of how the design looks when seeing it naturally and not up close.
The Design
The design I’m using for the pocket embroidery comes from my Party in Provence kaleidoscope. You can see the whole kaleidoscope stitched here in a different style. The kaleidoscope design is available in my e-book, Favorite Kaleidoscopes, which is a design book featuring over 30 kaleidoscopes for embroidery and other crafts.
The pocket embroidery is one quarter of the design, and in the e-book, I supply the design broken down, in case anyone wants to use it similarly. You might not use it on the pocket of a tote, but you might have a corner of something that you’d like embellished. That’s the fun thing about kaleidoscopes – you can actually break them down in sections or in layers, depending on what you want to stitch. This is demonstrated in the e-book, too.
The Plan
My plan is to finish up the embroidery on this today and then hopefully, I’ll sew the whole thing into a reasonable semblance of a tote bag before this weekend. Yay!
If I discover that the machine and I aren’t going to get along sew well (see what I did there? a corny pun?), I’ll see if I can convince Susie to do it for me. Heh heh.
Wish me luck (either way)!
