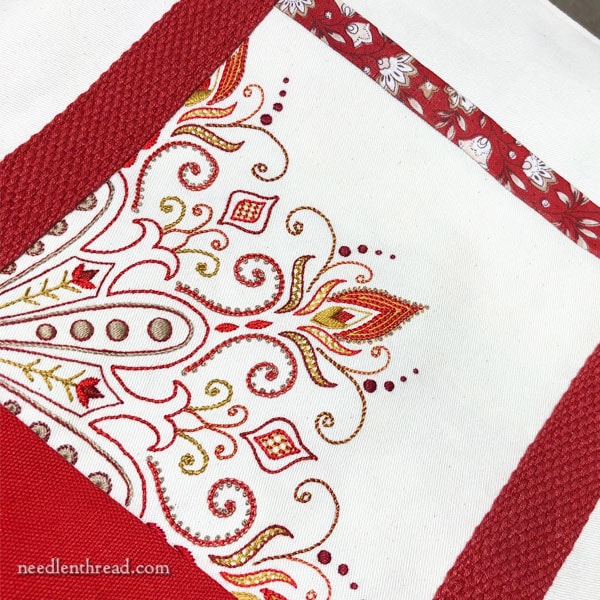
Last week, I showed you a resurrected embroidery project – one of those projects I had high hopes for, but never got around to finishing. It’s this embroidered kaleidoscope design broken down to fit on a pocket for a tote bag.
With my sister – who’s much more adept at sewing than I am – in town, it was a good time to tackle the tote.
Her approach was to let me do the tackling while she advised when needed. This worked out well, because I learned a lot.
There were a couple mishaps along the way.
Right off the bat, after cutting everything out and preparing it to sew, I discovered that the pattern I used (which was a free pattern from Craftsy before it merged into Blueprint and hence, is no longer available) wasn’t everything I wanted.
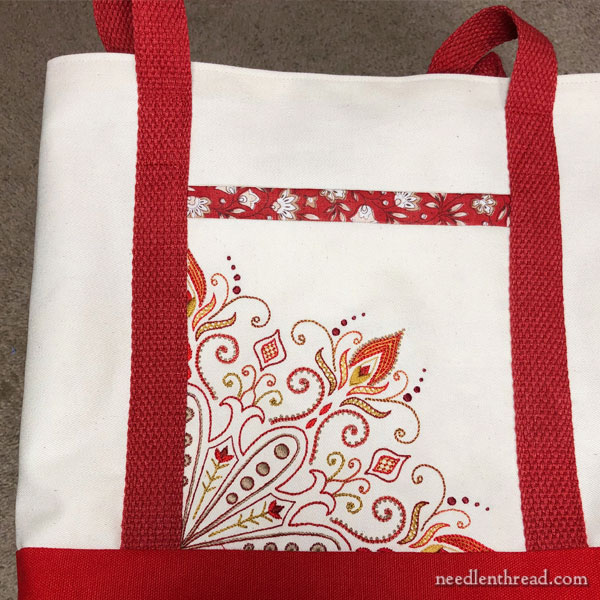
The straps on the original pattern were too narrow and too thick. Once constructed according to directions, they ended up being a quadruple layer of heavy fabric a scant 3/4″ wide – uncomfortable to hold, skimpy in width up the side of the pockets, and visible in bulkiness under the layer of fabric at the base of the tote.
Susie advised substituting cotton webbing, which makes a nice, comfortable handle for a tote. Unfortunately, the weather outside was frightful that day – not a good day for driving, with snow and ice and accidents all over the highways – so I had to put off a trip to town for webbing.
My sister left the next morning and I ended up flying solo on the rest of the tote, but accompanied by lots of good advice.
The whole thing came together easily enough, although the lining does not sit as well on the inside as I would like.
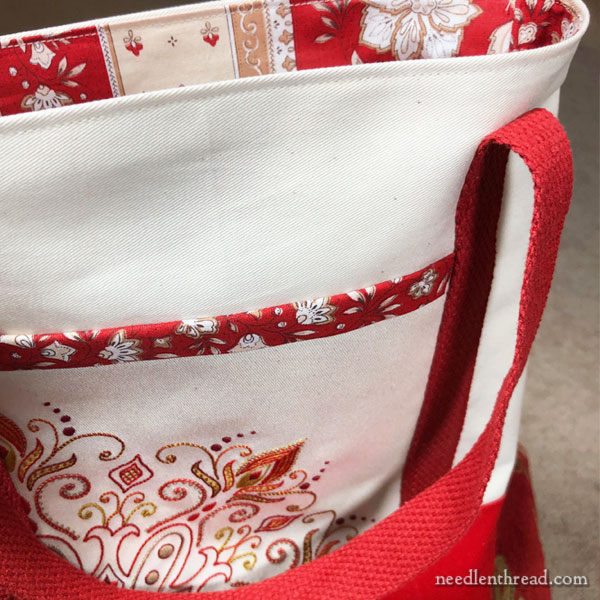
I was super pleased, though, with the lining fabric, as far as color and design go. I love this stuff! I found it through French Connections, where they offer a wide variety of this style of fabric from Provence, France.
I found the lining fabric very easy to sew and to keep straight.
Following the instructions, though, I cut the lining fabric too large and didn’t realize it until after the whole bag was constructed. Next time, I’ll take a different approach, cutting and trimming the lining after the outside is constructed to make sure I get a good fit.
It’s hard to get a photo of the inside of a bag and the outside of a bag at the same time!
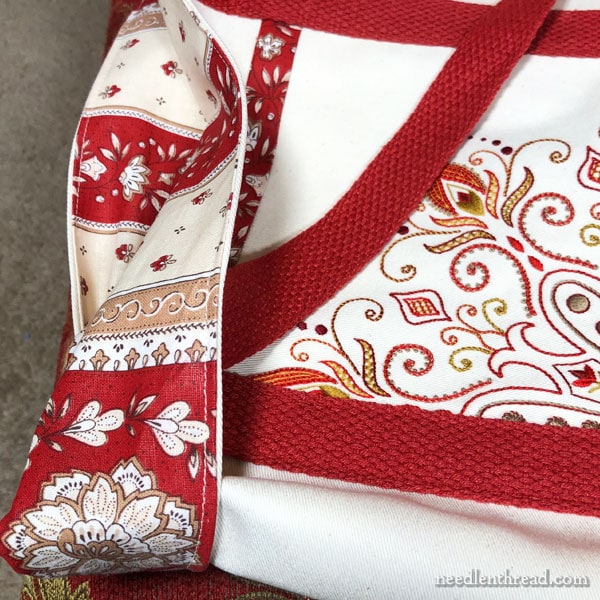
Here’s a better idea of the lining fabric, at the expense of crumpling the tote.
Hey – it’s just a tote! It irons!
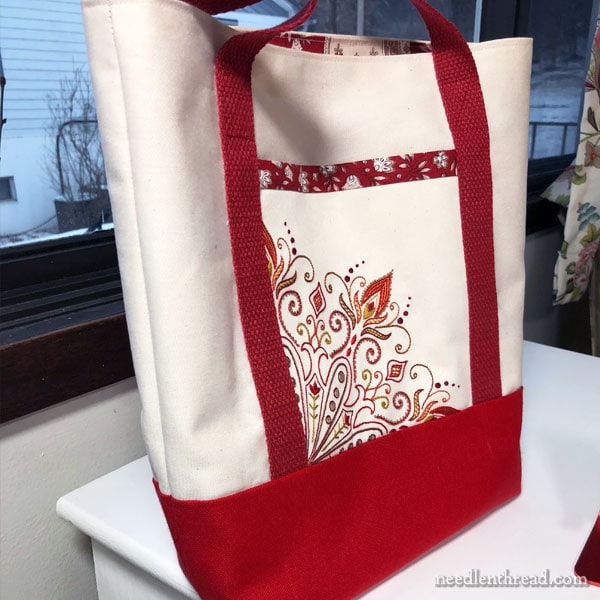
The combination of twill (the lighter, natural fabric) and duck (the red base) make the outer shell of the tote stiff enough to stand up fairly well without being a rigid bag. There’s no interfacing in this thing, so it really is just a simple bag.
My point is not to focus on the construction of a tote, though – you can find plenty of free patterns online for tote bags with instructions on how to make them.
Instead, I just wanted to share a finishing idea for small pieces of embroidery – especially if you like tote bags. I like using totes for project bags or for carrying miscellaneous books and items when traveling.
A decorative outside pocket on a tote bag is a great way to use a small piece of embroidery. It makes any standard tote uniquely your own!
The dreadful thing is that, when I went shopping for that cotton webbing, I found another combination of fabric that would make a lovely tote. And I had so much fun constructing this one that I’m fated, it seems, to make another. I already have a new embroidery pattern in mind for it.
But I must move on to other things first. I’ll keep you posted!
Happy Monday!
