It’s time to add a new embroidery project into the mix! Yay! I’m excited about it! I have a vision in my head for it, and I can’t wait to work it out with needle and thread.
In fact, I’m suffering from the Start Up Thrills.
The problem with the Start Up Thrills – which is the official name of this malady – is that this new project is all I can think about at the moment. When I’m drifting off to sleep at night, it’s on my mind: what treatment for that leaf, should I add this thread, is there an alternative for that part of the design…
And when I wake up in the morning, my one concern is how quickly I can accomplish the Needful Daily Things in order to get back to the project.
You’ve suffered from the same malady before, haven’t you? I knew you would understand!
This project is something a little different. (And it’s about time…)
I’m temporarily calling it Jacobean Whitework, but I might develop that name into something a little more poetic… or not. If it’s a flop, it’ll be “or not.”
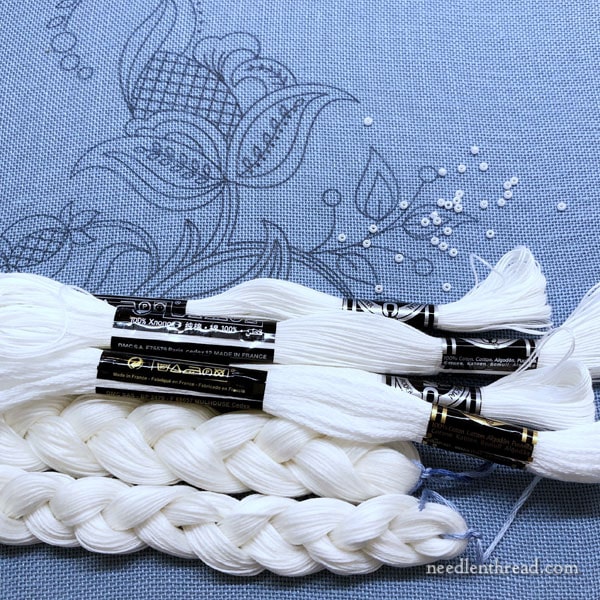
In any case, something different! I’m using blue linen and (at the moment) white threads. I expect to add another couple threads into the mix as an experiment, but we will see how that develops.
This particular linen is delightfully called “Atmosphere,” part of the Legacy Linen line from Access Commodities.
It’s a 30 count linen, which could be problematic for surface embroidery. Why? A lower count linen like this doesn’t always supply a close enough fabric weave to accommodate stitches like satin stitch and long and short stitch and still achieve smooth edges. It can also make line stitching a little choppy.
To allay all those difficulties, I’ve backed the blue linen with finer white linen to give the surface stitches the support they will need for achieving smooth edges and lines. The backing fabric gives the stitches something to grip into, when the weave of the ground fabric isn’t where you want it to be.
You can read more about backing ground fabrics for surface embroidery here, with details on why to do it, when to do it, and what to do it with.
My backing fabric is white. To further enhance the blue, I could have used blue – a blue cotton, for example, that matches the ground fabric. But I might play with some pulled thread or drawn thread stitches (not sure about that yet), that leave a little bit of the backing fabric exposed, in which case, I want it white for the contrast.
When I set up a project on linen, it’s actually a while before I get to the point of framing it up. Before I can frame it up, I do the following with the linen and any backing fabric I’m using:
Pre-Wash & Pre-Shrink
I’ve thoroughly washed and pre-shrunk the fabric, by soaking the cut (in this case, it’s about 11″ x 12″) in alternating hot and cold water (three alternations) in a clean bowl or pot.
When it’s soaking in the hot water (and I mean hot-hot, like almost boiling hot), I leave it to soak until the water is pretty much tepid to the touch. It’s during the hot water soak that the water will turn a little milky at first, indicating that the sizing is releasing from the fabric. I want all the sizing out.
The linen softens considerably in the hot water. But then, the fun part – running it under ice cold water! At this point, the linen stiffens up again.
Then back in hot, then cold, then hot, then cold. It’s the back and forth with the hot and cold that’s going to take all the shrink out of the linen.
For small pieces like this that may never be laundered, it doesn’t necessarily matter that the whole piece of fabric is thoroughly pre-shrunk, but for me, I prefer to know it is (just in case I have to soak it again at the end), and I also prefer knowing it’s free of sizing.
Sizing, incidentally, (and starch) can cause fabric to discolor, especially if you iron it for any extend period of time.
I never wring or twist the fabric while putting it through the hot and cold baths. When I’m finished, I lay it flat between a couple towels and press on the towels to remove excess water.
Somewhat Dry, then Iron
With linen, it’s easiest to remove wrinkles if it is ironed damp. So I let my fabric piece dry a little bit, but only until it’s still noticeably damp. Then I iron it with a hot iron.
If you can’t get to the ironing right away, you can roll the damp linen up in a towel and stick it in the freezer until you have time to iron it.
The trick when ironing damp linen with a hot iron is to keep the iron moving. You don’t have to press the fabric hard or anything – it’s the heat (and steam) that’s going to get the wrinkles out, not the pressure you put on the iron. Just keep that iron moving! I iron east-west and north-south on the fabric (between the cut edges), but not diagonally, which can stretch it on the bias.
With colored linen, you’ll see the color lighten as the fabric dries. Pay special attention to the edges of the fabric, which will dry more slowly. If the edges undulate (meaning they’re somewhat wavy), then they are not dry. The waves are caused by the difference between the drier interior fabric and the wetter edges.
After the initial ironing to get any wrinkles out, I leave my linen to air dry, and then right before I’m ready to do the rest of the set-up, I run the iron over it again, especially the edges. By this time, the result is a perfectly smooth, perfectly flat piece of linen. Beautiful stuff!
Neaten the Edges
Before I transfer the design or frame up that perfect piece of linen, I run the edges through my sewing machine on a zig-zag stitch to neaten the edges.
I do this with the backing fabric as well.
Neatening the edges prevents the threads of the fabric from shedding while you’re stitching on the project. Who needs extra fabric threads tangling up on the back of the embroidery, after all?
You can read an article on neatening the edges of fabric here, including why and how (and by hand).
Next up is transferring the project design onto the fabric. You can read all about different methods of transferring embroidery project designs onto fabric here. Read the comments for lots of other suggestions, too. My favorite methods of transferring designs are tracing, prick and pounce, tissue tacking, and iron-on – and which one I use depends on the project, whether or not the lines will be covered, and so forth.
For this piece, I ironed the design on, as all the lines will be covered.
For most folks wishing for an affordable option for making their own iron-on transfers, I recommend Sublime Stitching’s fine-tipped iron-on transfer pen. Keep in mind, the transfer does not wash out. Test the pen first, to make sure it will give you fine enough lines for what you need.
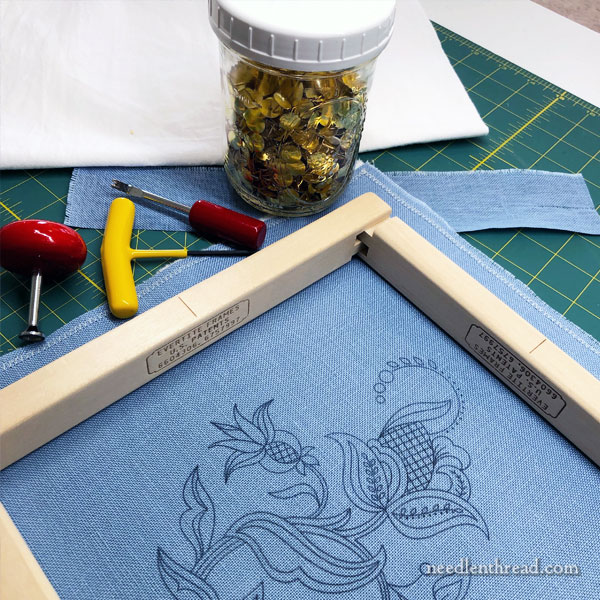
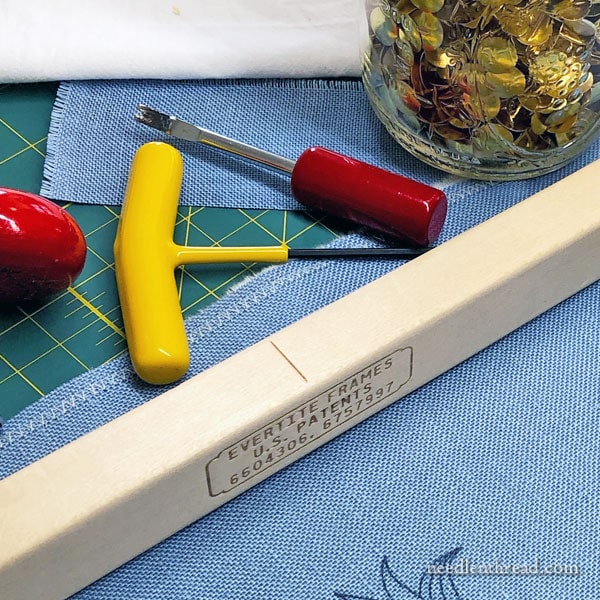
Then I frame the fabric up.
My favorite “quick” frames for this type of embroidery project are Evertite stretcher bar frames. You can read about Evertite stretcher bar frames and how to use them here.
I use regular thumbtacks and the pusher tool that comes with this tool kit to tack the fabric to the frame.

By this time – once the project is framed up and ready to stitch – I’ve usually also gathered all my supplies for stitching.
So far, I’ve gathered some five or so different weights and types of white cotton embroidery threads, including floche, regular stranded cotton, and coton a broder in several sizes. For texture, I may mix in some other whites down the road. I’m also going to pull some blues, just in case I want to use them to enhance the fabric. We’ll see.
You can read about cotton floche and coton a broder here, if you’re not familiar with those threads.
I’ve also pulled different sizes and types of white beads for this project.
And, so that I can stitch on it whenever I have the chance, I’ve put a selection of needles in a small needlebook, grabbed a small tool tin (with scissors, seam ripper, tweezers, laying tool), and put the whole kit and caboodle in a basket on my work table.
I’m ready to go when the opportunity arises!
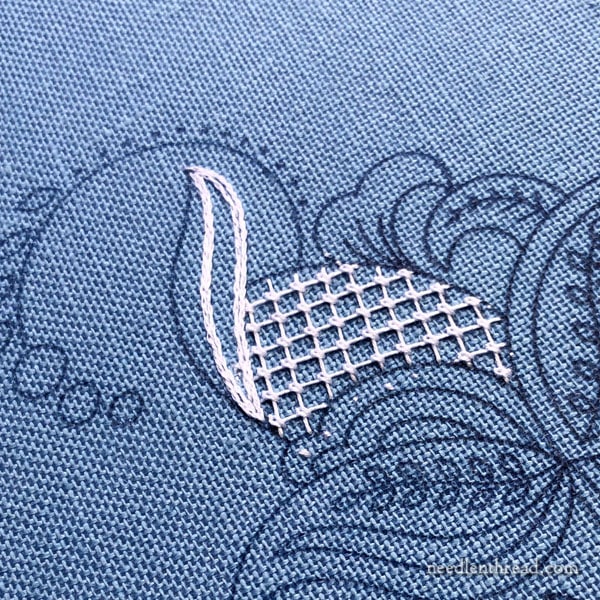
The opportunity arose briefly this weekend to start putting some stitches in. Not really much progress, but this will develop!
So that’s my new project for now.
I’ll take you through the development of the project as I travel along!
If you have any questions, comments, suggestions, please feel free to join in the conversation below!
Coming Up
Keep an eye out at the end of this week! Finally – finally – I’m releasing the Floral Corners instructional stitching guide & designs from last summer! I’ll also have some pre-transferred towel sets to go with it, if you’re wary of transferring your own designs or if you just like to jump straight into stitching without the bother of transferring!
Happy Monday!
