You know that booklet I reviewed on Monday, by Elisabetta Sforza? In a Wheat Field?
Well, it’s become rather diverting. I think you need to get it, if you haven’t already gotten it. We could have fun together!
I wasn’t really going to let myself be diverted by it.
But then I did.
You see, I got it into my head that I would at least scuffle through my DMC thread colors to see what I had on hand for the projects in the book. And then, while I was chillin’ a bit in the evening, I figured I’d go ahead and trace some of the designs onto vellum – you know, just for the fun of it.
Then I got it into my head that I’d like to play with the designs on a linen glass towel. And one thing led to another, and here I am. And I’m Perfectly Happy to be here!
As I began to delve into the projects, considering colors and stitches and what-have-you, I admit that I changed things up a little bit.
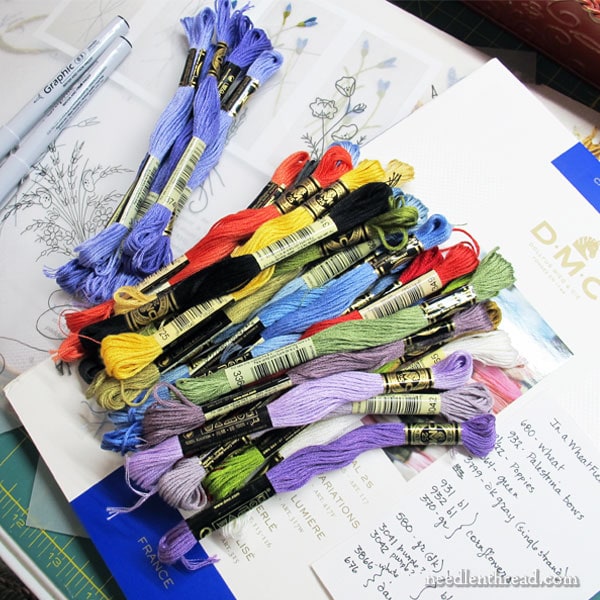
The first thing I did was go through In a Wheat Field and, on a little index card, note all the DMC thread colors used for the various elements. There are only a dozen colors called for across all the projects, so I fished them out of my thread drawers.
As I looked at the threads, I realized the color palette was a little more muted than I expected. It’s a very elegant muted palette, but – maybe because it’s spring, maybe because I’m longing for sunshiny days – the colors just didn’t sing for me.
I was really wanting the cornflower blues to be that vibrant blue that our cornflowers are out here in the Midwest in summer. Sometimes they lean more towards periwinkle; sometimes they’re a brilliant blue-blue; sometimes, they’re just typical blue. But they’re always vibrant. You can see them from afar, among the grasses. They stand out, in all their blueness. I love them.
Our poppies are red-orange, brilliant, fiery flowers. To me, they personify summer. And poppies and cornflowers together are magical.
So I decided to mix up the color palette a little bit, mixing in a few of my own color choices.
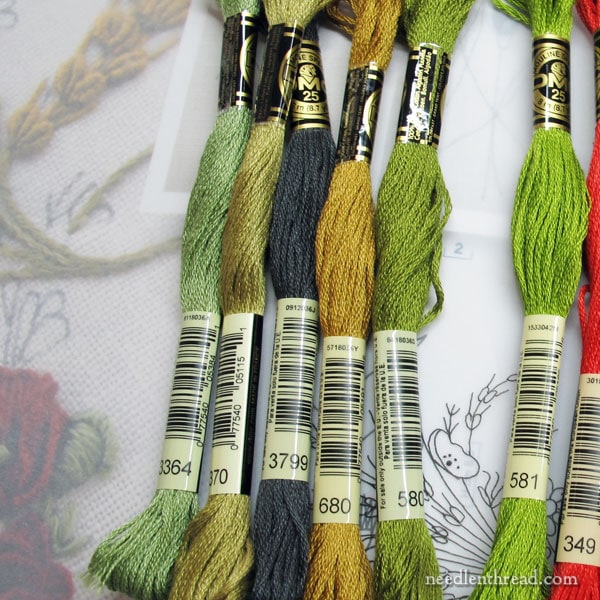
I kept some of the original colors, which you can see grouped on the left here. They will balance, I hope, my more garish color choices.
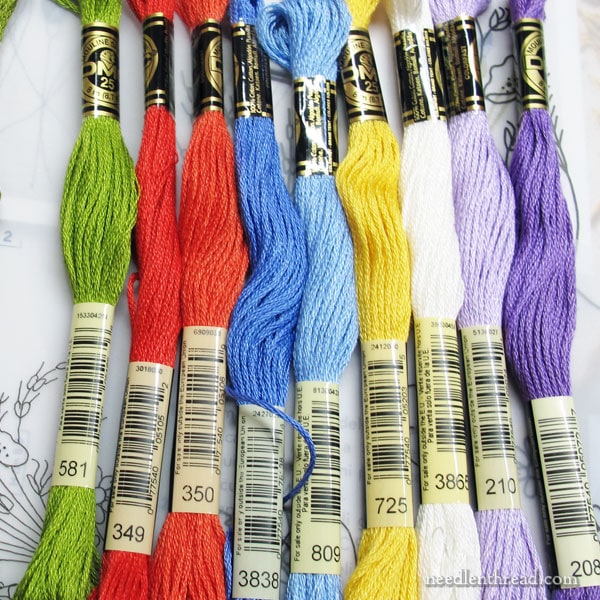
I swapped out some of the more muted florals for these brighter choices. The purple on the end, I’m still considering. The flowers are bluebells, which are periwinkle, but the periwinkle didn’t seem to mix so well with the cornflower blue and the poppy red & coral. Once I stitch with the colors together, I might develop some other ideas.
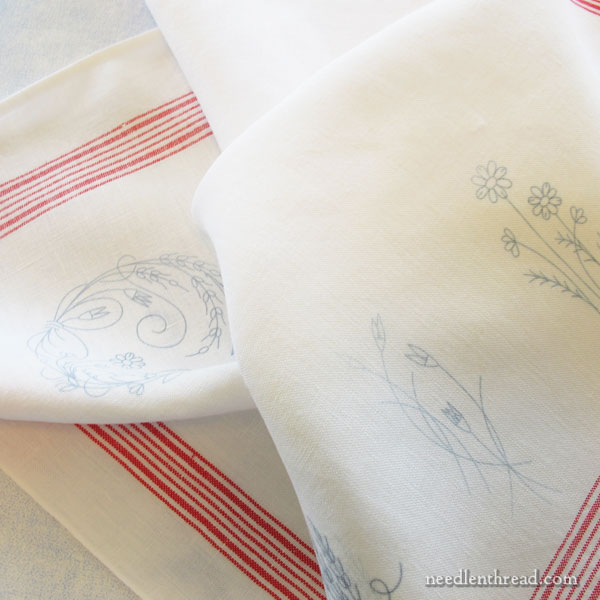
Since I have some of these linen glass towels on hand, and since they are very nice to stitch on, and since the red in the stripes works with the poppies, I figured I’d use one of these to stitch the small motifs in the book.
I’ve written about these linen glass towels before, when I used them for monogramming, here. If you’re looking for beautiful European linen striped towels to stitch on, you’ll find these available at Needle in a Haystack, here. They come in blue, green, and red stripes.
I lined up all five practice motifs on one side of the towel. I also took the small round design found just at the end of the book and transferred it into one corner, for the fun of it.
It won’t create a very coherent layout on the towel, I’m afraid, but that’s ok! I’m just testing!
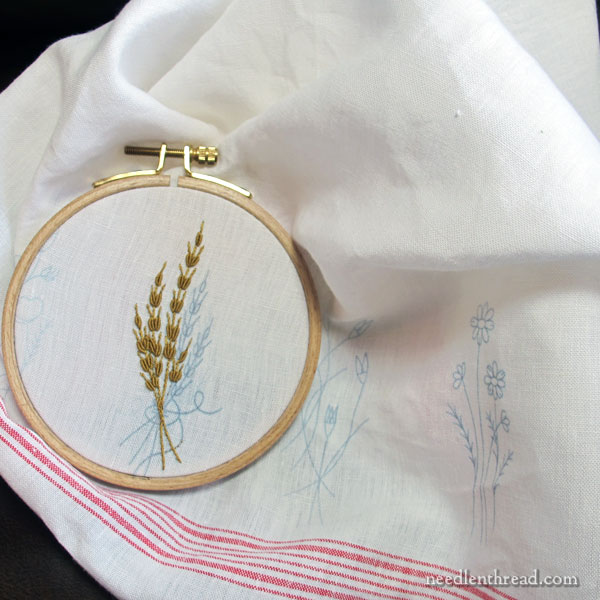
I enlarged the wheat motif slightly, since it’s in the center of the row of individual motifs and I wanted it to stand out a bit.
Oh my, it took me forever to get into my Bullion Groove. I haven’t stitched bullions in a while. They’re one of those stitches that requires me to get into a certain stitching rhythm, if I want them to come out with any consistency or neatness.
And of course, as soon as I was trucking along into Comfortable Bullion Land, I got interrupted. So the next time I picked it up, I had to re-groove myself all over again!
Isn’t that just the way of it?
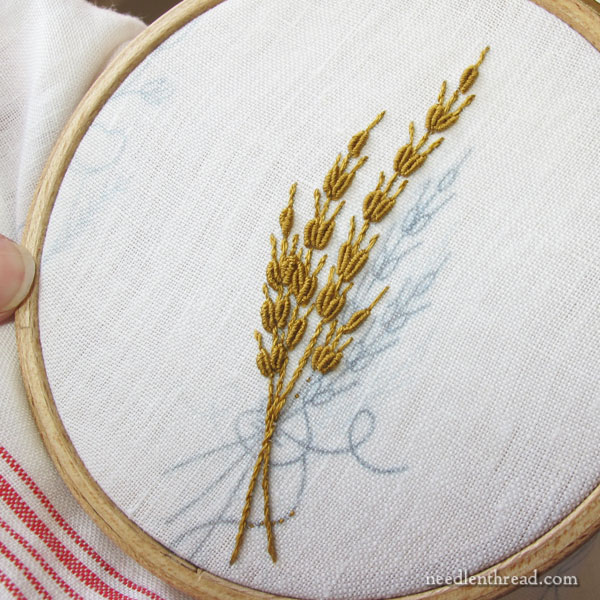
Behold, Much Bullion Wonkiness!
A Bullion Substitute
For those who are intimidated by bullion knots, try watching my video tutorial for bullion knots. It may help you conquer the stitch.
However, if they still discourage you, you can always substitute a daisy stitch held with a long anchor stitch for the wheat kernels. And if you want them solid rather than open (like a daisy stitch normally is), you can stitch a straight stitch down the middle of the daisy stitch. You’ll end up with a perfectly acceptable kernel of wheat, with the long anchor stitch as the beard.
A Bullion Tale
Incidentally, I was Face Timing a friend of mine a while ago who was having trouble with bullions.
I said, “Let me see how you’re doing it.”
With her needle threaded and ready, she launched in. Just as she was trying to pull the thread through the wraps, the whole thing seized up, resulting in a mess that she had to snip out.
So I went through some questions:
Are you using a milliner needle? Yes. (Read about needles and how to choose them and use them here.)
How tightly are you wrapping the needle? Are you choking it to death? No.
Have you tried wrapping the needle in the opposite direction? Yes, with the same results.
When you bring the needle back up in the fabric near the beginning of the stitch, are you getting caught in the original part of the stitch? No.
So we troubleshot back and forth.
Finally I said, “Show me again.”
At this point, she didn’t have a thread ready, so we kept casually chatting while she cut a new thread and prepared it for stitching.
And then… The Moment of Enlightenment! I saw the problem. But I let her continue without saying anything.
She got her needle and thread situated in the fabric, but I already knew this knot was doomed. Exactly the same thing happened – as she pulled her thread through, following all the correct form for a bullion, the whole thing seized up.
At that point, I suggested, “Now let’s try it again, but this time, don’t lick your thread when you thread your needle.”
The result with a dry thread? A perfect bullion.
Perhaps you’re a thread licker, and you don’t have this problem with bullions. But I’ve noticed it with other thread lickers, too. So, if you have trouble with bullions and you’re a thread licker, snip off the damp end of the thread after you thread your needle. The damp thread increases the friction as the thread pulls through the wraps and can cause everything to seize up.
I’m not going to say, “Shame on you for being a thread licker.” But I normally encourage thread lickers to find a different way to thread your needle.
There are some definite cons on the side of thread licking – it can cause the deterioration of the inside of the eye of your needle, for one thing. It can cause your thread to leave color residue on your fabric. And it can cause bullion knots to seize up. (If you think about it, you can probably come up with other disadvantages, too!)
More Later…
I’m going to continue with this particular stitching diversion for a couple days during my stitching time.
This will give me some time to think about the Jacobean Whitework project I started a couple weeks ago. I’m not 100% happy with some aspects of it – I’ll share those with you in the future – and I’m thinking I should try it on a different fabric, anyway. We’ll talk about it soon.
I hope your week is going well!
