Good morning, and Happy Friday! I had a nice little break this past week, during which I was able to catch up on a few things, experiment with some stitching ideas, start a non-embroidery-related project, and get some of my other ducks in a row. I hope you enjoyed the break, too!
As usual, I didn’t get as much as I thought I could get done, done. Isn’t that always the way of it?
Today, I’m going to show you an experiment with embroidery design transfer and laundry bluing. It involves the prick and pounce method of transfer that I demonstrate a while ago here, so if you’re not familiar with the basic techniques, you’re welcome to read that earlier article.
Prick and pounce – though a time consuming method of transfer – is a tried-and-true method. It results in an accurate transfer of your design, and it can be used on both light and dark fabrics. It is an especially useful method of transfer for large projects.
But let’s get on with the experiment!

You might be wondering (and rightly so!) why the experiment in the first place. If this is the same technique as prick and pounce, why bother doing it with laundry bluing?
Well, I’ve read about using laundry bluing for embroidery design transfer in old embroidery books, but I never quite knew what they were talking about. I had a vague idea, but I didn’t grow up in an age where laundry bluing was a standard ingredient in the washroom, and I had never seen a bluing brick.
I’d also heard of using stencils to transfer designs, using a dry transfer agent and alcohol as the “ink.” The dry transfer agent depended on where I was reading about it. Charcoal, a blue powder, a blue cake – different transfer agents have popped up in my reading over the years.
Then, one day, I came across a bit of writing (and I can’t remember where – was it an old book? an article? I didn’t keep the reference, I just kept the name of the product!) that mentioned Reckitt’s Crown Blue as a transfer agent, when used with alcohol.
I found some Reckitt’s Crown Blue online, and I’ve kept the stuff stowed away since then. I decided to get it out a couple weeks ago, after a conversation about the prick-and-pounce method producing a more permanent transfer that doesn’t require “connecting the dots,” or drawing the design again over the charcoal dots left on the fabric.
So that’s the background of my experiment here.
For supplies, I used a little brick of Reckitt’s Crown Blue, which is a concentrated, dry bluing agent that makes whites whiter in the laundry; some alcohol (I used 70%); a pattern, which I printed onto vellum in my inkjet printer (both points – vellum and inkjet – are important later); a paper piercing tool; a piercing mat; a bowl; a spoon; fabric to transfer on (I used linen); and a scrap of felt.

The first step was to pierce my pattern.
I printed this on a heavy piece of vellum – a semi-translucent paper you can find in the paper craft area of any hobby store – and I pierced it with a little paper piercing tool. Alternately, you can use a fine needle or pin, but it’s not as easy to hold. For a piercing mat, I just use a piece of craft foam from the craft store (a lot less expensive than a paper piercing mat, but made from the same material).
The vellum is important, because you want to use a type of paper that can handle being slightly wet without turning to mush and without allowing the wet to bleed through.

Here’s the little brick of Reckitt’s, open and placed in a shallow bowl. This stuff is a glorious blue!
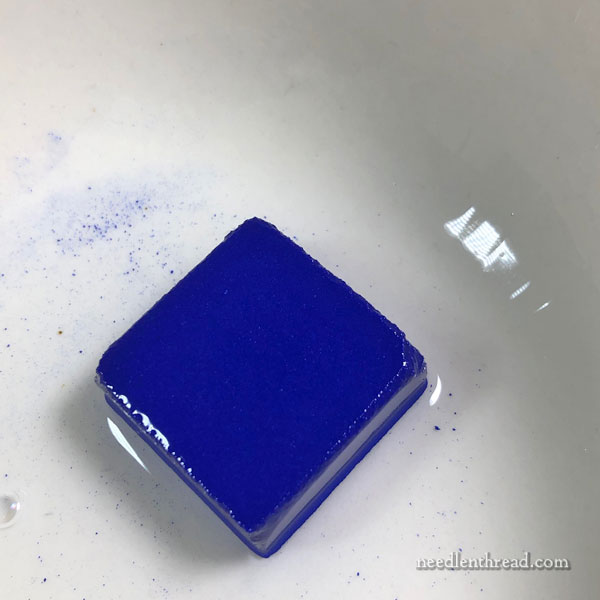
And here it is, with some alcohol dribbled over it.
In old books, they never give proportions, so I had no idea how much Reckitt’s to use or how much alcohol. I figured dribbling sounded like a good idea!
I half-expected the brick of bluing to dissolve into a kind of soft, inky mass of vibrant blue – kind of like what happens when you drip absinthe or coffee over a sugar cube. The sugar starts to soften.
In fact, nothing happened, really. The alcohol pooled on it for a bit, and then began evaporating.
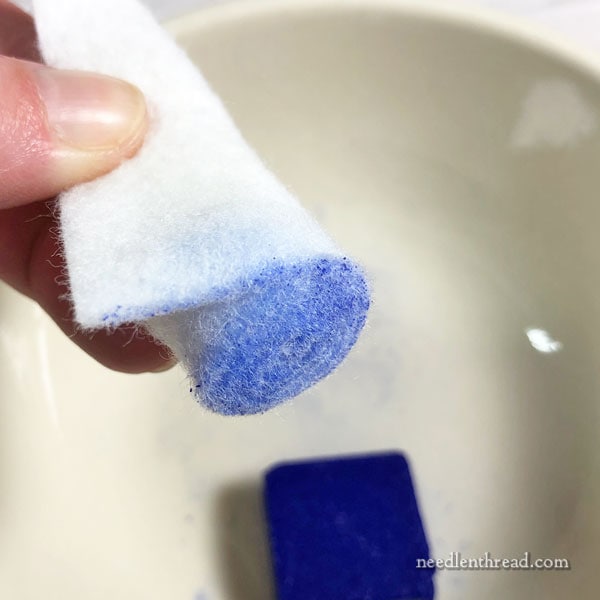
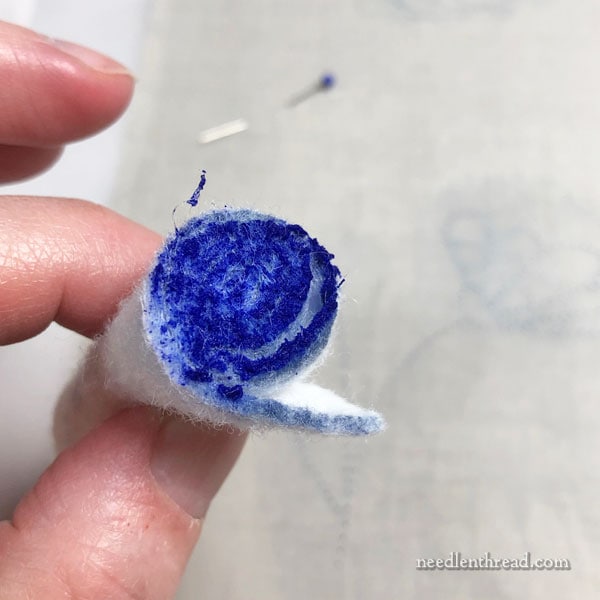
I took my little scrap of felt and rolled it up tightly, and then rubbed it around on the alcohol covered brick of bluing.
The resulting blue on the end of the felt roll was fairly light – but it’s a pretty color, isn’t it?
I didn’t know if this is what I wanted or not, but I figured I’d give it a whirl!

With my pierced pattern pinned to my fabric, I approached with the felt…
…and gave the whole thing a good rub.
Now, the felt had absorbed the alcohol from the bluing pretty well, so it was fairly damp with alcohol, though it didn’t pick up all that much blue.
Rubbing the felt over the pierced pattern resulted in removing the inkjet ink completely, but I wasn’t sure what had happened, transfer-wise.
I lifted up the vellum, and this is what I saw.
Not very pretty.
The wetness of the fabric is from the alcohol which hasn’t dissipated yet. The spots? I couldn’t tell if they were the ink from the inkjet-printed design or if they were something else. They looked a little dark and black to me, to be the blue from the Reckitt’s.
Not too impressed so far…
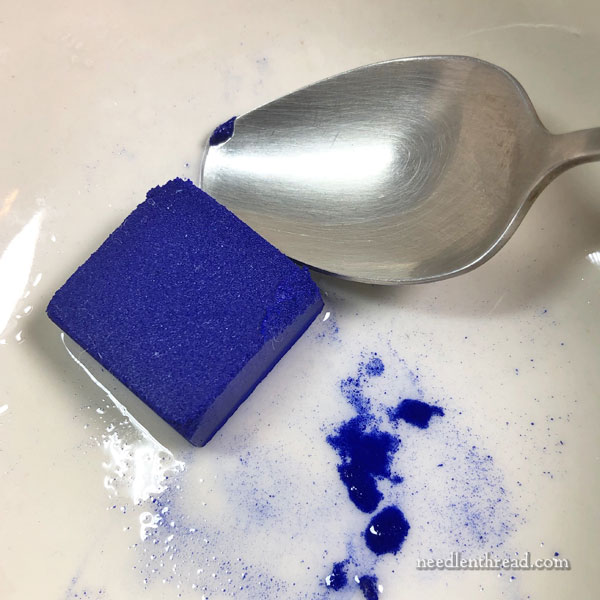
I decided I needed a little more bluing, so I grabbed a spoon and chipped off a bit of the Reckitt’s.
This stuff is hard! It requires a little scraping and chipping. But when the scraped bits meet the alcohol, they spread into little thick, blue pools. Pretty stuff!
This time, I picked up quite a bit more bluing on the felt roll, and some of the alcohol from the previous dip had dissipated.
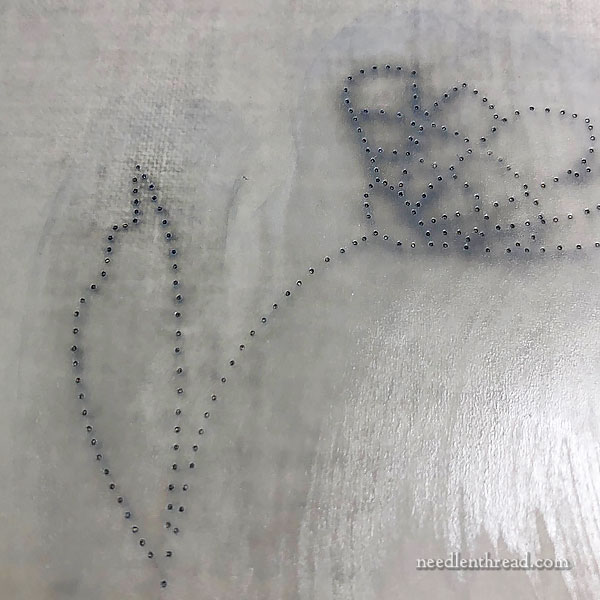
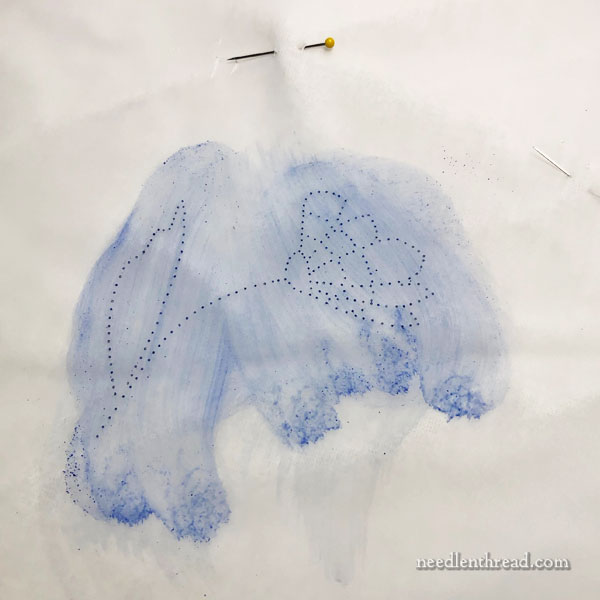
I gave the pattern a good rub with the heavier bluing, and this is the result on the fabric.
It still looks very dark, but since the inkjet ink was already gone, I didn’t think it could be the printer ink passing through the pierced holes in the vellum. I figured I’d give it a few moments to dry.
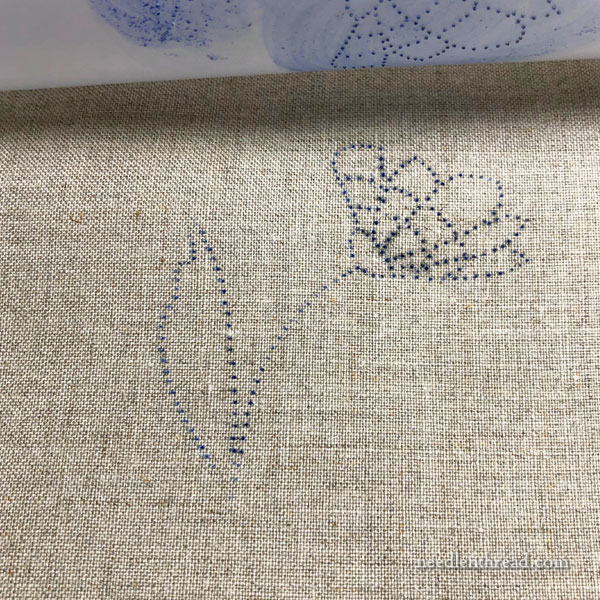
After just a few seconds of drying – allowing the alcohol to dissipate – the dots appear blue!
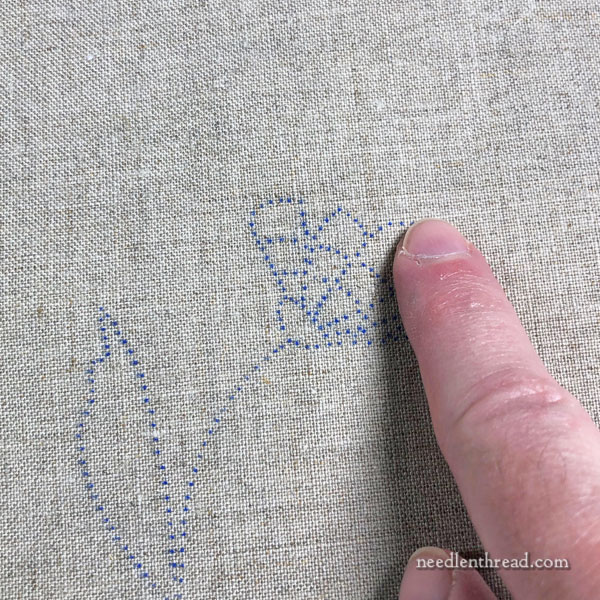
I found I could rub my finger over them without any of them smearing or any residue picking up on my finger.
This is a good sign, and exactly what I wanted from the transfer. Yay!
I took the pattern off and pinned it onto a cotton towel, just for kicks. The towel was not ironed (bad me – never transfer a design on an un-ironed, wrinkled ground fabric!), but I wasn’t too concerned about that. I just wanted to see how it transferred onto a softer fabric.
Notice that with the vellum, I can keep using the same pattern over and over again. It dries out between uses.
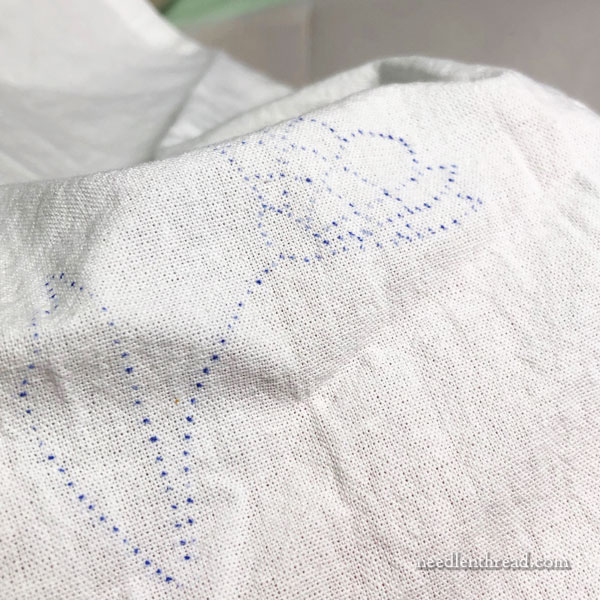
The design transferred fine on the cotton.
Then, I wanted to know how water would affect the bluing.
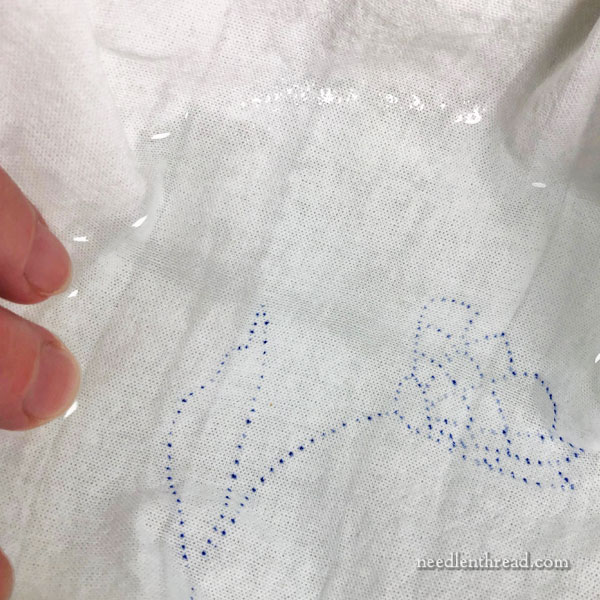
So I filled a shallow bowl with cool water and laid the cotton towel with the design transferred on it into the water.
I expected a bluish haze to release from the fabric and the design to dissipate under the water.
It didn’t happen. The design didn’t budge.
I left it there for several minutes, and still, the design remained.
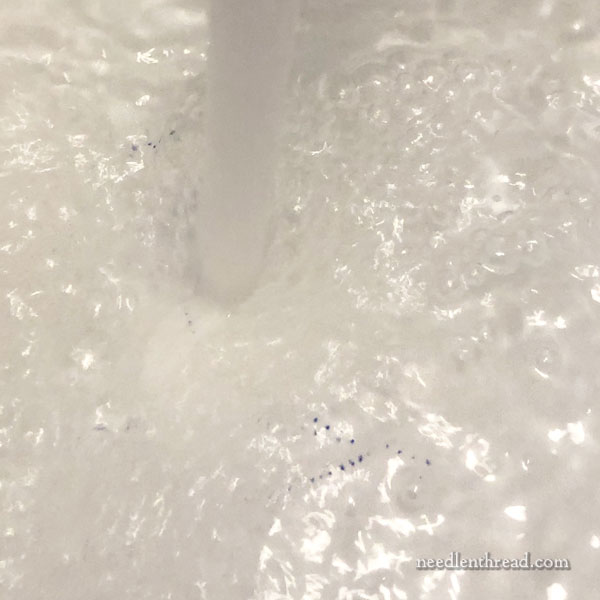
I then took the towel to the sink and ran it under hot water. The design began to release after quite a while, but I could still see it quite clearly, so I squirted on some dish soap and rubbed the design area together, to see exactly how stubborn those little blue dots were.
They’re pretty stubborn! Even with the rubbing, I could still see the design, though much fainter, which leads me to believe that after a few washings – if you’re transferring onto something like cotton or linen that will be laundered – the design will eventually fade completely.
I also think that, if you’re in a hurry and you want the whole design off, you could do as they do with Schwalm whitework and other similar whitework worked on linen. They boil the embroidered linen in a pot of water for ten minutes. I think the design would disappear. This is something I’ll have to experiment with later.
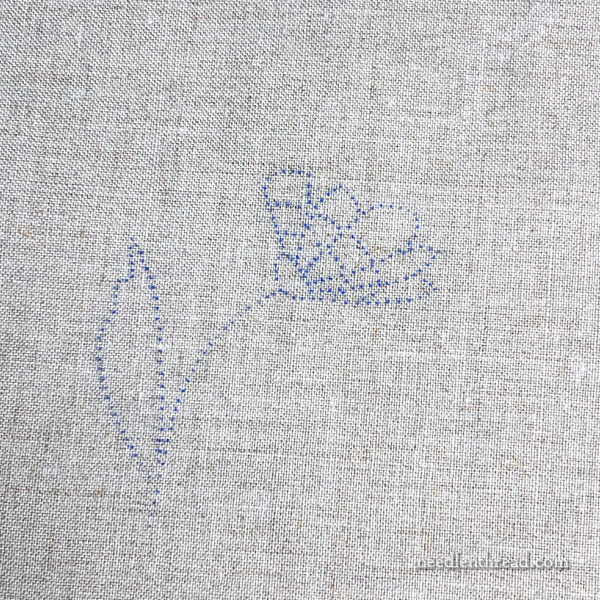
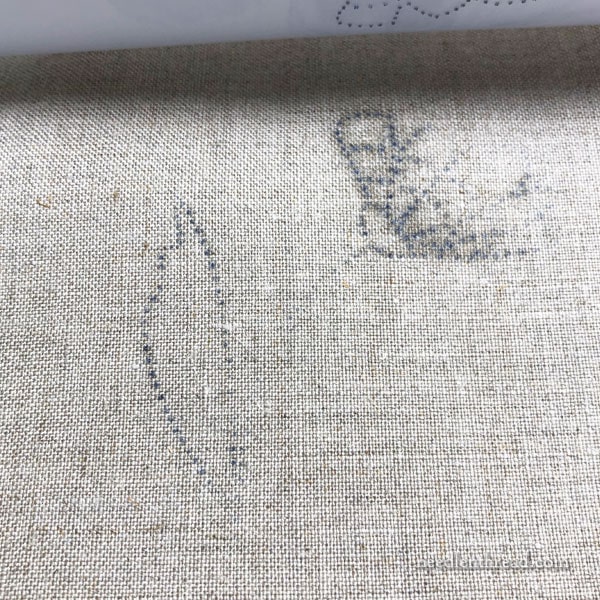
But back to the transfer on linen. This is a decent transfer. And it’s not going to brush off at all. I don’t believe it will leave any residue on the threads, either. It’s like a fine blue ink, dried onto the fabric.
So, my point is that here we have a decent design transfer method – similar to prick and pounce – that leaves more permanent dots that aren’t “dusty” (like the charcoal or chalk used for prick and pounce) and that don’t require connecting the dots to do the embroidery.
I’ll embroider this little flower to see how it goes, and then I’ll get back to you!
More Information on Design Transfer
If you’re looking for more information on embroidery design transfer, this article covers lots of methods for transferring embroidery designs. Read the comments, too! You’ll find a lot of input from the wider Needle ‘n Thread community in the comments.
Where to Find It
I’ve added Reckitt’s and Vrinda (a French version of the same thing) to my Amazon Recommendations page here. They come in large packs of bricks, and you’ll never need that many if you’re using them for design transfer!
But, if you have friends you can split them with, that might work. You can also use them for their original use, which is whitening whites – just make sure you read the directions carefully!
You might be able to find them online in smaller quantities by searching. I saw that there are some Etsy sellers that sell the bricks for other purposes, but they charge quite a bit for a fraction of the quantity.
This article contains an affiliate link to my Amazon Recommendations page, which means that any purchases made through that link results in a small commission for Needle ‘n Thread at no additional cost to you. Thanks!
