When a something in my needlework tool box starts to annoy me, I remove it. If it’s a tool that provides a service I need, I think of improvements to it, so that it doesn’t annoy me.
For example, I have a little pin cushion that works great for me outside my sewing box. But inside my sewing box, it Drives Me Nuts because it has a magnet on it, and the magnet catches on my scissors, my clips, or anything else it can suck into its Area of Attraction.
When my little magnetic pin cushion is stuck on my light pole by my stitching spot, it’s great. When it’s in my tool box creating havoc, it’s not. So I decided to pitch it in favor of something better.
And that something better was a quick little pincushion I whipped up in about 15 minutes. And you can do the same thing for your tool box or stitching area, too! I’ll show you how I did it…
As I take you through this quick little tutorial, I’ll note some things that I would change, now that I’ve got the pin cushion in place.
I’ll also point out areas where you don’t want to cut corners, and areas where you can cut corners.
Materials for a Quick Pin Cushion
These are the materials I used to make my quick pin cushion:
Fabric for the outside
Fabric for the inside
Emery sand
Fiberfill
It helps to have various tools on hand: paper scissors, fabric scissors, some scrap paper, a ruler, some pins, a spoon, and something blunt and long that can be used for turning and stuffing.
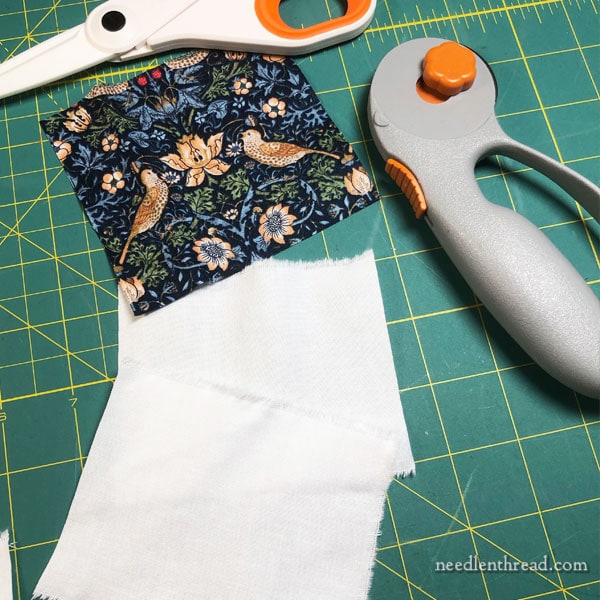
Fabric
I didn’t have a lot of fabric to choose from, but you only need enough to make a small tube – less than a 5″ square, for the tube I made.
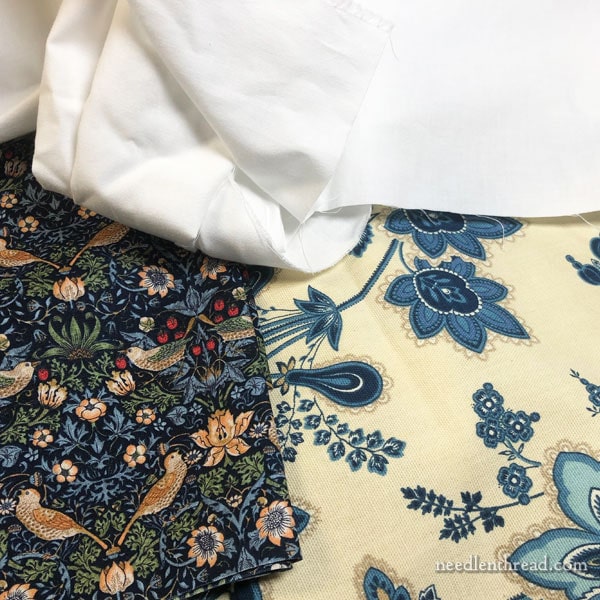
These are the only decorative fabrics I had on hand, aside from the quilting fabric I’m using on a quilt right now (which I wrote about the other day, here).
The fabric on the left is a quilting weight cotton in a Morris design (love this!) and the fabric on the right is a upholstery weight fabric in a nice Jacobean design on pale yellow with blues.
Either fabric works, as far as “matching” the sewing box I’m using. But your pin cushion doesn’t have to match. You can just use what you have on hand.
For the inside emery sack (if you use emery sand), you’ll need a high thread count cotton.
I picked this fabric. It matches, but that’s not the reason I chose it, and it has a Huge Drawback for a pin cushion, in my opinion.
I didn’t choose the upholstery weight fabric because the item I’m making is quite small and it will be easier to turn the sewn casing (outside of the pin cushion) with a lighter fabric.
But the problem with the Morris fabric is that it is quite dark and it’s hard to see needles against a dark fabric. Still, it’s what I had, so it’s what I used.
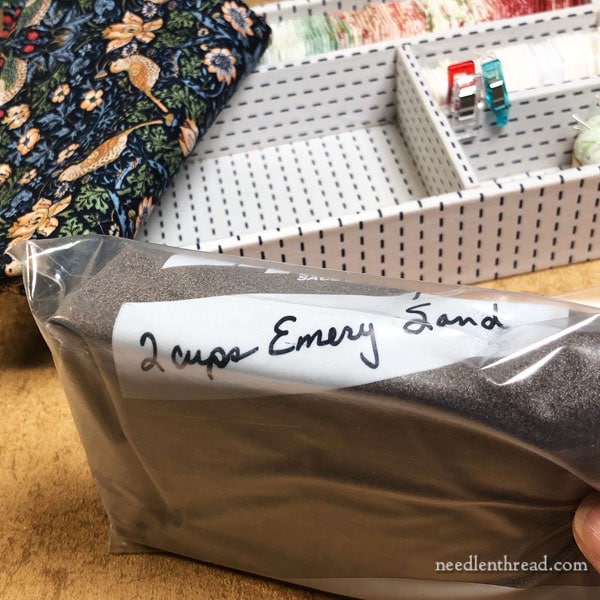
Emery sand is a gritty sand that’s used inside some pin cushions or pin cushion accessories (like the strawberry on a tomato pin cushion). It helps keep your needles and pins sharp.
However, it’s not the best stuff in the world to store needles in for a long time, which is why I used both emery and fiberfill in my pin cushion. If I had had it, I would have used a nice wool roving in the pin cushion instead of fiber fill, but I didn’t have any on hand. And this isn’t necessarily meant to be the world’s greatest and most effective pin cushion – it’s just supposed to be a quick solution pin cushion!
I bought this emery sand on Etsy. You can get it in different grits – I bought the 100 grit, but 80 will do fine, and in fact, it might do better, because it would be less prone to seep as it isn’t quite as fine.
You don’t need emery sand. You can just stuff your little cushion with fiber fill – in which case, you only need the outside fabric.
But I like the emery sand for two reasons: 1. it gives weight to the pin cushion; and 2. it provides a sharpening agent for my pins and needles.
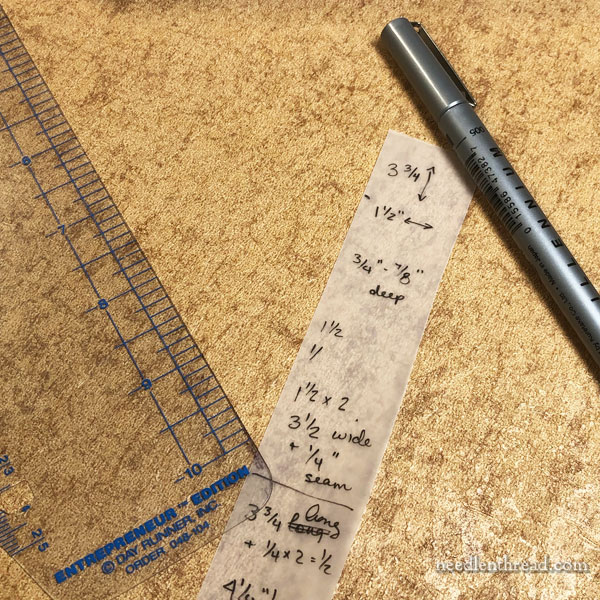
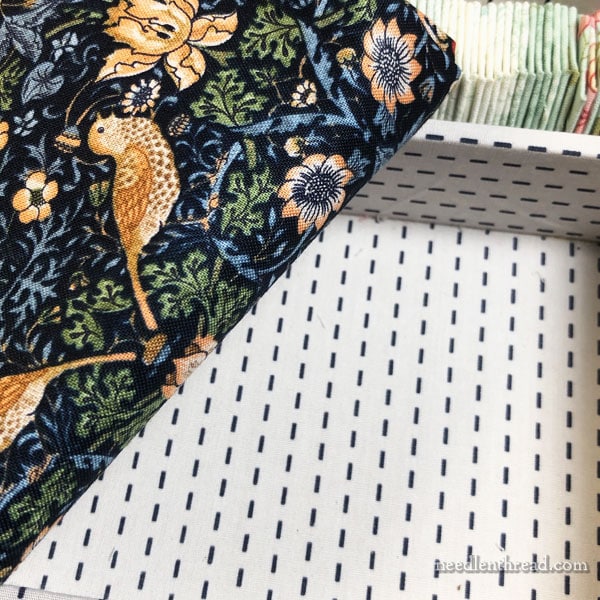
I measured the section of my tool box where I wanted my pin cushion to fit, to determine the size of fabric I wanted to cut.
My plan was to use one piece of outside fabric, and sew it up once on the long seam and then sew up the two short seams, to make a small tube.
I multiplied the top surface width times 2, added an extra 1/2″ or so for depth and then a 1/2″ for the seam allowances on two sides. I ended up cutting a piece that was 4.25″ long x 3.75″ wide.
I cut two inside pieces of white, high thread count cotton for the inside emery sack, making it half an inch smaller. These two pieces are sewn together as if they are one piece, to give a double thickness to the emery sack. This helps prevent the sand from easily seeping. It’s essential to use two layers for the emery sack, so don’t cut corners here!
So, in summary, if you’re using emery sand, cut your outside fabric piece the size you need to create the “tube” size you want for your pin cushion. Then cut two pieces of inside fabric 1/2″ smaller than the outside in both length and width.
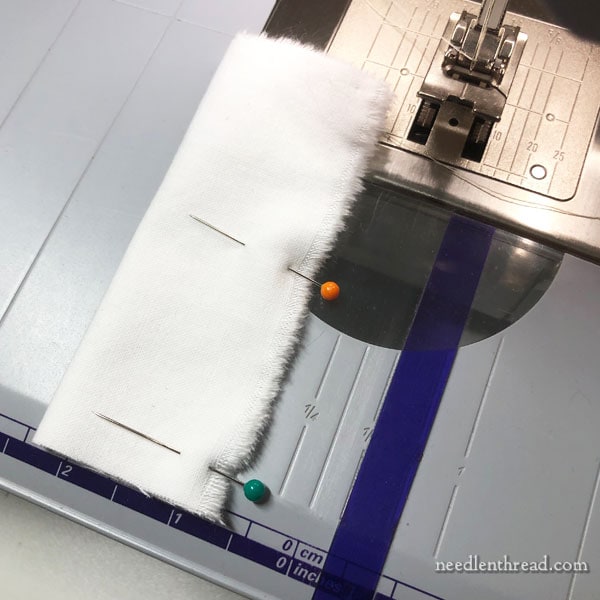
Stack the two pieces of inside fabric, and sew the long seam and one short seam, leaving one short end open for turning and filling.
After you sew the seams, trim the seam allowance a little and turn the tube inside out.
You don’t have to be too persnickety with this inside emery sack. No one will ever see it. So if it isn’t perfect, don’t fret!
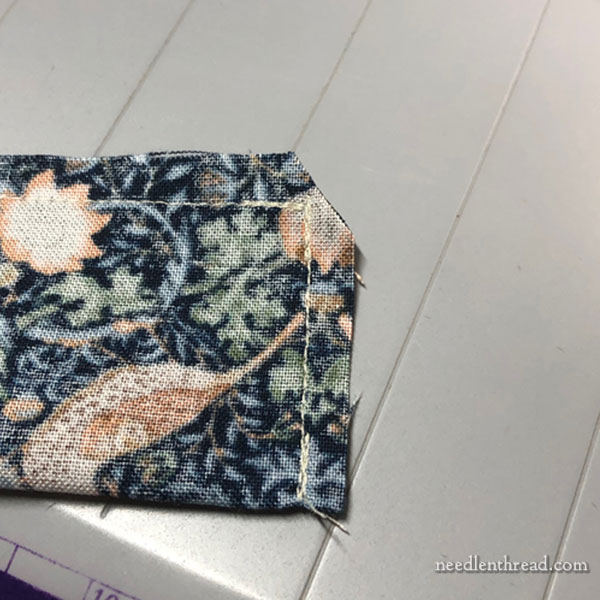
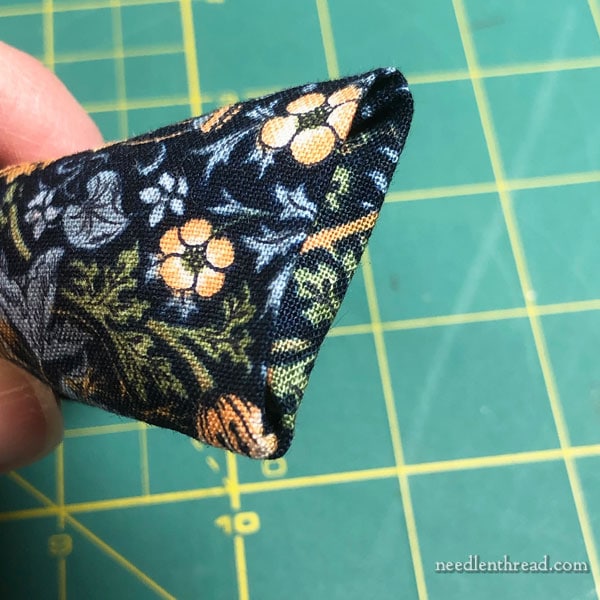
While you’re at the sewing machine, sew the outside of the pin cushion the same way – down the long seam and across one short end seam. Trim the corner a little, as shown above, so that the corner when it’s turned out is a little neater.
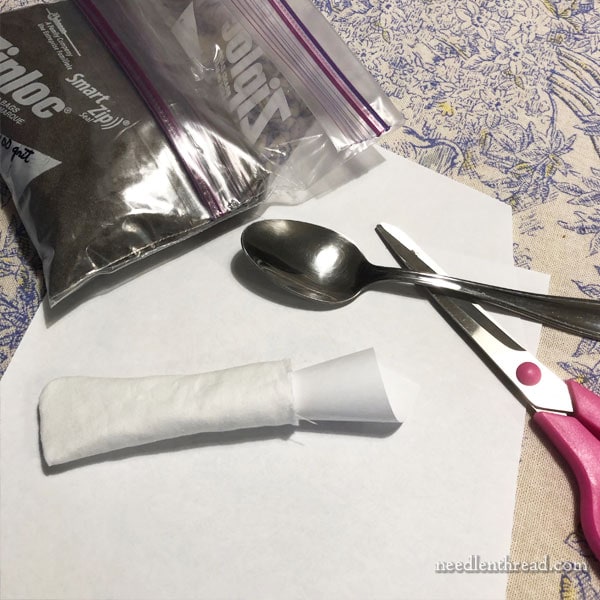
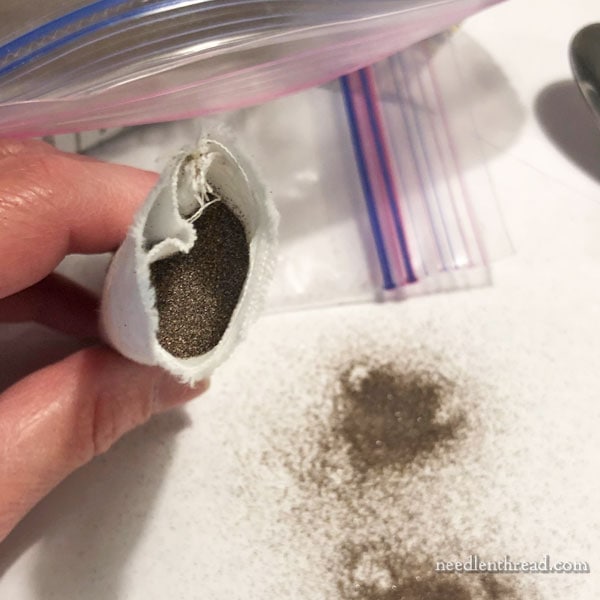
Working over a piece of scrap paper, using a spoon and a small paper funnel made from scrap paper, fill the inside tube with emery sand. You don’t have to fill it packed full – just fill it enough to fill the shape.
On a piece this size, it’s not going to take much emery sand.
You can see why it’s a good idea to work over some scrap paper. Any sand that over fills or spills can be poured back into your sand bag.
Being careful not to spill any of the sand, sew across the top of the emery sack. I went back and forth (using the reverse button), not being too neat.
It helps to sew a little bit away from the emery, so your presser foot on your machine isn’t having to climb that little mountain of sand – but if you want to sew closer to the emery, it might help to change to a zipper foot.
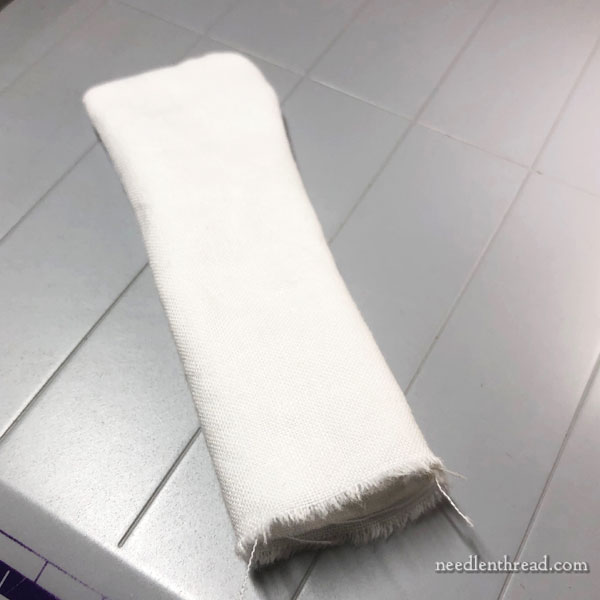
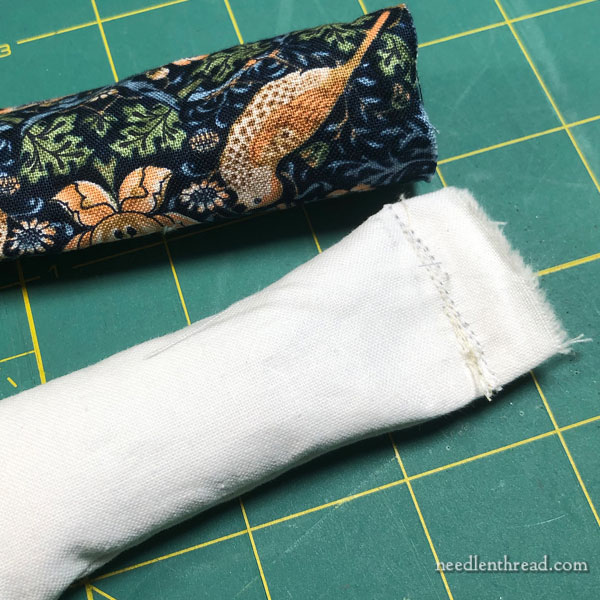
Trim the edge of the emery tube next to the sewing within a scant 1/8″, then slide the tube inside the outside fabric of the pin cushion.
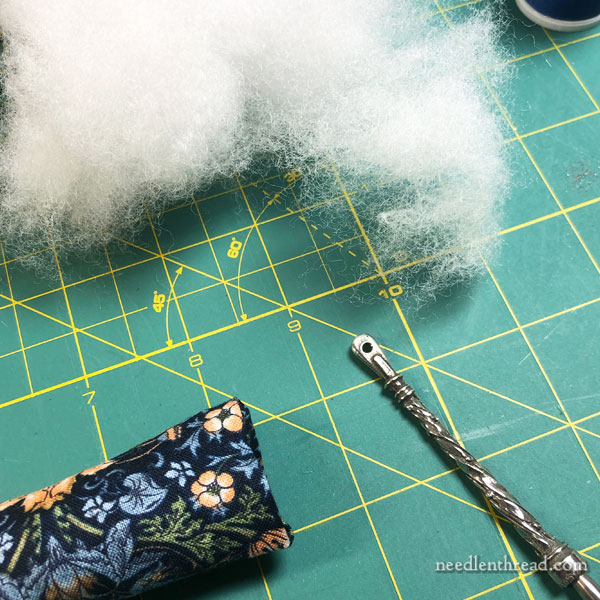
Gather a bit of fiberfill and a blunt tool that you can use to push it into the tube.
Do not use a sharp tool – you don’t want to pierce the emery tube with anything that’s large and sharp, or you’ll loose your sand pretty quickly!
Stuff fiberfill into the tube on one side of the emery tube (and towards the up side of your pincushion, if it matters to you which side is up).
Work the pin cushion with your fingers, to manipulate the fiberfil into place and spread it out, so it isn’t lumpy. You want the whole pin cushion to be fairly tight, so stuff in more than you think you actually should, working in small bunches and working it down and smoothing it out by messaging the outside of the pin cushion as you stuff.
When you like the feel of it, and before the side seam starts pulling so that you can see your sewing stitches, stop stuffing!
On the open side of the tube, fold the edges in, and using a coordinating thread color, work a blind slip stitch inside the edges to close the hole.
Voilá! You’re finished!

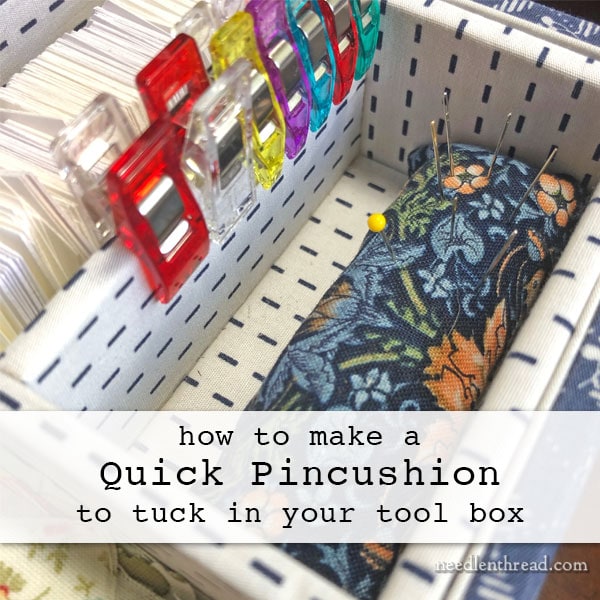
I made my pin cushion so that it tucks into this little section in my box. I can stick pins and needles just into the fiberfill layer on top, or I can go a little deeper into the emery layer.
The emery helps weight the cushion – a feature I like in a pin cushion – but it also serves to sharpen my pins and needles.
There are other fillings you can use to fill pin cushions, depending on what’s easy for you to come by: crushed walnut shells, wool roving, scraps of threads (orts) and other fibers that make sense.
One thing I’d do differently is use a lighter fabric, but I used what I had on hand. It’s easier to see pins and needles against a lighter fabric than it is against a darker fabric.
On this pin cushion, I use the yellow-headed pin to mark where I put my favorite sewing needle. I always slip it in right next to the yellow-headed pin.
This is a quick way to make a handy little pin cushion. The whole process, if you’re using a sewing machine, takes about 15 minutes.
If you’re in need of a little pin cushion, I hope today’s tutorial comes in handy for you!
Have a wonderful weekend!
