This past weekend, I began one of many little embroidery projects that I’m putting together, that are exercises of one sort or another. This particular one is an exercise in needlepainting.
Needlepainting – also called long and short stitch shading, soft shading, silk shading, thread painting – is working with long and short stitch and sometimes a few other stitches to create embroidery that is realistically shaded in a way that mimics painting.
There are many different styles of needlepainting, some more realistic than others, some more painterly than others, some more embroidery-ish than others – it really depends on the stitcher’s own aesthetic.
And there are different approaches to needlepainting, too.
In Japanese embroidery, for example, the order of work is opposite the order of work in Western styles of embroidery; that is, their needlepainting is worked from foreground to background, resulting in a much more two-dimensional look to the finished embroidery.
In Western styles of embroidery, needlepainting and other techniques and worked from background to foreground, on the principle that, when elements in a design overlap each other, stitching the background elements increases the sense of dimension and realism of the design, especially when shading is involved.
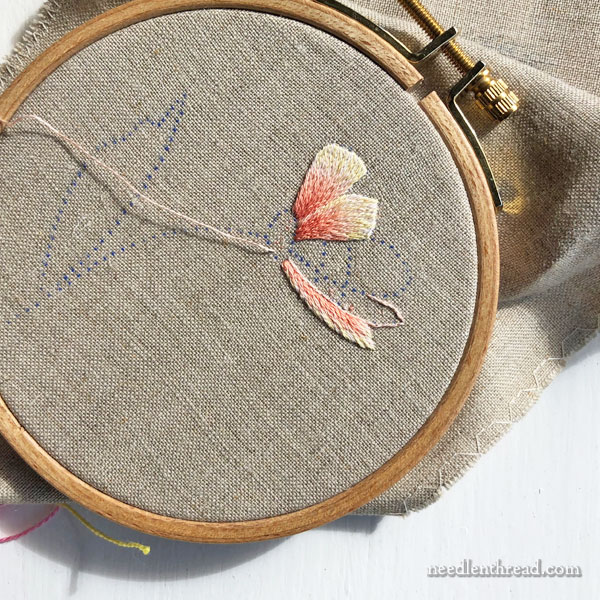
With this particular flower – which you might recognize from this experiment in transferring embroidery designs – I started with the petals on the far left side of the flower.
I’m using one strand of DMC cotton in the needle at a time, and I’m working on about a 45-count linen. There’s no backing fabric behind the linen. I’m finding that it works really well for needlepainting as is.
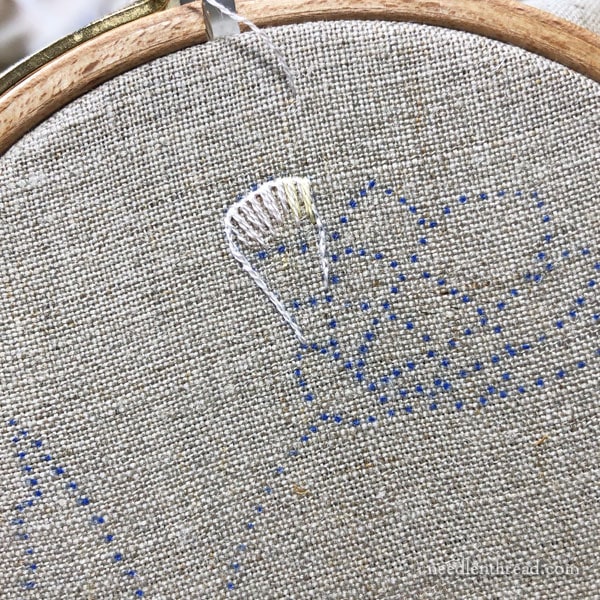
I started with a split stitch line around the shape of the petal, to give a defined, smooth edge and slightly lift the edge from the fabric.
You can read about using split stitch to outline underneath embroidery stitches like long and short stitch and satin stitch here, where I wrote specifically about why we use the split stitch as opposed to, say, backstitch for this job.
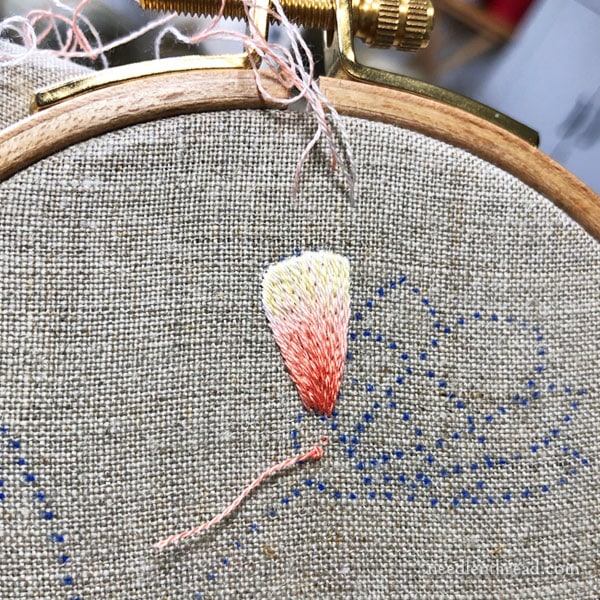
Then I started working the first layer of long and short stitch, working from the outside edge of the petal towards the base of the petal, and angling my stitches as I worked towards the base towards the natural growth point of the petal.
Working on that outside first layer, I stitched in what I call directional stitches first. These are just randomly spaced long or longer stitches in one of the colors (of the two – a very pale coral and a very light yellow) that I’m using on that outside layer. Then I go across and fill in around those long stitches.
For this first layer, I usually stitch from the inside of the petal (bringing the needle and thread up on the inside of the petal), passing over the split stitch line and down into the fabric. This is my personal preference for the first layer of long and short stitch, because I think it helps keep that outer edge of the petal nice and smooth.
Some stitchers do the opposite and start outside the split stitch line, coming up in the fabric and taking the needle down inside the petal. One of the advantages of working from this direction is that you can more easily judge the direction of your stitches by pulling your thread taut towards the growth point on the petal and then entering the fabric along the line formed by your thread.
The subsequent rows of long and short stitch are worked up into the previous rows, splitting the stitches of each row as you pass the needle from the back of the fabric to the front.
When I’m working with this many shades in such a small space and not using up a full strand of thread at any time, I “park” my threads as I stitch, bringing the still-functional working thread to the front of my fabric in a spot that’s out of my way, instead of finishing off each thread on the back. This way, if I need the color again, I can go back to that parked thread and pick it up again.
That’s what all those threads are at the top of the hoop.
You can read more about parking embroidery threads and why it’s a useful practice here.
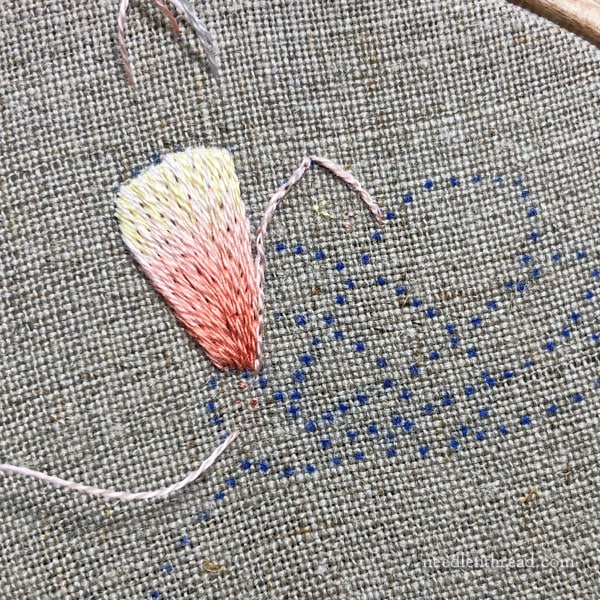
With the first petal finished, it’s time to move on to the one right next to it, which overlaps the first petal slightly.
I split stitched the second petal along the outline that overlaps the first, but notice that I didn’t split stitch on the right side of this second petal, on the border shared with the larger middle petal. This is because the larger petal overlaps this second side petal, so the larger petal will be split stitch all around, which will help “lift” it visually above the other petals to each side.
So that’s my current wee little flower. I’m working in a 4″ hoop, so you can see that the flower is, in fact, rather small (probably around 2.75″ – 3″ in height). The small size is great for a quick exercise in needlepainting.
This little piece is part of a series I’m working up, which will be out later this year.
If you want to learn more about needlepainting, you can take a look at my long and short stitch sampler series here on Needle ‘n Thread.
A Gift for Patrons
I’ll be sharing the design for this wee flower with my patrons on my Patreon page later today. I mentioned Patreon at the end of last Friday’s blog post, and several folks jumped over there and signed on right away. Thank you so much for your kind and generous support!
I spent the weekend thinking out some occasional rewards for patrons. If you want to follow me over there and become a patron, you’ll find this design available a little later today, so that you can try your hand at needlepainting on this very simple little flower, too. It would make a nice little accent on anything stitchable. And down the road, I’ll be releasing other little exclusive thank you gifts to patrons as well.
After mentioning Patreon last week, I received an influx of email asking about it – what it is, what it does, how it works, and so forth. I’ll write something about that later, to clarify for those who are not familiar with Patreon.
I really didn’t intend to use Patreon too often in conjunction with Needle ‘n Thread. It was intended primarily to attach to my YouTube channel, so that I can make new and better videos without having to add any kind of advertising to them to make them affordable for me to produce. But since it’s a topic of interest, I may write about it in the future. If you have questions, feel free to contact me.
