Quite a while ago, we talked about this Jacobean-ish embroidery design that I keep toying with.
I set the design up on new fabric (a natural-colored linen), and collected threads for it.
Finally, the other day, I started some stitching on it.
Today, I’ll show you some minute initial progress as I work my way through the beginning of the project; I’ll tell you my thought processes; and we’ll talk about gradual shade and color changes when you’re working with solid colors in linear stitching.
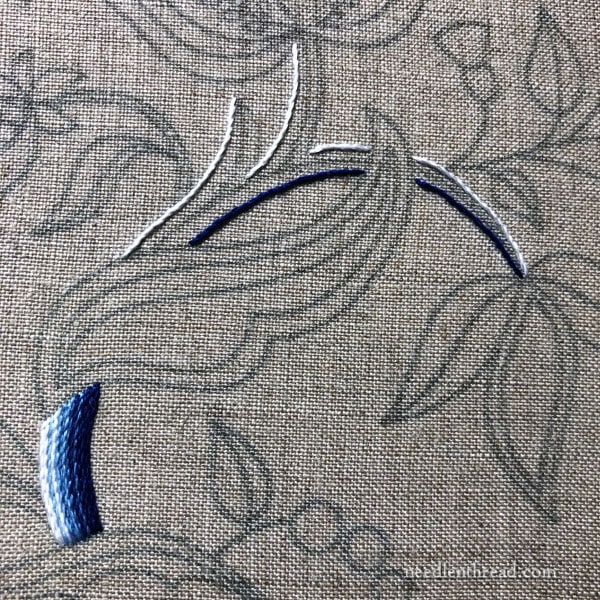
I started with the trunk on the design, and my thought was that I’d like the trunk solidly filled with embroidery, not too textured, and gradually shaded.
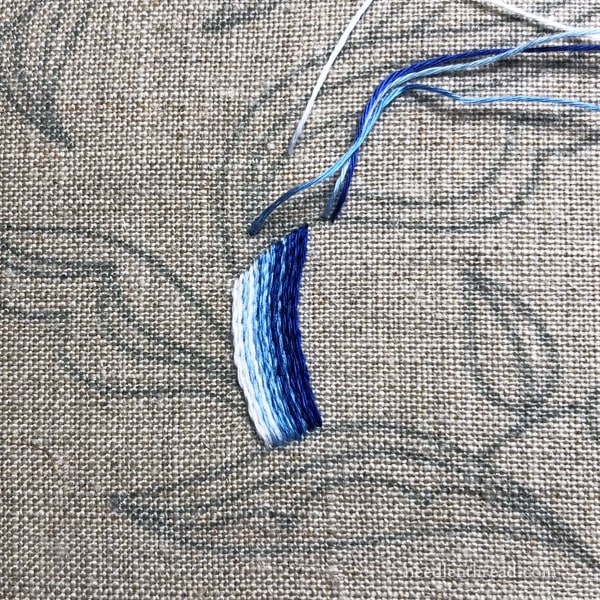
I’m working with DMC Floche on this project (and I’ll also be mixing in some regular DMC cotton). Floche is about the weight of 1.5 – 2 single strands of DMC floss, when stitched.
I vaguely thought about using a raised stem stitch on the trunk, since I’ve seen that effectively done many times, but in fact, the floche is heavy already, and working it raised would really make the trunk – which is more of a background element – too hefty.
So I stuck with plain stem stitch.
The colors available in DMC floche are not extensive, so I don’t have super-smooth color transitions from the darkest blue to the white. In order to create the effect of a gradual shading, I worked the stem stitch in lines up the drunk, starting with the darkest blue and moving to the white, but striping them as I went.
So, in sequence, from right to left, with A being the darkest shade of blue and E being white, the colors go like this: one line of A, two lines of B, one line of C, one line of B, one line of C, two lines of D, one line of E, one line of D, two lines of E.
Up close, you can see the striped effect very distinctly, but even just a small distance back, the stripes are not as blatant and the colors blend from dark blue to white fairly well. Squint and pull back from your screen, and you’ll see what I mean. (Well, squinting might not be the best advice when you’re checking to see if something looks ok, but…)
To map out the rest of the journey on the trunk, I worked the outermost lines of each branch as they moved upward in the design.
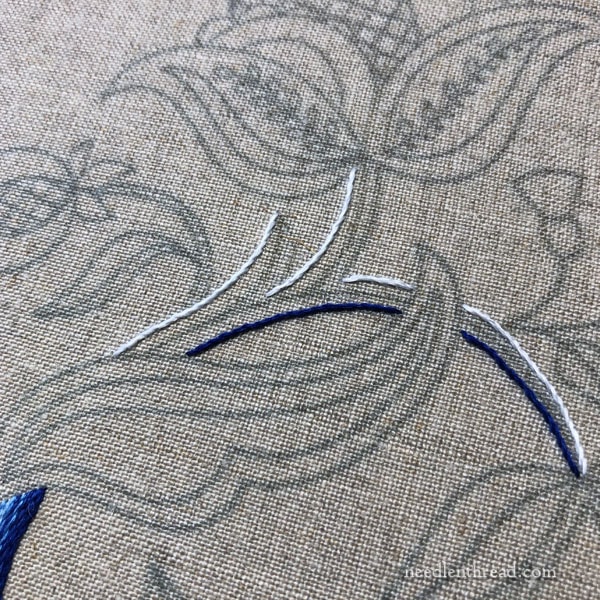
This way, I’m sure that my edges are the right colors, and now I can fill between them, gauging the layout of the threads in a way that keeps a sense of shade change but still fits within the narrower trunk as it grows upwards.
It’s not a lot of progress, but at least it’s something. I’ve been a bit distracted with other projects that have a deadline, so I haven’t had much of a chance to even think about this particular embroidery project. But I keep it within eyesight, so that I don’t forget about it for too long!
As I work through this project, I’ll share thought processes, what works, what doesn’t, mistakes and corrections – until I hopefully bring it to a successful conclusion. It will be a slow developing project, though! Stay tuned for future updates!
