This week and last, and probably all of next week, there’s one thing on my mind: getting The Leafy Tree embroidery kit and the instructional e-book finished and ready for you!
A couple weeks ago, I showed you my fabric sticks for the Leafy Tree kits. All the components are now arrived and ready to package into kit form – with the exception of half of the boxes…but more on that below.
So now the fun part! When the fun part starts – that is, the assembling of everything – there’s not much room for anything else to go on in the studio. Kitting pretty much takes over the work area, especially with this particular kit, which contains an abundance of embroidery thread.
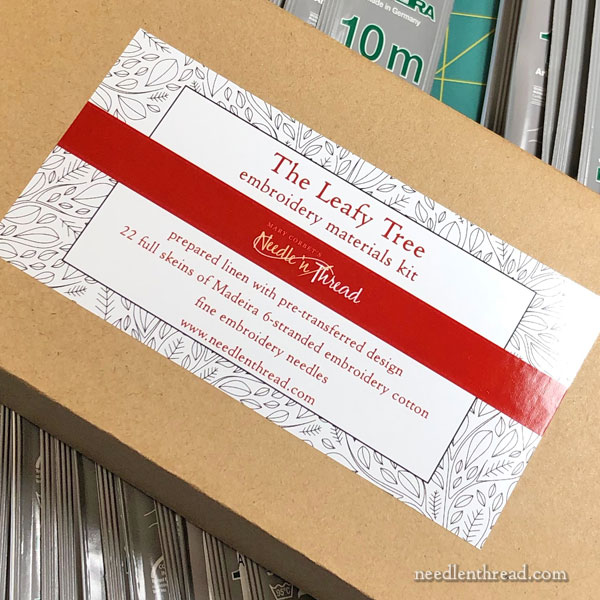
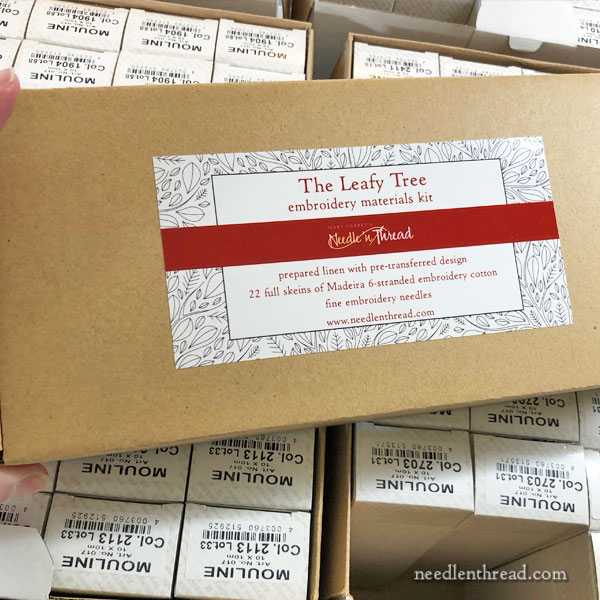
My favorite part of kitting is seeing, complete, the entire kit as anyone who purchases it will see it. That is, seeing the outside of the box with its the label in place, and experiencing opening the box, seeing the tissue wrapped goods (hopefully in their rightful place, despite the postal journey), and enjoying the pleasure of checking out each item in the kit.
There’s just something delightful about receiving a well-packaged embroidery kit in the mail!
I want you to experience that delight, so I try to give plenty of thought to the packaging of the kit, while at the same time keeping the expense of packaging as low as possible.
There are a couple things that I consider when packaging.
First of all, how will it be mailed? When you purchase an embroidery kit, I think it should go in the mail directly and it should get to you as quickly and as safely as possible, so I use US Priority mail. This way, it’s trackable (a very handy feature!), it’s insured, and it moves quickly through the system.
When I think of packaging, then, I think of sizes that will fit in Priority mailers. The Leafy Tree box just fits into a Priority mailer.
Why a box? A few of you wrote in and suggested ziplock plastic bags for the kits, because they are less expensive and they allow for some “give” when packaging. In other words, they can be squeezed into envelopes.
The box manufacturer that I order boxes from makes lightweight but sturdy boxes from recycled materials, and they are very affordable. Yes, they cost more than a ziplock, but they aren’t “custom box” expensive! They average less than $.30 per box. It’s worth the small cost of the box to me, to ensure that the kit contents don’t arrive crushed.
With this kit, it’s not, perhaps, so important, as there’s nothing breakable or noticeably crushable in it, since the fabric has been carefully rolled on their sturdy tubes.
But whenever I order a kit with spools in it or with metal threads in it, for example, I’m always thrilled when it arrives in a sturdy box that maintains its shape through the mailing system. I’ve ordered many a kit in my life that has arrived crushed, with chipped or broken spools, with cracked metal threads, rumpled fabric, the contents in a hodgepodge, and so forth. A sturdy box, at least, ensures that the contents arrive in as contained, tidy, and neat a package as possible – and as close as possible to the state they were in when they left my studio.
In other words, when you open your kit, you should see what I saw when I closed it.
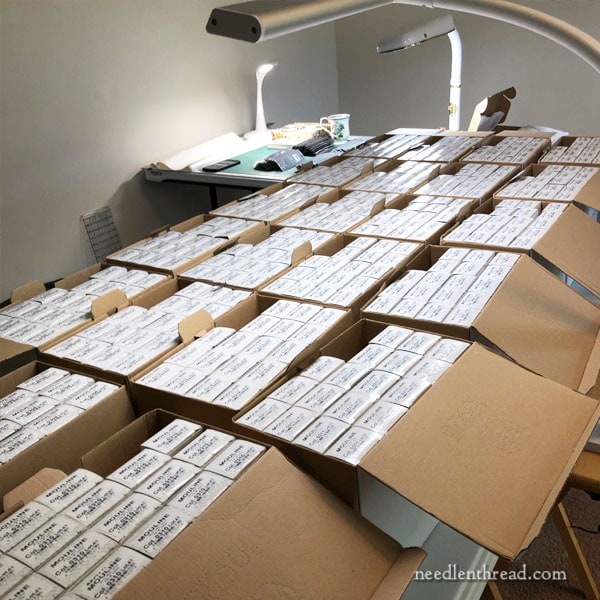
There are 22 colors of Madeira embroidery floss in the the Leafy Tree kit. And that means I have embroidery floss boxes covering the entire surface of my 8-foot work table.
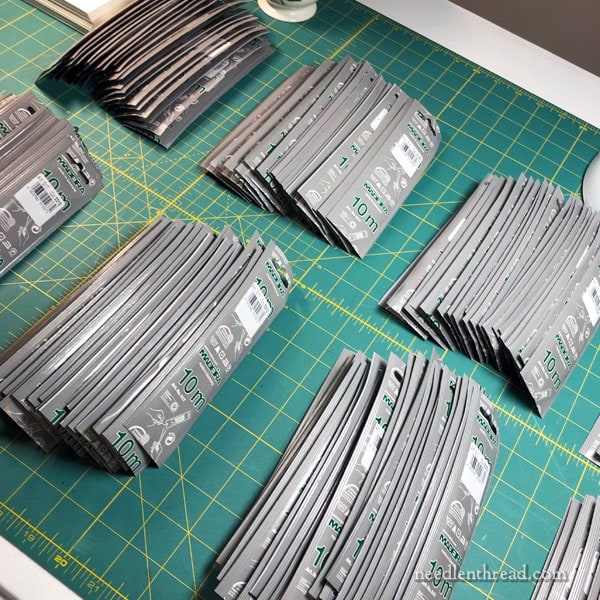
You can read about Madeira embroidery floss here. It’s a high quality floss, in unique packaging, and there are 10 meters of the 6-stranded floss in each package. That means there are 220 meters of floss in each kit.
That’s a lot of embroidery thread!
For the actual packaging of each kit, there’s not a whole lot of work space, so only a few kits can be assembled at a time.
Each color of floss is selected and bunched together, and then, one by one, each box is assembled:
The box is built, it’s lined with tissue paper, the fabric stick is tucked into its place, the floss is carefully arranged to fill the space around the fabric stick, the needle ribbon card is tucked tidily into place, the printed insert sits on top of the contents, the tissue paper is folded over everything and held with a sticker, the box is tucked closed, and the kit label is fixed to the outside of the box.
Ta-dum!
I love it when a plan comes together!
In fact, the manufacturer ran out of this particular sized box, so I’m waiting for them to be available again next week. I have half the quantity I need, though, so half the kits will be finished by early next week. I’m still plugging away on the instructions, too, but each day, we’re just a bit closer to launch day!
I hope you enjoy reading about some of the work that goes into putting embroidery kits together. I always find it interesting to know what goes on behind the scenes, so I’m hoping you do, too! It’s a sort of odd curiosity on my part, I suppose…
You’ll find me studio-bound over the weekend, doing a bit of this work, but also finishing up a couple small embroidery samples that I’ll share with you next week!
Wishing you a fabulous weekend!
