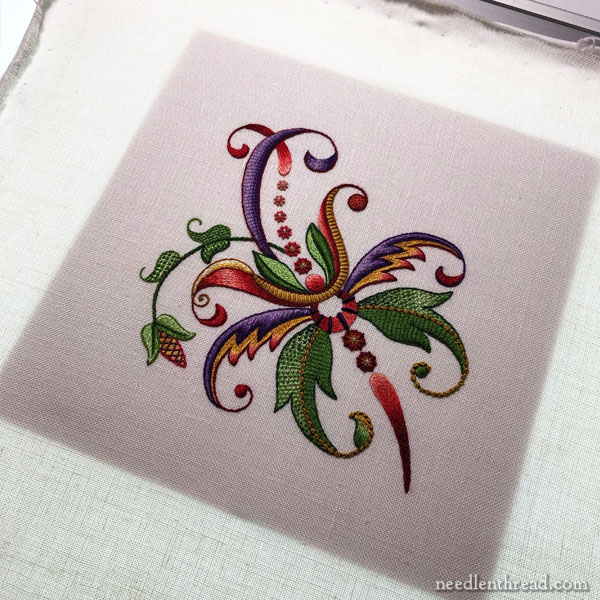
Good morning, and happy Friday! Today, we’re going to continue the saga of reframing an embroidery piece that we started talking about last week, when I showed you this botched frame job.
On Wednesday, we looked at Part 1 of the reframing process, and now we’re going to finish that up.

Hopefully, between these two articles, you’ll pick up some framing tips for your own embroidery work and gain confidence in preparing your own work for framing.
If you frame a lot of work, knowing how to prepare it can save you possible frustration and a whole lot of money.
Custom framing is expensive, and if you can cut out the prep work, your frame job will be a little less expensive.
Better yet, if you can find a non-custom frame – or re-use an older frame – you can drastically reduce the cost of framing all around by doing the whole job yourself.
As I mentioned at the end of part 1 on this job, I use a light pad underneath the piece to help me measure the placement of the blocked and damp-stretched embroidered over the foam core backing.
A clear ruler with measurement lines marked on it (like a quilter’s ruler or some drafting rulers) will help you determine where you want to place the finished embroidery on the mounting board, and accurately space it from both sides.
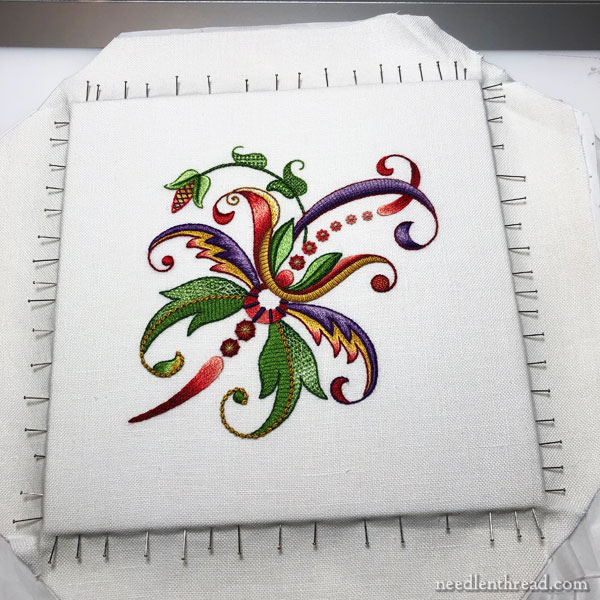
In fact, I did not center this piece exactly. I tried it centered, placing it in the frame and matting, and, to my eye, it looked slightly wrong. So I floated it about 1/8″ from dead center towards the top, which looked better to me.
Sometimes, “dead center” is not the best placement for a piece of needlework – especially one like this, which suffers from a lack of “grounding.” It’s a floating element, and dead center didn’t really do it. You don’t want it so off center that you notice that it’s off – with too much recognizable white space to one side or another, but nudging it just a wee bit off dead center can improve the framed effect.
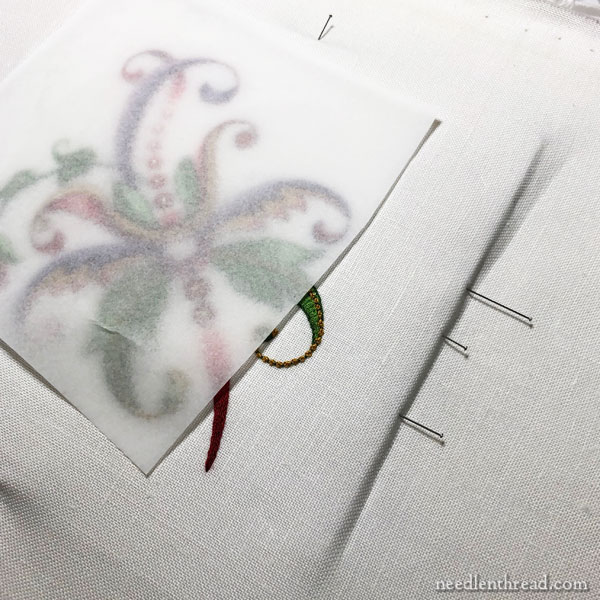
With the piece placed how I wanted it, I took fine, stainless steel lace pins and pinned the four sides in the center to hold things in place.
The pins slide through the fabric and into the side of the foam core board.
I used a piece of tissue paper over the top of the embroidery while I worked, so that my hands weren’t all over it.
I strongly recommend, if you’re doing this type of thing, to cut your fingernails. Fingernail marks are not always noticeable right off the bat, but if your fingernails are long and you’re getting leverage on the pins while you’re holding the work in place, those little areas where your fingernails come into contact with the linen – even if they don’t dig into it or the backing board – can leave little moon-sliver hints of handling all over the fabric.
I know this, because I’ve done it, and I’ve noticed it too late.
On the bright side, if you have one of the mister bottles that I mentioned in the previous article, you can spray the finest mist of water on the pinned work without its penetrating the linen to the foam core board, and this should eliminate such marks.
You could also go so far as to work with cotton gloves on, but I didn’t have any on hand (chortle), so I just covered the top with tissue paper as I worked.
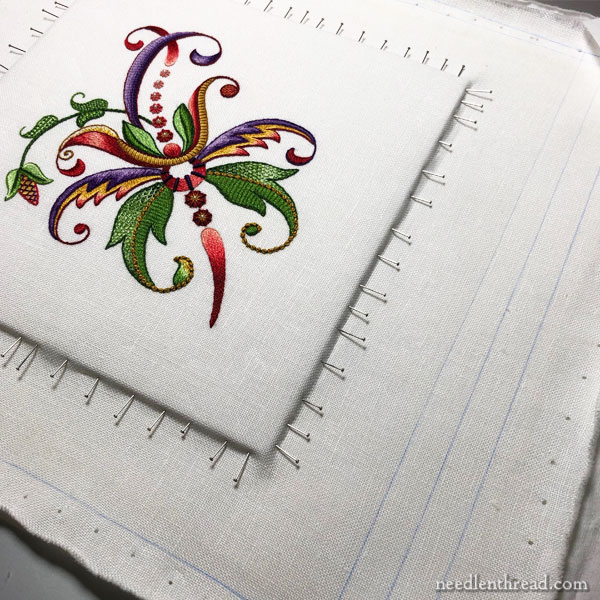
Once you’ve got the piece anchored on four sides with pins, fill in all around! Go as close to the corners as you can.
And be careful as you place the pins. You want to slide them straight into the side of the foam core, without their angling up or down and splitting through the outer layer of the board (and especially not into the fabric on top).
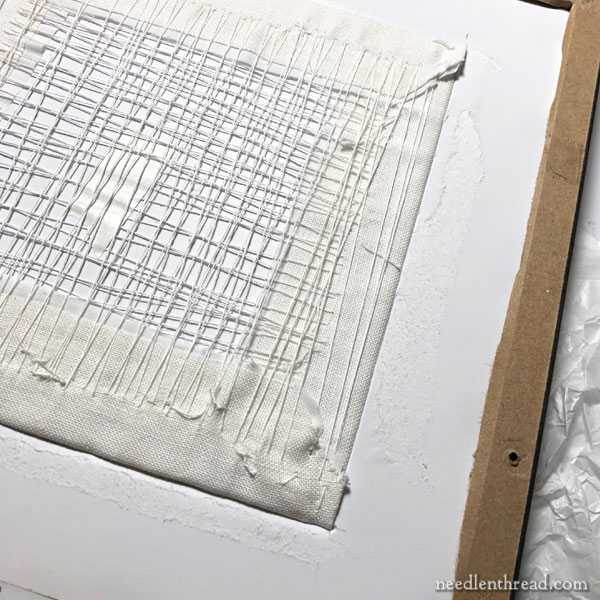
Then, I took a ruler and I measured and marked my trimming lines and I cut the excess fabric off.
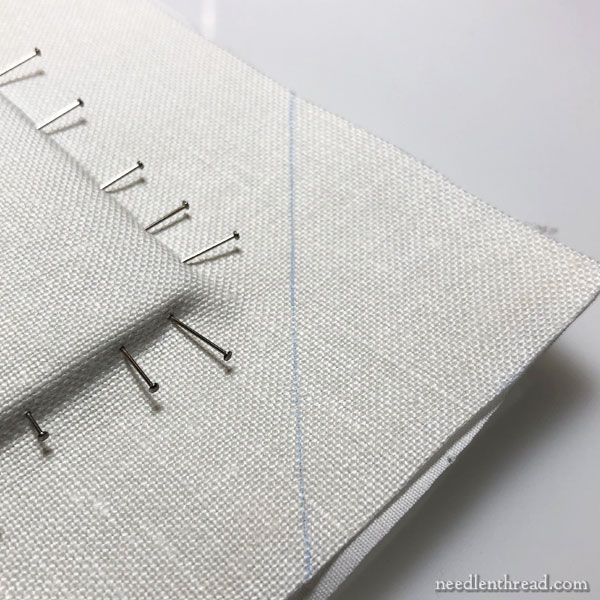
With the excess fabric cut away, I measured the corners and cut the excess fabric off there, too, preparing them for mitering.
As it turns out, I didn’t miter the corners, and I’ll tell you why below.

Under the area where I trimmed the corners for mitering, I also trimmed out the backing fabric just right in the corner, to eliminate some of the bulk on the corners.
So, here we are, ready for the next step.
And this is where I’ll tell you about mitering the corners. I tried mitering the corners, but they were very bulky, and I could see that the piece wouldn’t fit into the already cut foam core board behind the matting in the frame.
I could have trimmed that cut out of the foam core board (which you’ll see in a photo below), but once you start trimming things like that, you can get yourself into a whole boatload of mess.
So, instead, I took a path that reduced some of the corner bulk on the prepared embroidery piece, so that it would fit securely in the foam core board already situated behind the matting in the frame.
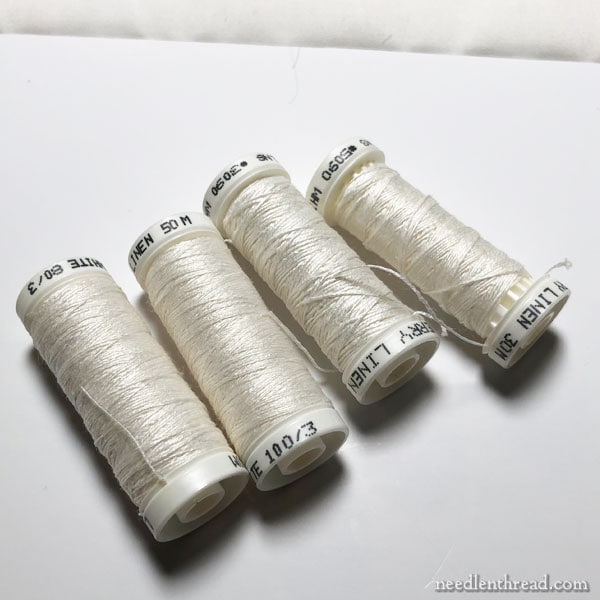
I fetched a few spools of linen thread. I use Londonderry Linen thread for several things, besides stitching. One of them is dressing a slate frame. The other is lacing the back of embroidery.
Why linen thread? It is not prone to stretching, like cotton is. It’s not going to give as much as cotton would over time, or when there’s a change in humidity or whatnot. Linen thread is strong and it is mighty.
I used the size 30 for most of the lacing, but I ran out right towards the end and had to switch to 50.
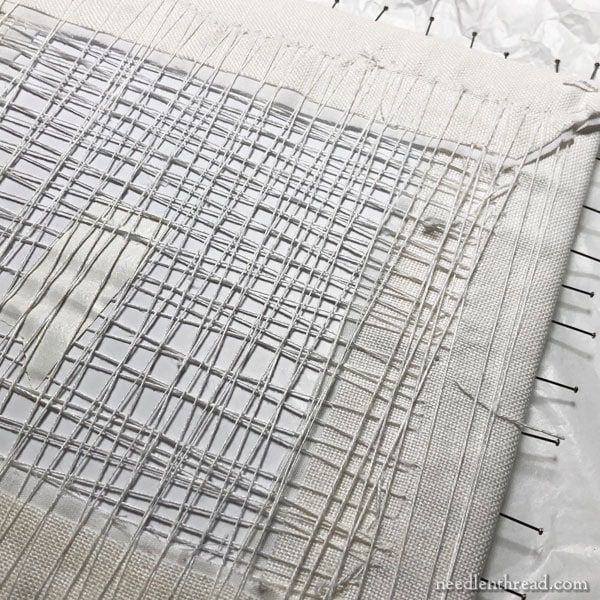
So, yes, I laced the heck out of the back of the piece. I may have overlaced it.
This could have been some kind of deep-seated emotional response to the previous botched frame job, I reckon. (Well, that’s my excuse, and I’m sticking to it.)
Anyway, lacing is just a matter of pulling two opposite sides as close together as possible, and then moving on to the other two opposite sides. I use a herringbone type movement when I lace the sides.
There’s a piece of tape in among the lacing there. I was interrupted by the phone while working through the first layer, so I stuck I stuck a piece of tape on my thread, and somehow, I didn’t notice it until I was almost finished with the second layer. Given the proximity of all those lacing stitches, I couldn’t pick it out without disturbing too much, so I left it.
Anyway, I lace from the middle with a very long piece of thread and then I go back to the middle and lace the other half of the side, using the tail of long thread. Then, I work those threads a bit – like you would a shoe lace – to tighten them up before finishing them off in the edges of the linen by making several small stitches.
Sometimes, I have to change threads, so I do the same thing – I finish them off with several small stitches in the sides of the linen and switch to a new thread, starting it the same way. In any case, the idea is to work the lacing so that the fabric is nice and evenly taut all around.
When the lacing is finished, out come the pins!
Everything should remain good and taut and sharp.
Examine the embroidery well at this point. Make sure any stray pieces of fuzz or thread or what-have-you are removed. Make sure any beads or similar embellishments are as you want them to be when the piece is in the frame. Be overly scrupulous about all of this.
Also, examine the inside of your frame. If the glass needs cleaning from fingerprints, now’s the time to do that. Make sure there’s no fuzz or thread bits inside the frame.
If you have a mat on your work (I have a double mat, which eliminates the need for spacers between the glass and the fabric), you should also have a piece of foam core board in the frame, with a hole cut in the center behind the mats, where the embroider will fit.
And that’s what I have here. It’s a good snug fit, and this is why I didn’t want to miter the corners on the fabric around the foam core board.
If all is ready, shove the piece in place! (Ok, no shoving…)
Examine it from the front, from all angles, and make sure everything is as you want it to be.
Be overly scrupulous about this, too!
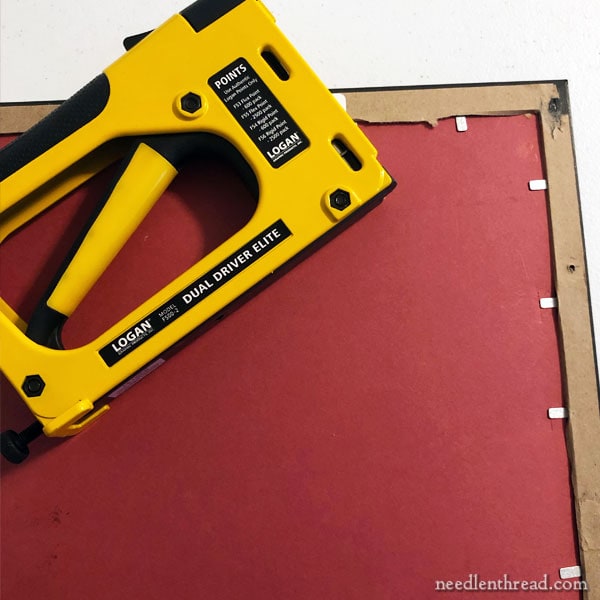
Now, place a mat board backing behind the work and drive framer’s points into place, to hold the backing.
There are lots of great tools for driving in framer’s points. I like this particular one from Logan – it’s on my Amazon recommendation page under Tools & Accessories. It shoots rigid or flexible points, and it’s very easy to use.
I use rigid points. Flexible are fine for photos and paper art work, but with needlework, there’s more stuff in the frame, so I like the rigid points.
Normally, I’d use white mat board here. The framers used red. The other side of the red mat is white, so I’m not really worried about it. It’ll be fine.
My last step is to paste the dust cover on the back – that’s the brown paper backing – and to screw in the wire hanger attachments on each side of the frame.

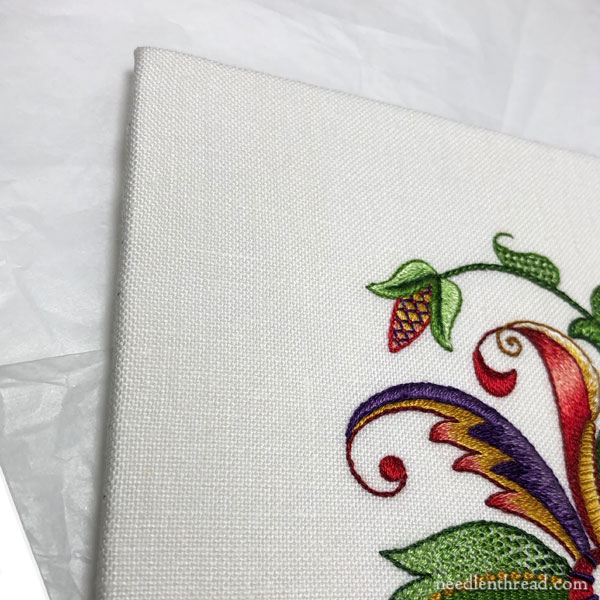
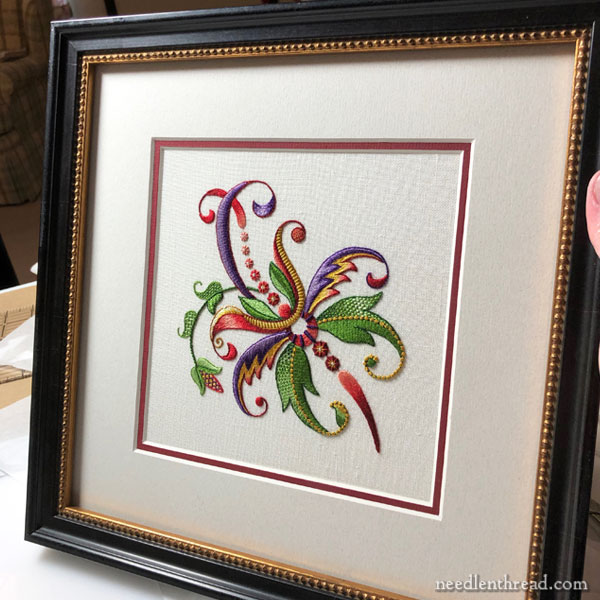
And here’s a final shot, in regular lighting again, taken from the side so that you can see there are no ripples. Hurray!
For those who have asked if I’ve gone back to the frame shop yet or who have advised all kinds of livid reactions, a couple points:
I live in rural Kansas, and the frame shop is not close by. I don’t have a chunk of day to do that right now.
That’s not my way of doing things, anyway. I’ll be in touch with them, and in a professional and calm way, I’ll discuss the initial job and hopefully, give them ideas for better frame jobs when it comes to needlework. I’ll also send them the links to my articles. But raising hell of any sort doesn’t help any situation. There’s enough vitriol in the world without adding more over something that, in the scheme of things, is mighty insignificant. It’s certainly not worth disrupting my own inner peace – or theirs.
Will I use them again? Of course not. I’ll just stick with my own methods. I think framing is fun, anyway – when I have time for it!
Have a great weekend! If you have any questions about framing, feel free to ask them below!
This article includes an affiliate link to my Amazon Recommendations page. Purchases made through that link result in a small commission for Needle ‘n Thread at no extra expense to you. Thanks!
