This morning, I’d like to share a little embroidery stitch tip with you.
If you like to embroider with your fabric taut* in a hoop, you may have found that some of the diagrams in stitch dictionaries are hard to imitate.
This is because most diagrams in stitch dictionaries illustrate the stitch in the most space-efficient way by showing it “sewn” rather than “stabbed” – by showing the needle mostly on the surface of the fabric, scooping up bits of the fabric to make the stitch, rather than being taken all the way to the back of the fabric.
If you’re not sure what the differences between stabbing and sewing a stitch are, you might want to read this article on stabbing vs sewing that I wrote a while ago.
“Sewing” embroidery stitches when your fabric is drum-taut* in a hoop or frame can be awkward and difficult. Sometimes, it’s just darned hard to scoop the fabric up!
And often, with some stitches, a sewn stitch looks significantly different from a stabbed stitch, due to the way the different methods cause the stitch to interact with the fabric.
One stitch that I always prefer to stab when working embroidery in a hoop or frame is the coral stitch, because the amount of fabric you pick up is so tiny that it’s hard to manipulate the needle. I always stab this stitch if the fabric’s in a hoop or on a frame.
There are two ways to stab it, and both work great.
The first version works best with two hands (if your hoop or frame is attached to a stand) and the second works well with one hand if you’re holding your hoop or frame with the other.
First, though, if you’re not familiar with coral stitch, here’s my video for it. You’ll understand the tips below better if you’re familiar with the movement of the stitch.
In the video, I use the sewing method for the stitch, because that’s the method you always see in stitch dictionaries, and that’s what folks are most familiar with. If you watch the video, you can see that I really have to push on the drum-taut fabric to scoop up a little bit of it.
Here’s the first method of stabbing the stitch. This is a quick, fast method, especially when you have your hoop or frame in a stand and you have two hands free.
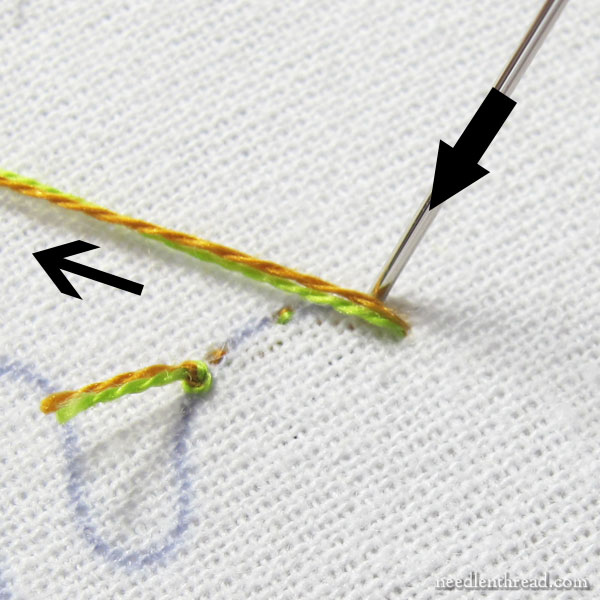
The concept is the same as sewing, except we’re going to avoid scooping the fabric. Instead, draw the working thread straight down the line you’re covering with coral knots, pulling the thread in the direction that you’re stitching and past the place where the needle is entering the fabric to form the first knot.
The needle will be just above your design line, and the thread will pass along the design line below the needle as shown above.
Pull the needle through to the back so that it is free of the fabric, but don’t pull the thread all the way through.
Bring the needle up into the fabric just below the design line, and inside the resulting loop of thread left on the front of the fabric.
Pull the needle and working thread through, in the direction of your stitching down the design line to tighten the thread into a small knot.
Then move forward the distance you want between your knots, going down into the fabric above the design line again and taking the needle all the way to the back but leaving a loop of working thread on the top of the fabric.

Come up right below the design line, just below where you entered the fabric and inside the loop of working thread.
Pull the working thread in the direction that you’re stitching down your design line to tighten the knot.
There. You just worked through two knots.
That’s the one method.
Hand Held Hoop Method
The method above works great and it’s an easy enough way to form coral knots using the stab method.
But I use the method below more often, because if I’m working in a hoop and not a frame, I normally hold the hoop in my left hand.
This method below works very quickly and neatly, it’s easy to get into a rhythm with, and it may very well become your favorite way to work coral knots.
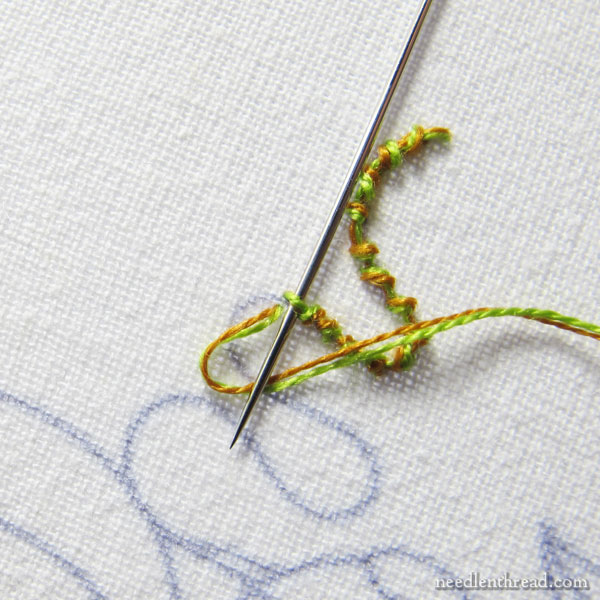
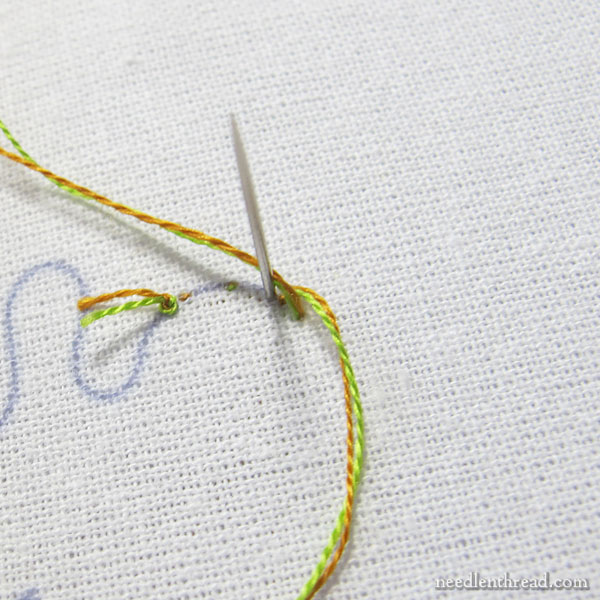
In the photo above, I’m demonstrating in the middle of the coral knot line.
Start by taking a straight stitch forward, going down just above your design line.
Bring your needle and thread all the way to the front, just below the design line, right below where you just entered the fabric.
You’ll only have about two or three threads of fabric between the entrance above the design line and the exit below the design line.
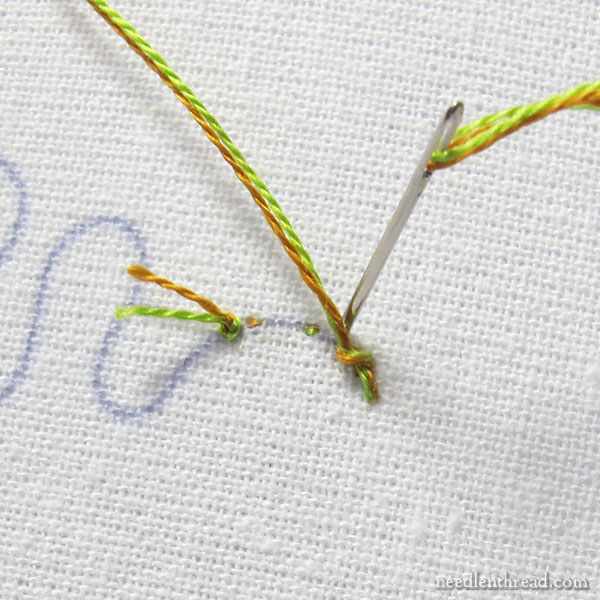
Pass your needle underneath the straight stitch (as shown above) and out over your working thread.
This is the Really Important Part: pull through, making sure that you’re pulling the thread in the direction that you are stitching on your design line, in order to pull the knot around the end of the straight stitch and turn it into a knot rather than just a buttonhole stitch. Don’t pull the working thread towards you, because that would simply result in a buttonhole stitch. You want the thread to latch into a knot around the end of the straight stitch.
If you like the Palestrina stitch, you may recognize that this movement is a lot like the last movement of the Palestrina stitch, and it makes it Very Easy to control the spacing and size of your coral knots along a line of embroidery.
The problem that most folks have with lines of coral knots is consistency in spacing and sizing. This method pretty much eliminates problems with inconsistency. You can clearly see how long the stitch is between the knots, and you can easily control the tension on the knot as you pull through.
Palestrina Stitch vs. Coral Knot Stitch
I like both the Palestrina stitch and the coral knot stitch for creating textured, knotty lines of embroidery.
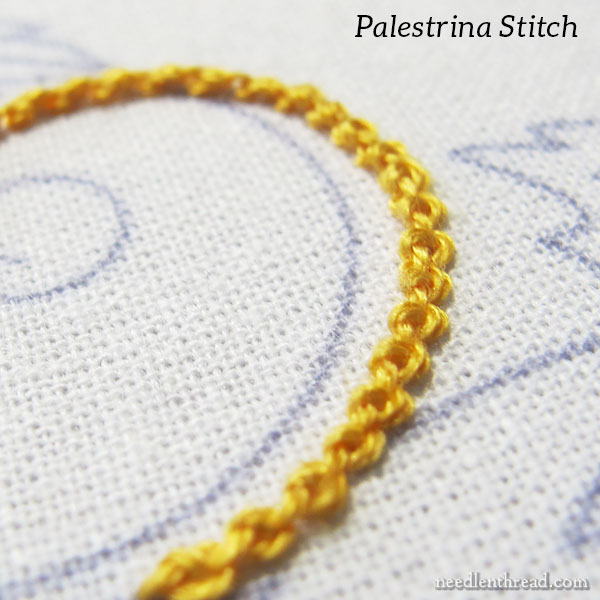
The Palestrina stitch creates a much fuller knotted line, and it’s really a beautiful, textured stitch. It’s also called a “double knot stitch” because it is just that – there are two loop movements around the stitch.
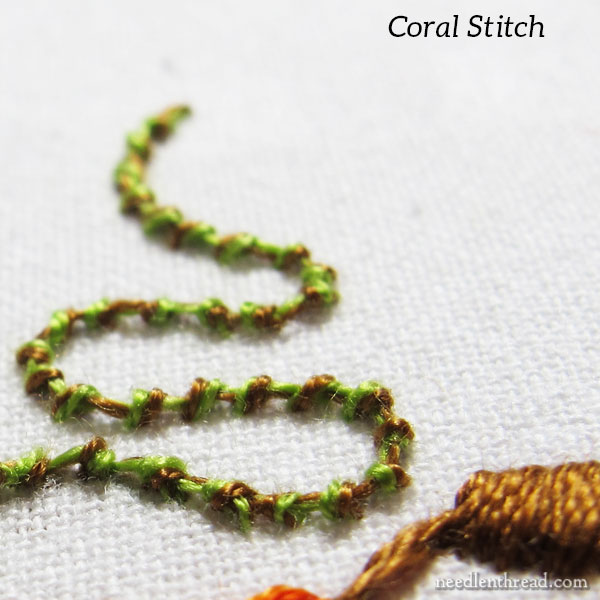
The coral stitch creates just one single knot, and I like to use it for finer textured lines. I also like to vary the look of it, by spacing the knots either farther apart or closer together, depending on what look I’m trying to achieve.
Stitch Diagrams and Taut Fabric
You can apply the concept of switching from a “sewing” method of working a stitch (as displayed in a stitch diagram) to the stabbing method to practically any embroidery stitch. It’s just a matter of taking the needle to the back of the fabric before turning it around and sending it back to the front.
Often, you’ll be required to leave a loop of working thread on the front of the fabric, and you might have to manipulate the loop into a certain configuration.
If you work with your fabric taut in a hoop or frame, you will find that you’ll get much neater, consistent results with your embroidery if you stab your stitches rather than sew them.
Try it!
*PS – I really do mean drum taut and not drum tight! When you’re talking about fabric tension, the term is taut. I get emails about this frequently, correcting my use of the word taut to tight. I definitely mean taut, which is defined as “under tension; stretched or pulled tightly; not slack.” It really is the correct term!
