At the end of last week, I posted some photos of my finished embroidered snowflake ornaments on social media.
I then spent more hours than I can count answering questions, emails, messages, and so forth about the trims I used and the finishing techniques.
So I’m interrupting my publishing schedule here to bring you some highlights about trims for finishing, because it seems that many folks are looking for decent trims for finishing up their own embroidered things – whether for ornaments or other uses.
I also received a few questions about dating. Well, that’s kind of a personal topic – but I’ll answer that question below, too.
So, trim!
In all things, look to the end.
(There’s nothing quite like starting an article on a Monday morning with such a deep philosophical statement!)
In any case, the statement above – I think Herodotus may have said it first (I could be wrong) – is good advice, and it fits well with needlework.
When you set out on a needlework journey – unless you’re just meandering for the learning experience or the fun of it – it helps to consider where you plan to arrive at the end of the particular journey.
And if you plan to arrive at a finished object like an ornament, it’s a good idea to consider the finish from the very beginning. You want to be able to finish an ornament in a way that “works” with the overall design and execution.
So I put in a collection of trims before I started the ornaments, and as the ornaments began to develop, I kept my eye out and my mind open for trims that I could add to my collection of possibilities.
Selecting trims can sometimes be a serendipitous experience.
There you are, short of time, running into a fabric store to pick up, say, some batting. While careening towards the batting section, you pass an aisle of trims and ribbons. Something catches your eye. You come to a screeching halt. “Why, look at that!” you exclaim aloud for all to hear. “What a perfect little trim for my snowflakes! YAY!” and you grab the spool and continue your madcap rush for the batting.
But usually, we have to plan a bit to get trims that will work well.
There are a few points to take into consideration when selecting trims:
1. The size of the thing you’re trimming
2. The shape of the thing you’re trimming
3. The type of finish you’re executing
4. The colors and textures involved, and
5. Exactly how much fiddle work you want to put into the whole finishing experience.
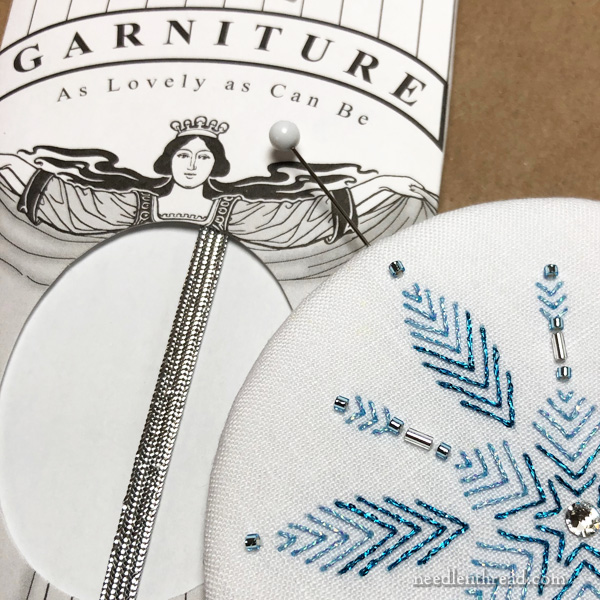
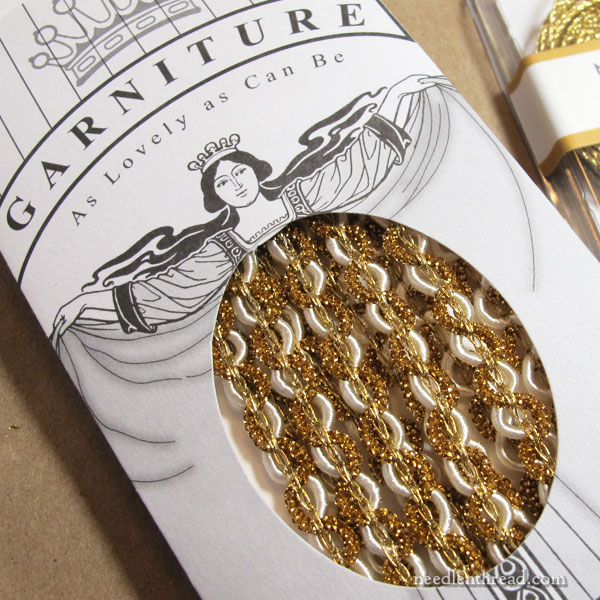
It just so happens that there’s a fantastic line of trims for finely embroidered goods already on the market.
They’re called Garniture, from Access Commodities. You can look at them here on their website, but if you want any of them, you’ll need to special order them through your local needlework shop or your favorite online locally owned shop.
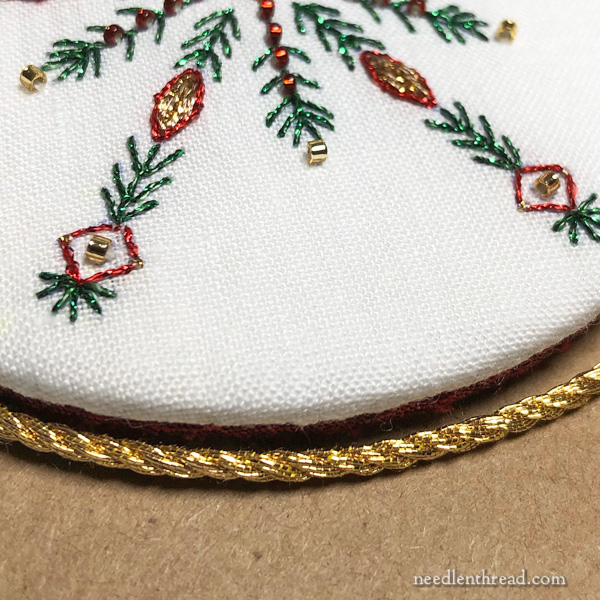
So, for my snowflakes, I already had some of the Garniture twists and trims in mind. They are small enough for ornaments, and many of them were perfectly suited for what I had in mind.
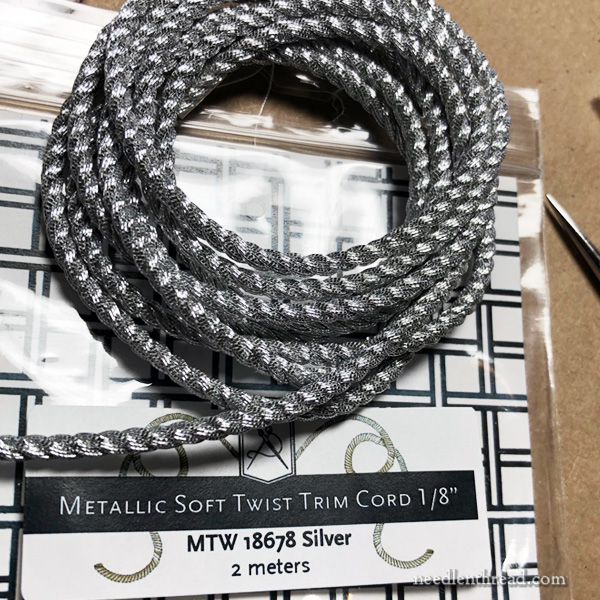
Access Commodities also has a line of soft metallic twists in silvers and golds that are excellent for trimming out ornaments. I wrote about these a while ago here.
Again, these are available through locally owned needlework shops. If they don’t have them in stock, you can ask them to special order them.
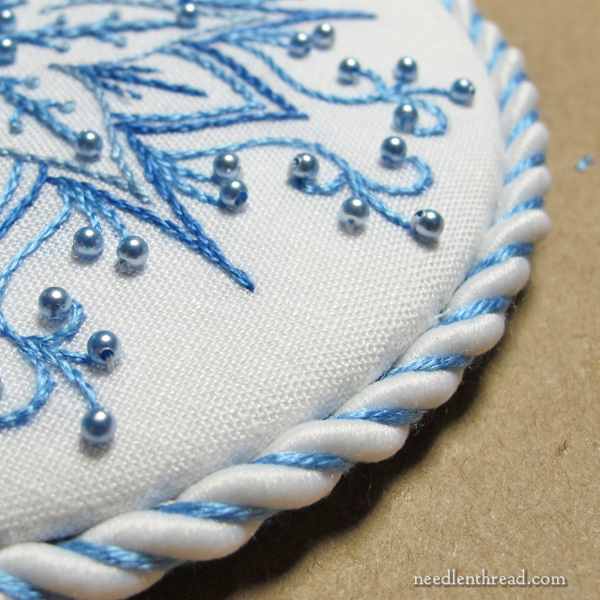
The soft metallic twists are beautiful and they are easy to work with. Since my ornaments will all be finished with tabs and twisted trims, it worked out well to have several of the soft metallic twists on hand.
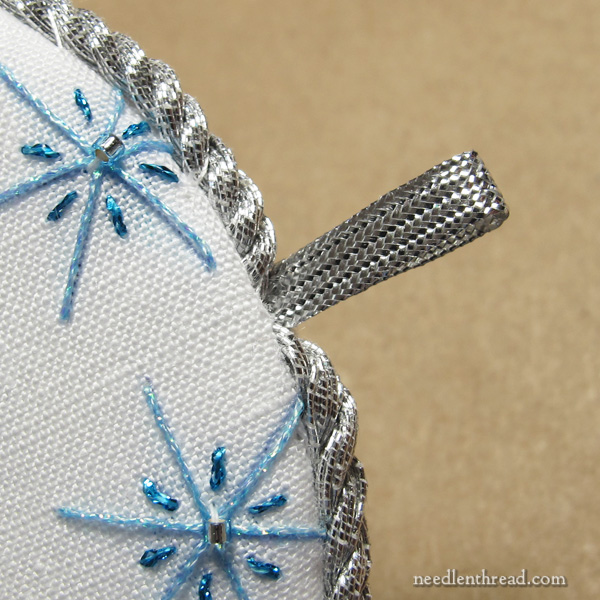
This is what I mean by tabs and twists for finishing my snowflakes. Each flake has a tab or small loop at the top, and then a twisted cord of some sort around the edge.
Of course, there are more than just twists for finishing edges. There are fancy braids and squiggles and laces and whatnot, too.
But this is where I took into consideration how much “fiddle time” I wanted to put into the finishing.
Twists are probably the easiest approach to finishing an edge, and for the sake of an instructional e-book – especially for those who have not done much of their own finishing – they’re a good introduction to achieving a professional, neat finish on a project.
Other Sources for Trims
Never underestimate the ribbon aisle at a craft store. You can find myriad twists and trims in there, in both full spools or by-the-yard options. Just be aware that upholstery trims are usually way too large for ornament finishing!
You can also make your own twists out of embroidery thread, ensuring a perfect match to your finished ornament. Here’s a good YouTube video here on twisted your own cord using yarn. The concept is exactly the same for embroidery. You would only need to fold one length of 6-stranded floss in half for the original length of thread for a cord on projects this size.
Or, you can do what I did for the white twist in the first photo of this article – combine the bought twist with the DIY twist. I purchased a white twisted cord and then twisted a length of floss into the purchased cord to achieve just the right color match. Because a twist like this is two-ply, you actually have to twist the matching floss twice, if you want color between each white twist. You can do this with any color of pre-twisted cording.
Dating Ornaments
So, the question about dating ornaments…

Yes, some of my ornaments are dated. The e-book will feature two possible designs for the backs of the ornaments, with dated and undated versions of those designs.
Some people like to date their ornaments. Some people don’t. Some people like to sign their ornaments; some people don’t.
Especially if I’m giving something as a gift, I will often stitch my initial very subtly somewhere on the back (usually in the same color as the ground fabric). If I’m going to date a Christmas ornament, I date it boldly. Otherwise, I don’t date it.
That’s just my personal preference. Do what you prefer!
I hope this gives you some ideas for finishing your own embroidery projects!
And happy Monday all around!
