Damp stretching (sometimes called blocking) is a crucial step you should never skip on embroidery that’s going to be finished into something, whether it’s framed art, an ornament, a needlebook, a pin cushion, a couch cushion, or anything else.
I’ve written about damp stretching – which I used to affectionately call damn stretching because it was often a frustrating pain for my fingers and hands! – here, with a tutorial. The tutorial will teach you the concept of damp stretching. As you progress through your embroidery journey, you will probably make little tweaks and adjustments to how you damp stretch your work.
At the beginning of this whole ornament-making process, I made some adjustments to my approach to damp stretching, and they are adjustments for the Oh-So-Much-Better. Why didn’t I do this before?!? Since there are some 20 snowflake ornaments floating around here now, I have a Massive Appreciation for these tweaks that have made damp stretching easier for me.
So I thought I’d share them with you! It’s really a matter of supplies, more than anything else…
So, damp stretching or blocking embroidery is simply pinning your embroidery project out on a piece of cork or anything that’s pin-on-able, misting it with water, and letting it dry.
When you pin the embroidery out, you make sure that the fabric is straight, pinned on the vertical and horizontal grain of the fabric. (You can read about fabric grain here, if you’re unsure of what fabric grain is.) Basically, you want to make sure your embroidery is “squared up.”
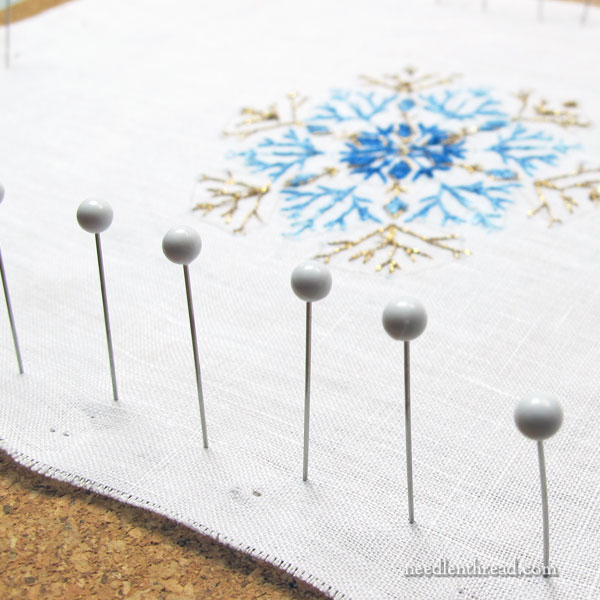
I used to pin with push pins or with thumb tacks.
And I used to pin on a large cork board from an office supply store.
Now, I pin with quilting pins with big fat heads (like the ones I wrote about the other day, here).
They are so much easier to push into the fabric and the cork. Part of that is because they are much finer than push pins and much sharper than push pins, and part of the ease is because of the cork I’m using, which I’ll explain below.

Here, my embroidery is pinned face-down on the cork board.
The cork board is clean, and it doesn’t give off any color or anything like that. But then again, I don’t wet the fabric enough to soak the cork. If you’re worried that your cork is somehow color treated, then you can always cover your cork board with a piece of fabric or even cling-on film wrap and pin through that.
Why did I pin it face down? I’m not exactly sure. I think it’s because it has beads and metallics on it, and I just thought I’d protect the front of those a little bit – no water accumulating in the beads or in the metallics. It doesn’t really matter, though!
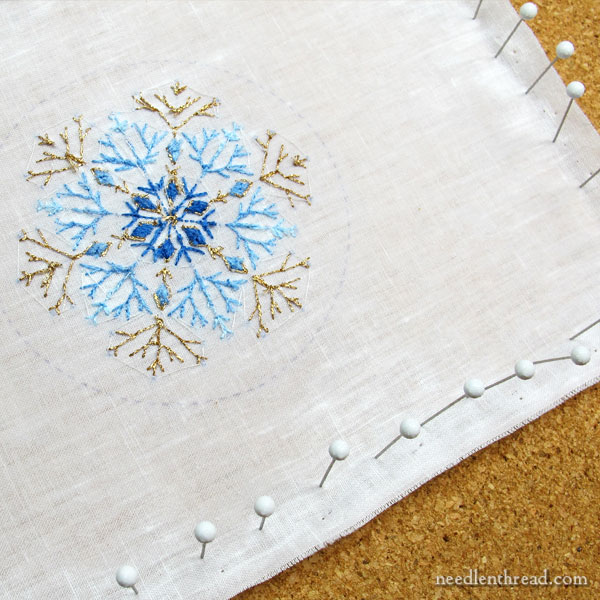
Here, the back of the fabric has been misted all over with water.
I used to use any old spray bottle, but now I use a misting spray bottle that puts out a super fine mist. I wrote about it in this article on framing.
My Favorite Part of damp stretching is in the seconds – I really mean seconds – following the water mist. Inside the pinned area, the linen magically smooths out. It’s so delectable to see, it almost makes my mouth water! I live for that part of damp stretching.
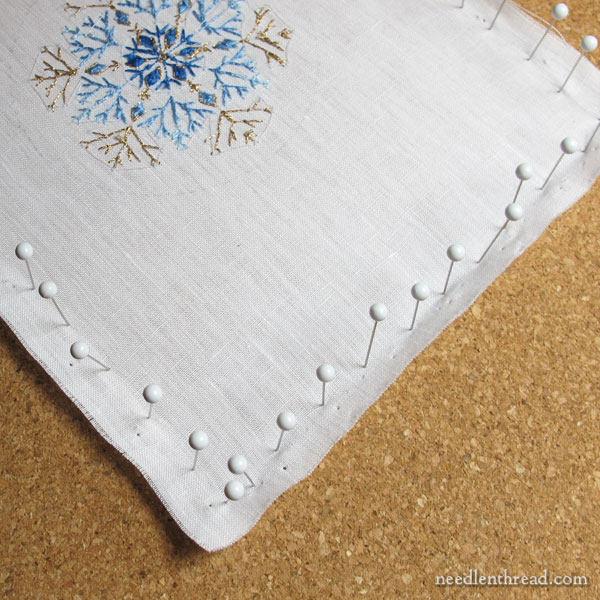
I usually leave the embroidery on the cork for a while, while I go about doing other things. Sometimes, I leave it on there overnight.
See how the edge of the linen is pulled up outside the pins? Part of that is because of the drying and tightening-up that went on inside the pins. Even though I usually pre-shrink my linen before I stitch on it (you can read about that process here), there’s still some shrink involved when you damp stretch. Because your linen (or cotton or whatever fabric you’re using) has been in a hoop or on a frame, it’s been stretched out a little bit. Wetting it slightly and letting it dry is going to remove that stretch.

This is the real game-changer for damp stretching for me, though.
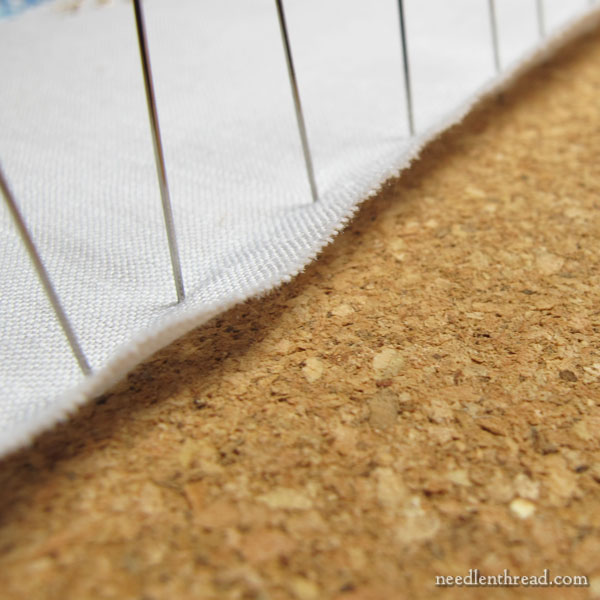
I bought a pack of four 1/2″ thick cork tiles. They’re 12″ x 12″.
The pins just slide right into the cork. They don’t run into the backing of a cheap office cork board – which is usually covered with the thinnest veneer of cork!
And I can damp stretch top-down on my table top, rather than from the side on a large cork board that’s hanging or leaning against a wall.
If the project is larger than 12″ x 12″, I can lay two tiles (or four – or more!) out on the table and pin away.
The deep cork tiles make Such a Huge Difference in the ease of damp stretching. Coupled with the quilting pins, they are a perfect solution for tabletop damp stretching that is easy, easy, easy on the hands. There’s no effort involved in pushing the pins into the cork or pulling them out – unlike with push pins or tacks on a thin cork board.
And on top of the ease of use, they are wonderfully mobile, so I can move them out of the way, or I can take them with me for demos, or what-have-you.
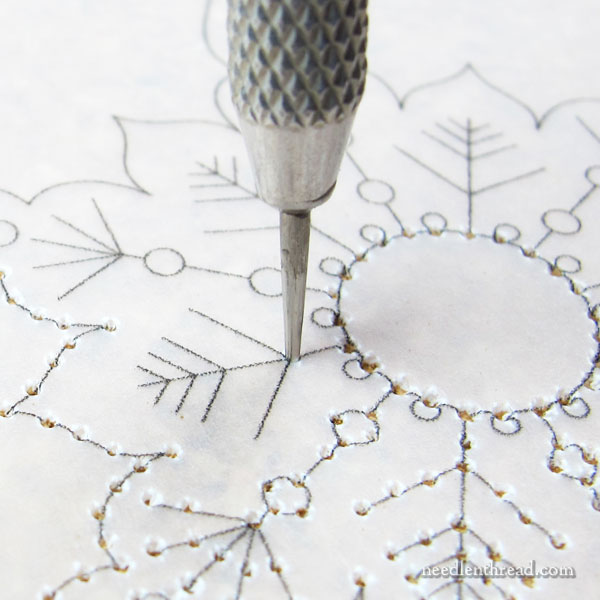
It turns out the cork tiles are multi-purpose, too. So far, I’ve used them for prick and pounce preparation (you can read about prick and pounce pattern transferring here) – what I’m doing with that is a conversation for another day, though!
And I’ve used them for some photo backdrops, too.
So, if you are looking for a good solution for damp stretching that is easy on the hands, efficient, comfortable to use on the table top, mobile, and that has good multi-use options, look for thick cork tiles.
They’re wonderful.
Where to Find Them
I think hobby, craft, and art shops probably carry these, but I couldn’t find the size and thickness I wanted locally. I really wanted 1/2″ thick tiles, not 1/4″ thick, which seem to be more common.
So I bought mine online – Amazon has them. I’ve added the cork tiles I purchased to my Amazon Recommendations page under the Tools and Accessories list. If you want to build a more permanent cork board with them, they are adhesive-backed, but I don’t use them that way. I like them mobile and small, with the option of being expandable, so I left the backing paper on them.
The link to my Amazon recommendations page is an affiliate link, which means that Needle ‘n Thread receives a small commission for purchases made through those links at no extra expense to you. Every little bit helps, so thanks for shopping through my recommendations page!
