If you’ve been embroidering for a long time, or if you’ve been following along with me on Needle ‘n Thread for years, you know what a slate frame is.
But if you’re new to embroidery and new to Needle ‘n Thread, there is a chance you’ve never come across the slate frame.
The slate frame is a very simple but effective tool for embroiderers. It’s been used for centuries in its most basic form, and in recent years, it’s enjoyed a renaissance of popularity.
I like to hunt down slate frame makers. Most of them are individual woodworkers who have found a niche in the needlework market with wooden tools. There’s nothing quite like a good wooden tool made by someone who knows wood and knows how to bring out the beauty and functionality in a good piece of wood!
TFWoodcraft has been around for a while, making wooden tools and other products for the historical reenactment camp and for other enthusiasts. I’d heard of them from several readers who recommended their products, so I thought I’d take a look.
For those of you looking for slate frame options in the US, then, here’s one to put on your list. Their frames are slightly different from the traditional slate frame, and they are beautifully made.
There’s just something about gorgeous pieces of wood that makes my heart go all a-flutter. And I’m not even a woodworker!
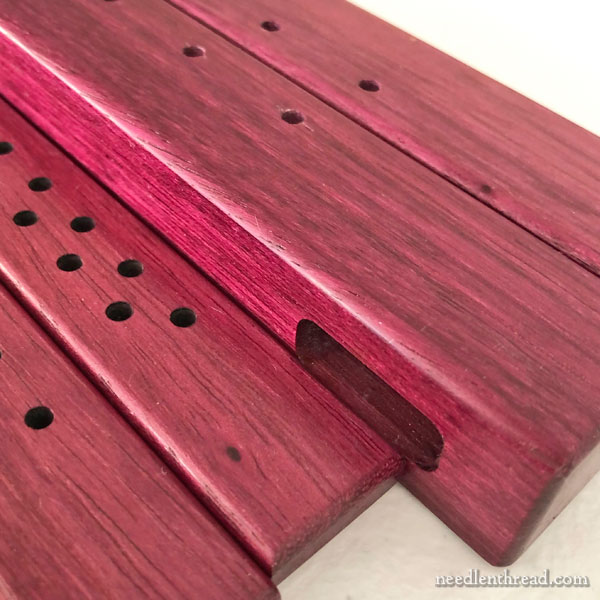
The wood on my frame is beautifully finished to a smooth, glass-like hand. There are no shards on the holes, nothing that catches or scratches. The finish on this frame is lovely!
The components to a slate frame are four: 2 top bars and 2 side bars, to make a square frame between which you stretch your fabric.
For most slate frames, the top & bottom (or “roller”) bars are situated horizontally, with the “slats” on the sides.
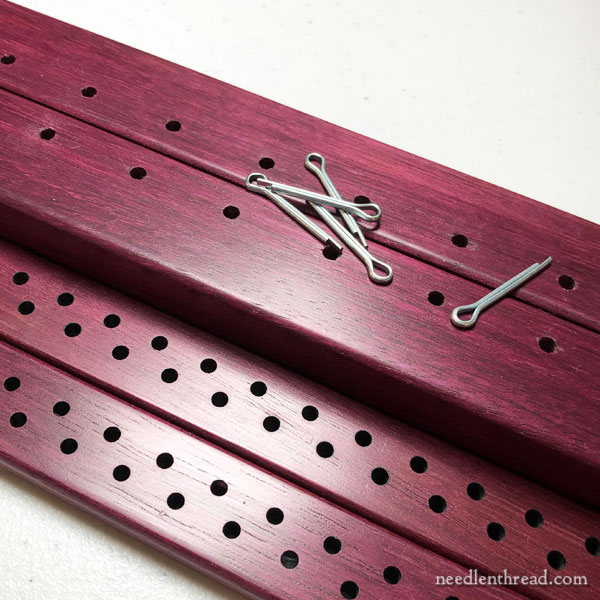
The slats feature a series of closely and evenly spaced holes into which some kind of pin or peg is inserted, to push the roller bars away from each other, stretching the fabric vertically between them.
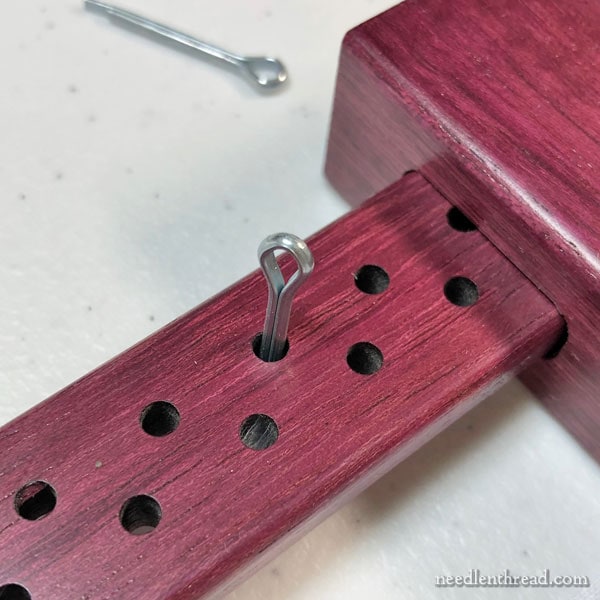
The TFWoodCraft frames come with cotter pins that fit the holes in the slats. The pins are somewhat loose until you have your frame fully stretched. Then the pressure of the frame also serves to hold the pins securely in place.
The sides of the fabric are then laced around the side slats, using string or twine (I use linen thread, because it doesn’t stretch).
There’s no high science to using a slate frame, really. Different people set up their frames different ways, depending on what the person’s used to, or how the frame is made The whole point of them is simply to achieve a firm tension on all four sides of your fabric. How you go about doing that depends on your preferences for setting up a frame.
You can read about setting up (or “dressing”) a slate frame here.
On the TFWoodCraft frames, the rollers (or the heavier bars that are usually seen in the horizontal position on the frame) are shown in their listing as the sides of the frame.
This configuration is fine – it works great if you’re stitching a long, narrow, horizontal piece. Just don’t let it throw you off! In fact, it doesn’t matter which direction the rollers are situated. If you want your rollers on the top and bottom of your work, horizontally, just remember to order the rollers according to the width you want your frame. You can configure the frame however you need to.
What’s different about the TFWoodCraft frames is that the rollers don’t feature any kind of tape. Some slate frames have a twill-type tape attached to them already (usually stapled) that you attach the horizontal ends of your fabric to.
The problem with stapled tape is that, if the twill tape needs replacing, you’ve got to pry the heck out of the staples that are fixed in that beautiful wood, and then you have to re-staple new tape.
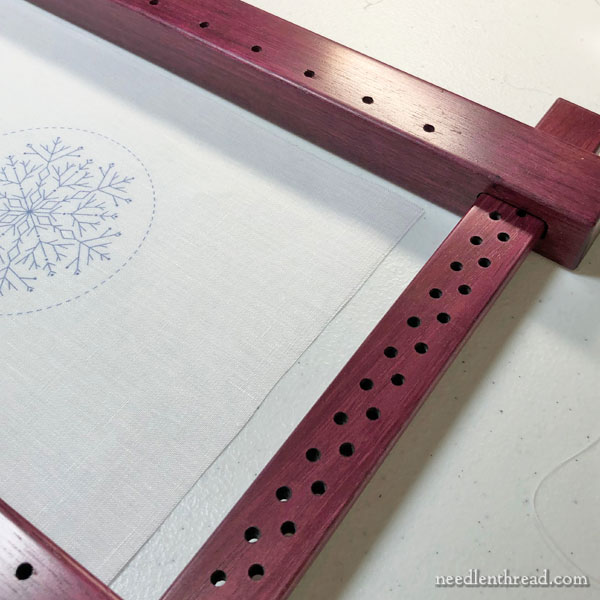
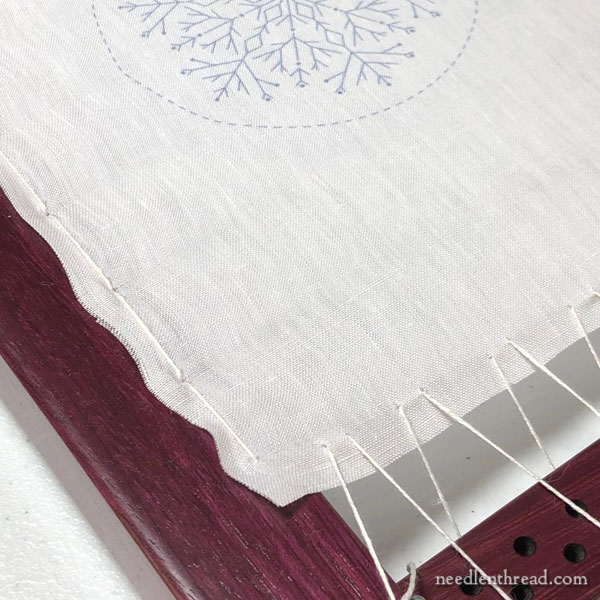
Instead, on these frames, you’ll find evenly spaced holes about an inch apart on the rollers.
You lace your fabric to the rollers directly, so that you’re actually lacing on four sides using the holes to lace through, rather than sewing the top and bottom of the fabric to tape on the rollers.
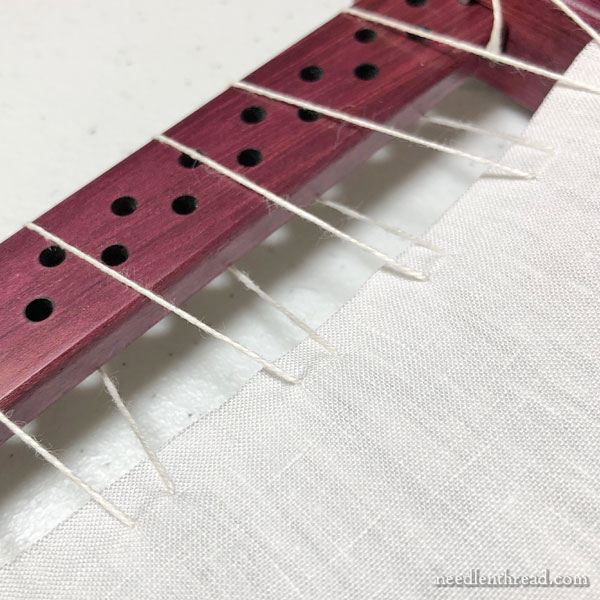
I took a shortcut. I just sewed my fabric onto the rollers through the holes, so that the fabric sat up on top of the frame.
Retrospectively, this wasn’t the best way to mount fabric on this frame, although it worked ok on this small piece. The problem with doing it this way is that you get definite tension points on your fabric. It’s better to just follow the lacing instructions that come with the frame!
My plan, though, with these rollers, is to use those holes to attach a heavy twill tape to the frame. I like the fact that I don’t have to staple the tape. It won’t be the easiest sewing job, perhaps, but I’m pretty sure I can get several uses out of a good tape or other heavy-duty fabric.
Then, I’ll sew the top and bottom ends of my fabric to the strips attached to the frame, which will provide a much more even vertical tension on the fabric. Then I’ll lace the sides, like I normally do.
So there you have it!
If you are looking for well-constructed, strong, beautiful slate frames from a reputable company that’s been around for a while – or if you’re looking for hand-crafted Japanese embroidery frames, lucets, drop spindles, wooden needles, beautiful charcuterie boards, gorgeous dove-tailed decorative yarn boxes, and more! – visit TFWoodCraft’s shop on Etsy, or visit their website here.
Their service and communication is excellent and they make exceptional hand-crafted products – definitely worth adding them to your list!
