Sometimes, it’s just a matter of getting started!
You know when you have a task looming in front of you, and you’re just not sure where to start – or how to start, or the best way to start?
Sometimes, the key is just starting! And with that in mind, here’s my start on my first embroidery projects that will materialize into Something of Some Sort in 2020.
The way I go about projects and the way you might go about projects is probably slightly different, just because I use the projects I do as demos here on the website, or as possible kit or e-book content, or as a springboard for tutorials and so forth.
But in some respects, our approach would be the same. So here’s my start! And maybe it will give you some ideas on how to start your own potential project, too.
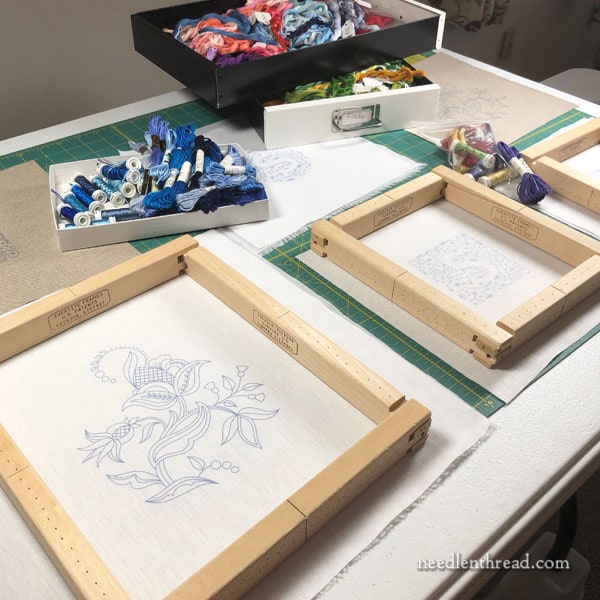
There they are!
I know, I know. It looks like a lot of embroidery projects all at once. In fact, it’s only two, with variations.
The first thing I did was tweak the designs on my computer, so that I could have clean line drawings to use as my embroidery designs. This is important for me, if I plan to make the designs widely available in any e-book or a kit or what-have-you. I don’t want to spend the time stitching a design that might change in a major way, because then I would have to re-stitch it. So I need to make sure my design (and any variations) are where I want them to be.
It is true that I may learn as I go that a design isn’t going to work, or that it needs a major adjustment. But with these particular projects, I’ve already toyed with stitching them and I’ve got the designs where I want them.
This step of tweaking and modifying designs may not be necessary for you – you might start with a simple sketch, hand-drawn, and that will do it. Or you might a purchased design that you’re going to stitch – and that’s fine, too!
Read More about Preparing Designs
You can read about how I prepare my designs for hand embroidery here.
Then, it’s time to select and prepare fabric.
I’m a linen gal, myself. I do most of my surface embroidery on linen of some sort, although occasionally, for certain types of embroidery, I will use cotton, silk, or wool, or some combination thereof.
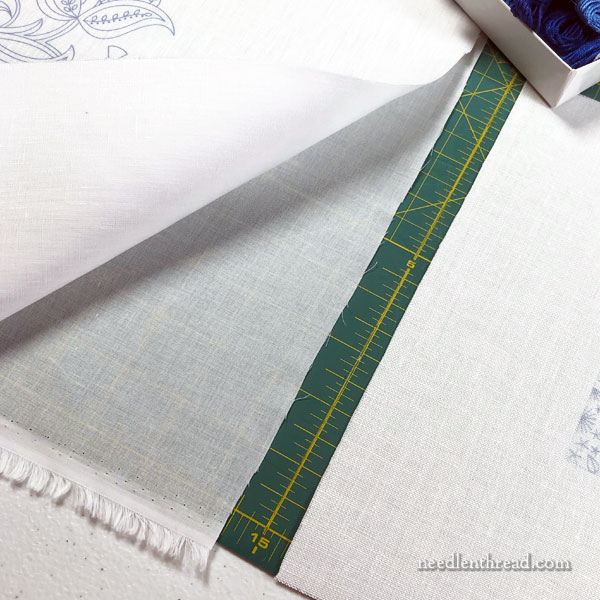
I had a such a great experience stitching on the Tailor’s Chalk linen on my Snowflakes that I published before Christmas that I knew I wanted to work at least one variation of each of these projects on that linen.
But because I’m planning on fairly full-coverage stitching, I wanted to back the linen (which is relatively light) with another layer of fabric. In this case, I’m using a cotton batiste. This keeps the whole effect of the ground fabric rather light, but it gives more support for the stitches.
Read More About Fabric for Embroidery
You can read about various linen for hand embroidery here.
You can read about how I prepared linen for a big embroidery project here.
And you can read about backing embroidery ground fabric (and when and how) here.
I’m also using a natural linen for a couple of variations. The natural colored linen you see in the pictures is called Sunflower Seed from Access Commodities (available through fine needlework shops). The natural linen does not need a backing fabric.
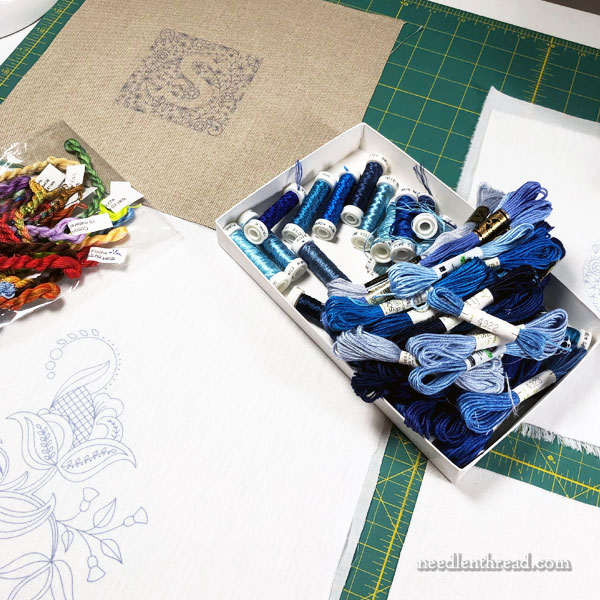
I’ve also got my threads all picked out, as you can see from the blue heap in the middle of the table.
One of the project variations will be worked in blues, in silk, and that’s what that heap of thread is. The other variation will be stitched in DMC cotton floss, in blues. I’m pretty sure they’re at the bottom of that heap of blue!
Now, I probably won’t use every single thread in that heap. I’ll pick the ones that work best for the effect I want, and I’ll take notes as I go, so I know which threads I’m using. I’ll eventually put the threads I’m not using aside, and sail on from there.
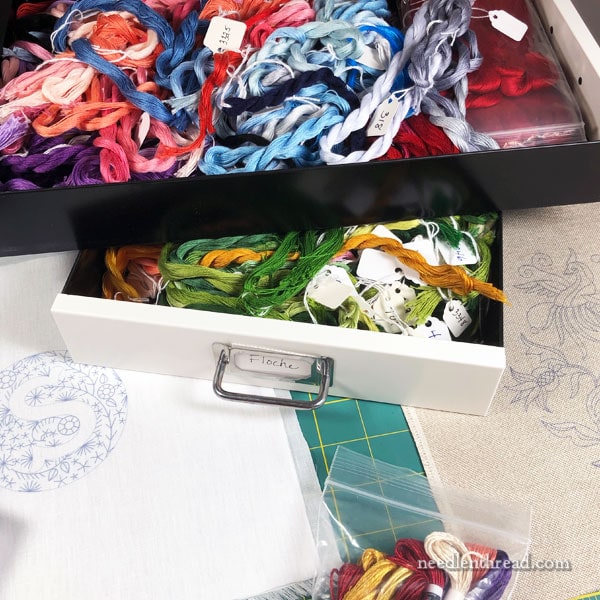
I mentioned the overdyed floche that I’ll be using on one of the projects just the other day.
I’m supplementing the overdyed floche with solid colors of floche, and so I have my floche drawers out. I’ll select colors as I go and make notes of which ones I use where. I definitely won’t be using all 90+ colors of the thread! But, when you’re first working through a project like this, it’s nice to have a selection of colors to pull from, to get just the color effect you want.
Read More About Silk and Floche
You can read more about stitching with silk embroidery threads (and different types of silk) in the following articles:
Silk Embroidery Thread 101: Getting Started with Silk
Silk Embroidery Thread 101: Twisted Filament Silks
Silk Embroidery Thread 101: Flat Silks
You can read more about floche in these articles:
Floche: What’s Not to Love
Three Good Reasons to Try Floche
Floche vs Coton a Broder
Cotton Floche vs Coton a Broder Up Close
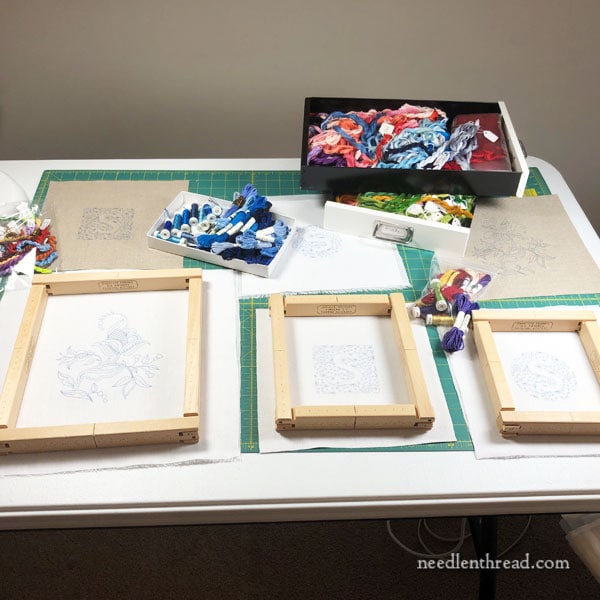
And I’ve pulled out a few stretcher bar frames to set the projects up on, so that they’re ready to stitch when I’m ready to stitch.
For the smaller projects (the “S” initial), I could use a 5″ hoop, but I like using stretcher bar frames and the like when I’m working on something that I’ll be hopefully photographing (and videoing) along the way. It gives a more open area around the stitching for photos.
I also want to make sure the designs fit inside the ring of the hoop or the sides of the frames, because I plan to use some beads on a couple of the variations.
Whether you’re using a frame or a hoop doesn’t matter so much with regular surface embroidery. If you’re adding beads or metal threads to your embroidery, you’ll want to make sure the design fits inside the hoop or frame.
The whole point of a hoop or frame is to hold the fabric drum taut – this will give you the best results at the end of the project. Use whichever you’re most comfortable with, that works best for you, but make sure your fabric is drum taut and not warping and wobbling about inside the hoop or frame.
Read More about Hoops & Frames
You can read about Evertite stretcher bar frames and how to set them up here.
You can read about using a hoop or a frame here.
You can read about choosing a good hoop here.
You can read about binding a hoop for hand embroidery here – a method that helps keep fabric clean and taut.
You can read about how I like to set up my embroidery hoop here.
And That’s a Start!
Lots of tips and tutorials generally spin out of the projects that I do, so I’ll share those with you along the way, with progress and whatnot. The tips and tutorials that I share can be applied to any hand embroidery projects, not just my projects, so in that way, we can all learn together.
I like to share my pitfalls and (hopefully) methods of recovering from them, too – because we all have pitfalls now and then!
And eventually, once I know the designs, colors, threads, and stitches all actually did work together as planned to create a harmonious and pleasing project, I’ll make all that information available, too.
So now I’m off! I’m excited! Fun times ahead!
