You can iron your embroidery.
I do it all the time!
But I hear from a lot of people who say, “I know I’m not supposed to iron my embroidery, but I have this tablecloth…” or “…I have this pillowcase…” or “I finished a flour sack towel and I want to give it as a gift…”
Everyday, usable embroidery is bound to need ironing, especially for a nice presentation. If it’s being displayed in your home or it’s being given as a gift, you want it to look crisp and nice and fresh and smooth and pretty!
I’m going to use one of these scroll towels that I finished last week as an example of how I iron everyday, usable, embroidered household linens.
And you’ll find information at the end of the article about the ready-to-stitch towel sets available for this design group.
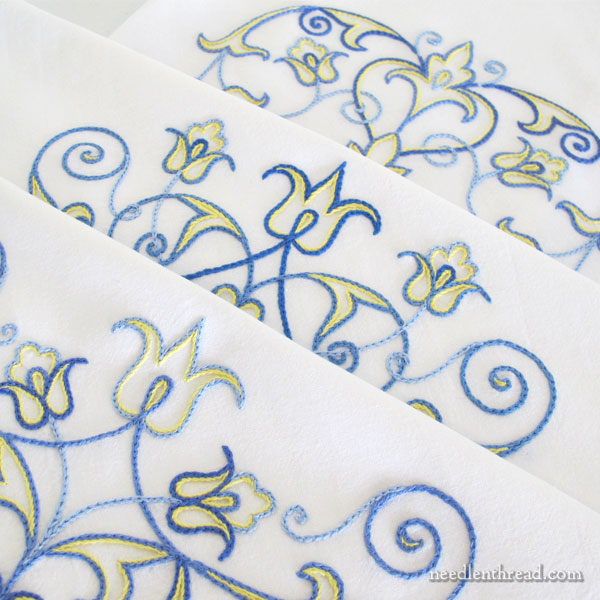
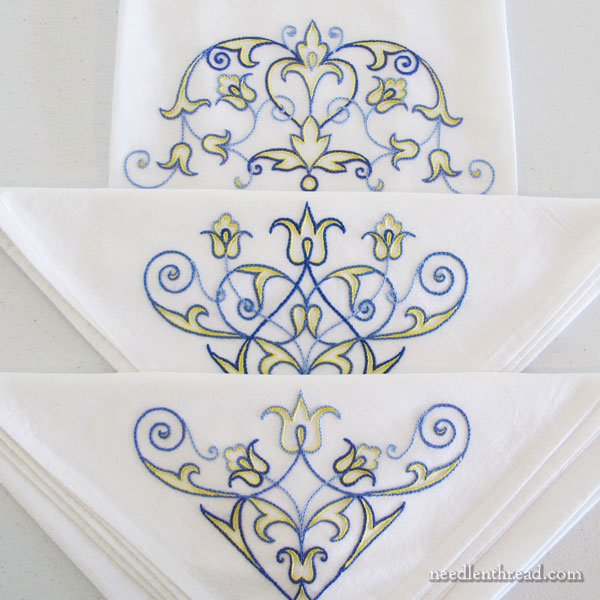
Here’s the finished set of scroll designs that I stitched last week on white cotton flour sack towels. They were fun to stitch, they worked up relatively quickly, and I am really pleased with the results. I’m including the set in a gift basket for a wedding shower.
The towels didn’t come off the hoop looking like this, though! Of course, they had hoop rings and they were a bit wrinkled from where I held them while I was stitching.
They weren’t dirty or anything, so I didn’t need to launder them.
Sometimes, we don’t want to launder something we’re giving as a gift – and that’s fine! Just take care when you’re stitching it to keep it really, really clean.
When you give it as a gift, include laundering instructions, if you haven’t already laundered them once.
Keep in mind, these types of goods are meant to be used, so they will need to be washed. They don’t have to be used for mopping up spills, of course! They can be used for decoration only, or just to dry hands, or as bread basket liners, tea cloths, or what-have-you. But no matter how they are used, they will eventually need to go in the wash.
In the case of flour sack towels, I generally launder them with whites or light colored items, on warm or cold, and tumble dry on low or hang to dry. Because they are household, everyday items, they should be able to go through the regular laundry.
Prepare the Ironing Board
The first thing I do when I need to iron an everyday household linen that has embroidery on it is to prepare the ironing board.
It’s very simple, really! I use two or three clean, plain flour sack towels smoothed out on the surface of my ironing board as a “pad” for any embroidery.
You can use any smooth, clean, relatively soft fabric surface, in layers, to provide padding for embroidery when you’re ironing. I don’t recommend terry cloth or any fabric that has texture. If you have a couple clean, plain pillowcases, they would work, too!
Since I have a surfeit of flour sack towels, though, I just use two or three, smoothed out on my ironing board, to pad the board for the embroidery.
If you don’t have any extra fabric or flour sack towels for this, and you’re ironing a flour sack towel, don’t worry! The towel itself can provide the padding!
Just fold the towel in such a way that the embroidery is face down on a couple layers of that very same folded towel. So, if the embroidery is in a corner, fold the towel in quarters, so the top of the embroidery is inside the folded corner, facing the rest of the folds of the towels.
To Mist or Not to Mist?
If your flour sack towel is not too wrinkled or marked from your hoop, you might not need to mist it with water.
However, I always think the ironed finish looks better when misted, so I usually mist the back of the embroidered area (and the whole towel, once I’m ironing the rest of the towel) with water.
I use the misting water bottle that I mentioned in this article to spray the back of the embroidery and the rest of the towel. It provides a beautiful, even, light mist of water.
Iron!
With the iron pre-heated to the cotton setting, I iron the back of the section of the towel where the embroidery is. The embroidery itself is face-down on the padded surface.
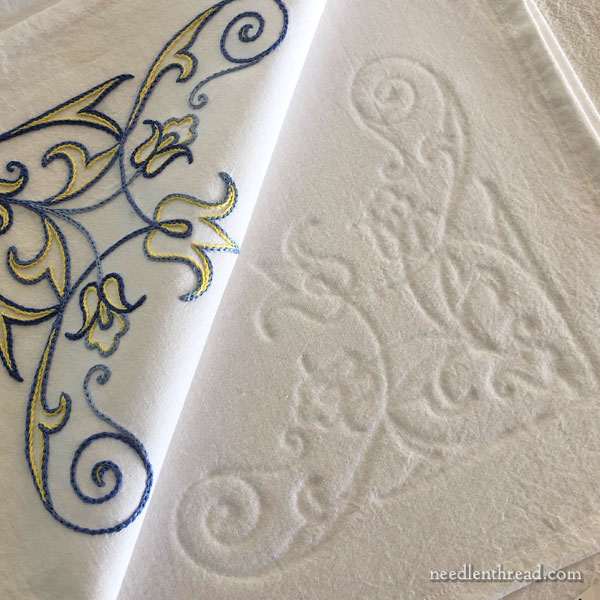
When you peel back the embroidered part of the towel from the padded surface, you’ll see the indentation of the embroidery in the padding.
This is my favorite part of ironing embroidery! I love seeing the design implanted in the fabric!
The whole point of upside-down ironing like this is to keep the stitches from being utterly flattened by the iron.
If you need to, you can now turn the piece over, and iron around the embroidery, but not over the embroidery. Iron the whole towel!
When you finish ironing, you should have a nice, smooth, beautiful finish on the fabric, and the stitches should still retain their plumpness. They won’t look like they’ve been flattened under a steamroller.
Simple, but effective!
Scroll Design Towel Sets
I have a few scroll design ready-to-stitch towel sets available in the shop here on Needle ‘n Thread. If you want to pick up a set, now’s a good time to do it!
Please make sure to read the product description, so that you know what you are getting.
It is a 3-towel set, and each towel has a slightly different version of the design on it. One towel has a larger design centered at the lower edge, and the other two have designs in the corner, opposite the hanging loop.
The designs are pre-transferred for you, crisp and clear, and ready to stitch. It’s not a full kit – there are no threads and no instructions – but you can find stitching tips for this set of towels here.
