Well, howdy there!
I took a long weekend off from writing so that I could accomplish a few goals in the studio, have a little R & R break before the summer push, and get in some organizing on my publishing calendar. I needed to do some Thinking Work.
Did I accomplish everything I planned to accomplish? … uh. No. But I made some headway. I think the Rest & Relaxation got in the way. And that made it a great weekend!
I hope you had a great weekend, too!
I managed a bit of progress on my Jacobean design. See:
As far as embroidery goes, I had a hopping weekend. As in, frog-hopping. Some call it frogging, this process of removing stitches, based (loosely) on the noise a frog makes (rippit, rippit).
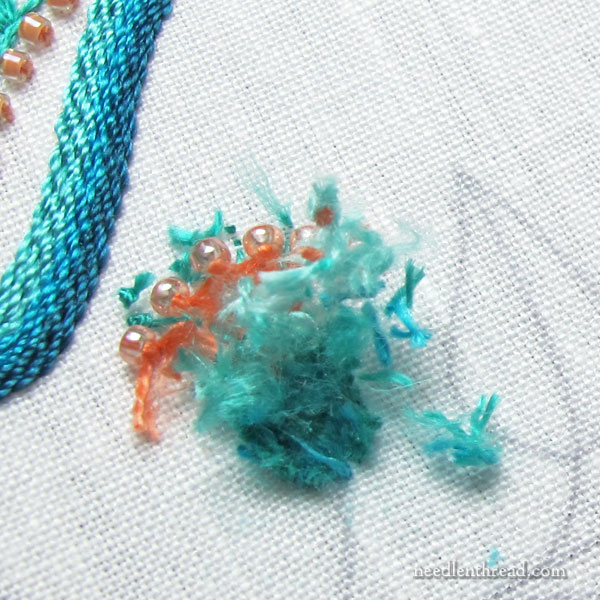
And I did a lot of it.
It’s probably a good thing I didn’t take pictures of every instance, or that’s what the next ten photos would be.
Tools for Frogging
I have three essential tools for frogging:
1. Tiny, sharp scissors
2. Tweezers
3. Tape
With those three items, you can remove embroidery stitches and bring your fabric back to decent condition before attempting the next round of trial and error.
I always cut my stitches on the back of the embroidery first, and then I use tweezers to pull out as many threads as I can. Then, I carefully cut through the front of any remaining stitches, and use the tweezers to remove the rest of the threads.
Finally, I take a little piece of tape (like Scotch tape), and roll it into a tube with the sticky on the outside, and I use my finger to roll this makeshift tiny lint roller all over the fabric, front and back, where the stitches were removed. This lifts off any extra fuzzies and bits of thread.
Mental Preparedness
I always go into a project like this one with a clear expectation that I’ll be doing a lot of frogging.
When I make my way for the first time through a design, I have ideas of what I want to do, but until those ideas are actually worked out in stitches on the fabric, I’m not 100% certain of them.
And sometimes, they’re a flop! And that’s ok! That’s part of the whole process for me.
So I prepare myself mentally for the exercise of picking out stitched areas, knowing in advance that it’s part of the process. Thinking this way helps keep me from being frustrated when something doesn’t work out and I have to pick out the embroidery.
It’s fun to put the embroidery back in and be able to say, “Ah yes, that works better.”
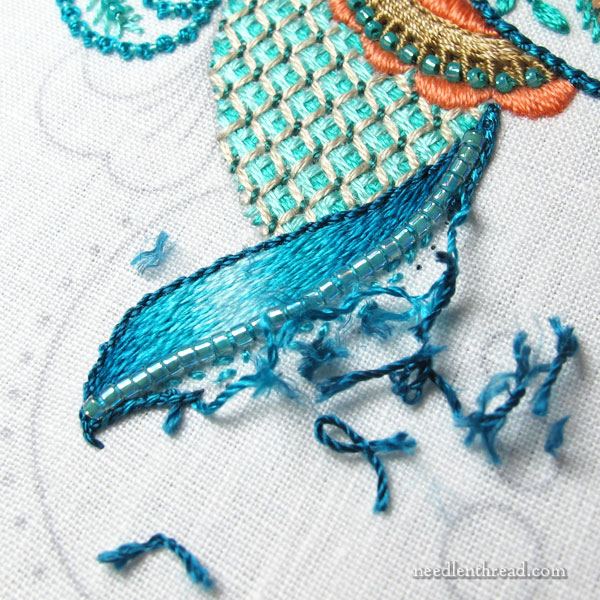
On the top of the swoosh in the image above, it was originally satin stitched in the darker blue found in the shading on the lower half of the swoosh. I forgot to take a picture.
I didn’t like it. It was far too heavy. It looked like Sam the Eagle’s brow. The whole thing was frowning!
I also didn’t like the beads I had chosen – they were too large.
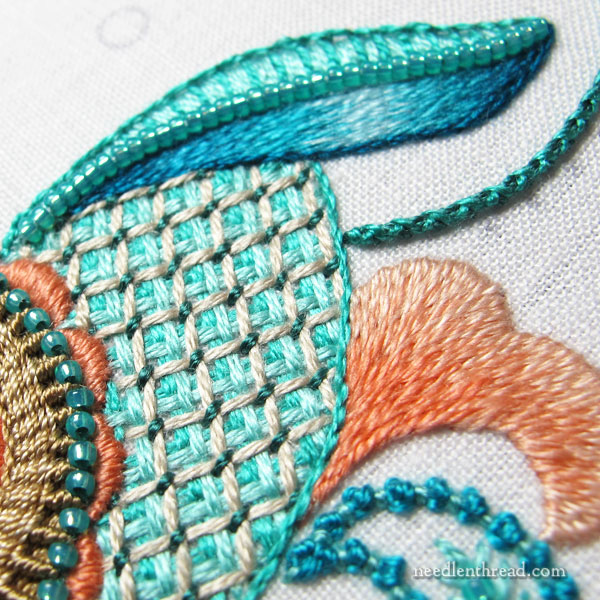
So I cut all that out, leaving the shading on the lower part of the swoosh, and decided to lighten the top half up by bringing in the greener colors. Instead of satin stitch, I worked a spaced buttonhole stitch over padding, and then, between the spaced buttonhole stitches, I filled in with some straight stitches.
I switched the beads out to the smaller 15/0 round seed beads that are part of the brown sandy element below.
Originally, the outline below the shaded part of the swoosh was worked with a silk perlee, but I found this too heavy. So I switched to a single strand of Soie d’Alger, and I liked it better.
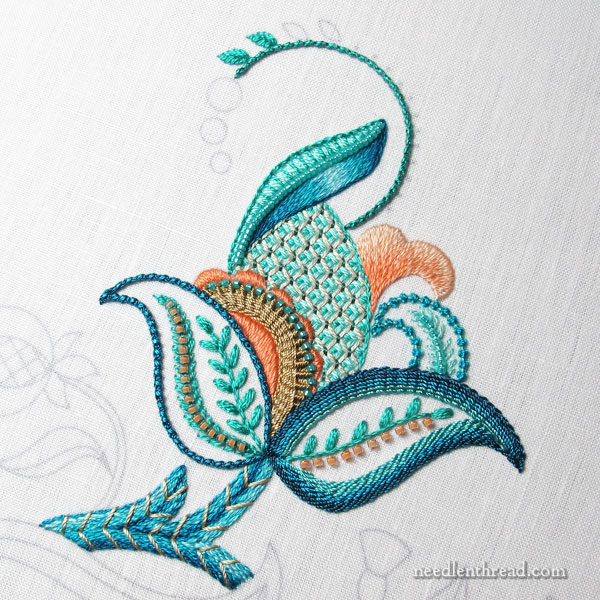
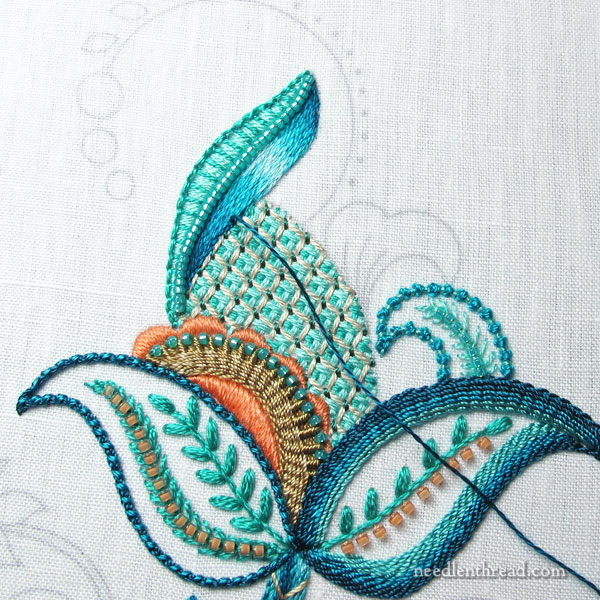
Once I was finished with the top swoosh, I worked the side elements, one outlined in Palestrina stitch and filled with a beaded fly stitch accent, and the other filled with long short stitch shading.
I also began working up the curled stem above the element, using chain stitch in Soie Perlee, whipped in both directions with one strand of Soie d’Alger, to bring in the brighter green that I wanted to use on the little leaves.
Then, I left that section for a while, so that I could think about the treatment of the circles at the end of the curled stem.
I contemplated adding an outline to “embolden” this long and short stitch element.
Lately, though, I’ve noticed so much outlining going on around long and short stitch in the embroidery world. It is starting to come across as very trendy, and it reminds me coloring books.
I’ve developed a slight distaste for the look – so much so, that I almost didn’t outline under the swoosh in the darker blue. But then, there are times when outlining is necessary. It’s just not necessary all the time. So I decided to forego it around the long & short stitch element for now.
If, in the scheme of things, there needs to be a touch of something to enhance that element, I’ll think about that when I’ve conquered a bit more of the whole picture.

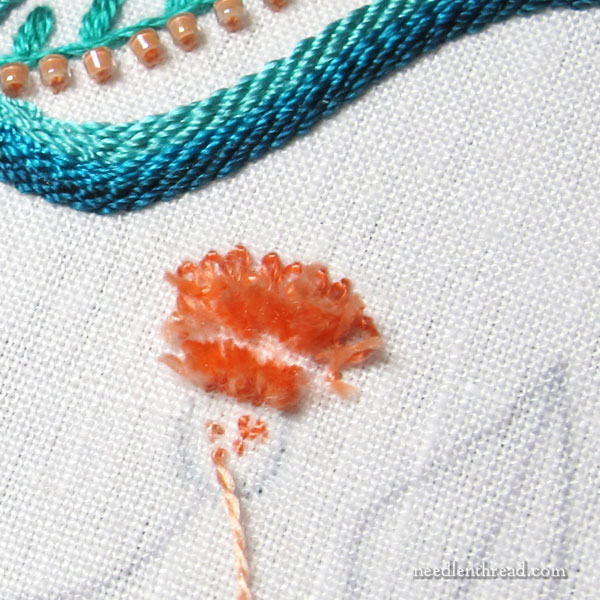
From there, I moved down to one of the little buds, and I stitched like that (above) and I disliked it greatly!

I re-did it several times, and eventually ended up with this (above), which I liked much better.
While I was working on that, I was thinking about the circles at the end of the curled stem above the main element. Once I finished this little bud, the circles were clear in my head…
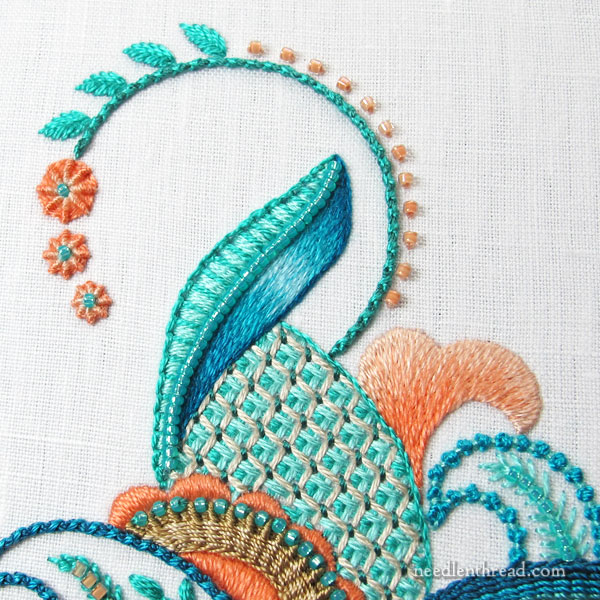
… so I went back up there, and worked them as ribbed wheels, shading them from light to dark and adding a small 15/0 seed bead in the middle.
I added some 11/0 beads (delicas) in the orangy-coral along the vine.
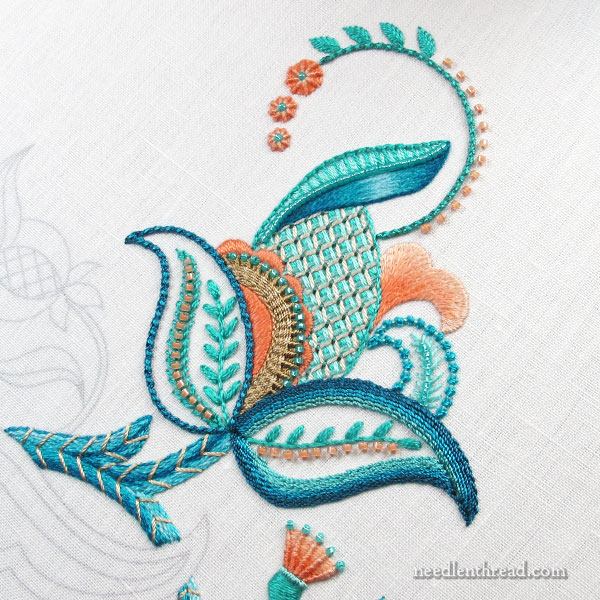
And there we are! I think it came together fairly well. I’m pleased with where it is so far, and I’m ready to move on to the next elements.
That’s where I am on this project. If you want to see the backstory, you’ll find the last update on the project here, with a full index of previous articles at the end of that page. I’ll be adding an index for this project under Tips & Techniques in the main menu on Needle ‘n Thread, where I have a list of hand embroidery projects & step-by-step lessons that you can follow along with.
If you have any questions, comments, suggestion, feel free to join in the conversation below!
