Finally and at long last… the Jacobean piece is finished.
Yay! Yesterday was a banner day, so I’m calling this embroidery project officially finished.
Now, that doesn’t mean I won’t make some changes. There are a few spots that I am mulling over, but I’m going to set the project aside – still on its frame – for a week or so. Then, when I look at it fresh in a little while, I’ll be able to make better decisions if I want to adjust anything.
Today, I’ll show you the finished design, close ups of the different sections, and share some random thoughts on the project as we examine it.
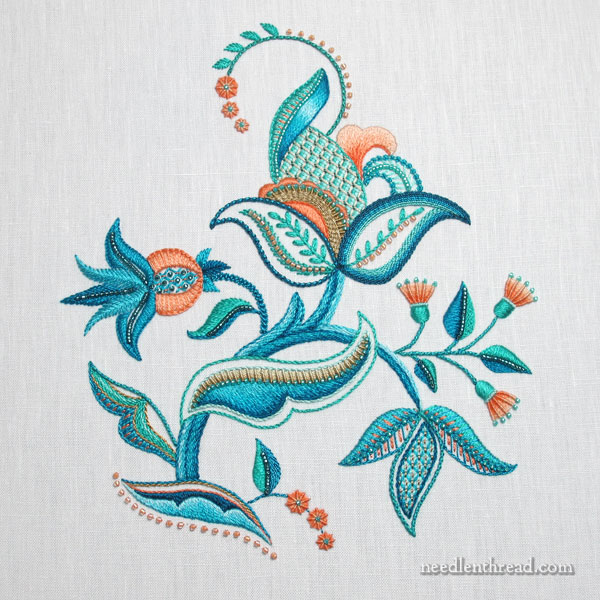
So there’s the finished sample, all stitched up.
Although I’ve already mentioned materials in earlier articles, I’ll recap: I used Au Ver a Soie silk threads – Soie d’Alger (a spun, stranded silk) and Soie Perlee (a twisted filament silk) – and Miyuki beads, both 15/0 round seed beads and 11/0 delicas. The ground fabric is linen.
The entire design, from farthest points north and south, is just barely 7.5″ high, and from east to west, just under 7″ wide.
I used Evertite stretcher bars, a Needlework System 4 table stand, my favorite Dovo scissors, a variety of needles (but mostly a #7 crewel and a #10 beading, both John James), my BlueMax table lamp for lighting, I sat on a Buoy by Steelcase with a gel seat cushion in it, and I listened to several books along the journey, including a good chunk of Kristen Lavrensdatter, a bit of Watership Down, and The Franchise Affair by Josephine Tey.
The finished piece will most likely be framed, and I will either hang it in my studio or give it as a gift, the latter being the most likely. I don’t keep a whole lot of my own work (except smaller sample pieces I can use for demos).
I think that should pretty much cover all the curiosity questions! If not, there’s space in the comments below for whatever occurs to you!
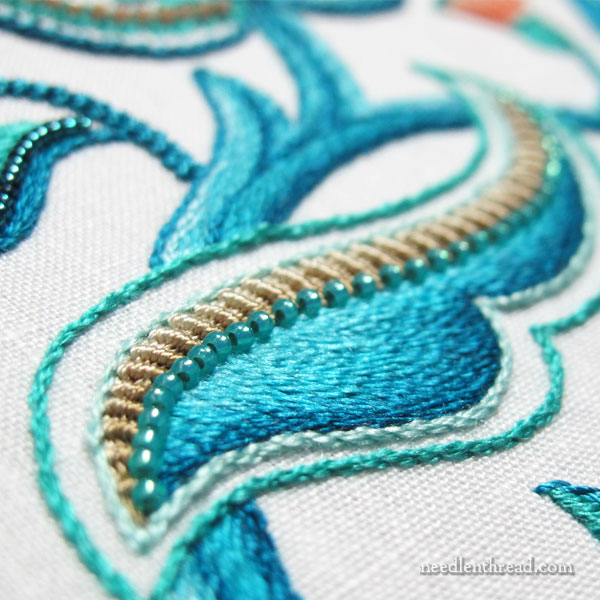
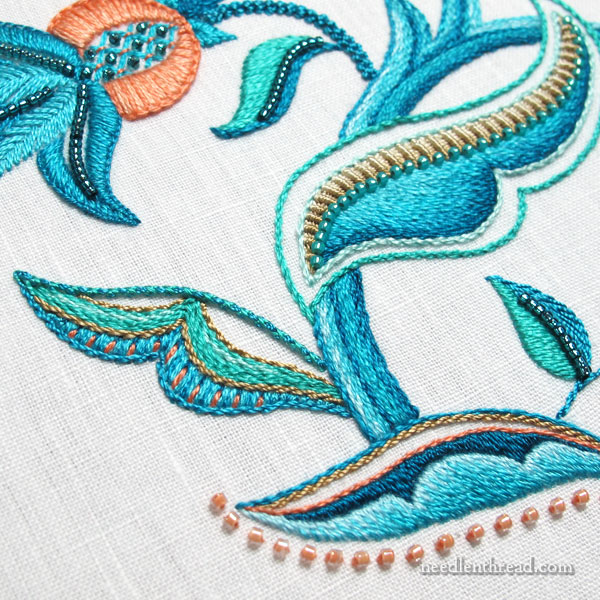
This element – the central large leaf crossing the stem – is probably my favorite, because I love the colors on the shaded part (they remind me of the sea), and I like the texture and shading on the ribbed area above the shading.
That area – the sandy textured strip – is simply the same stitch you would use on a ribbed spider web, only it’s worked in a long line.
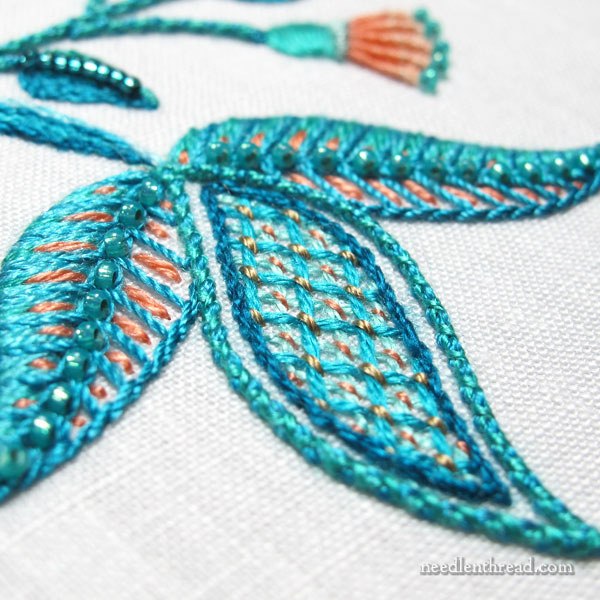
This bunch of leaves is a conglomeration of different stitching techniques. The heavier outline on the center leaf is a simple chain stitch with Soie Perlee, and then it’s whipped in both directions using one strand of Soie d’Alger in a lighter green.
On the “satin stitched” area on the tops of the side leaves, that’s actually a mix of both Soie Perlee and Soie d’Alger – and it’s not really satin stitch. The leaves are worked with a wheatear stitch down the middle in the Soie Perlee. I filled in between the arms of the wheatear with straight stitches in Soie d’Alger.
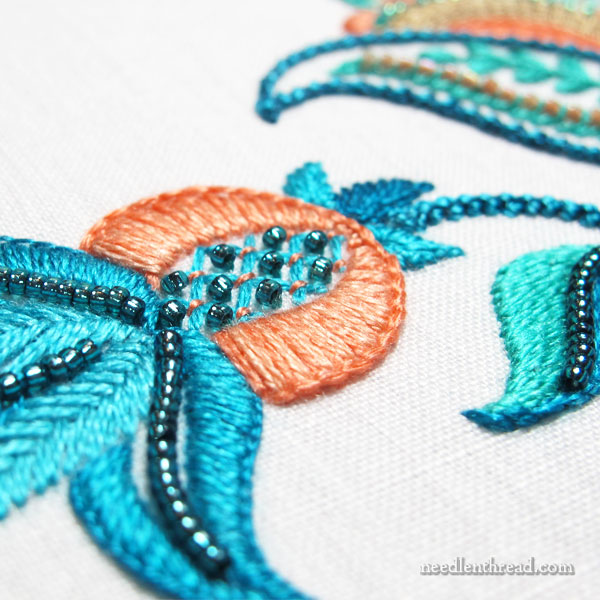
Oh, the troubled pomegranate element! This element gave me a wee bit of grief, but I like how it eventually turned out.
When I took these photos, I had not yet gone over the piece carefully, so some of the beads are a bit wonky. Once I damp stretch and block the whole piece before framing, I’ll go over the whole thing carefully and adjust any discombobulated beads.
These were the last elements I finished at the base of the design.
I’m still holding out on the leaf on the left. I may add something to that one.
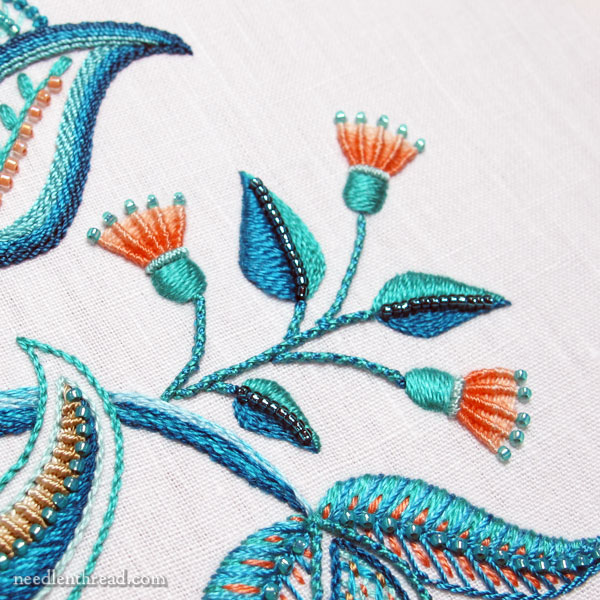
Finger flowers!
More ribbed stitch on these floral elements, and a touch of satin stitch and bullion knots.
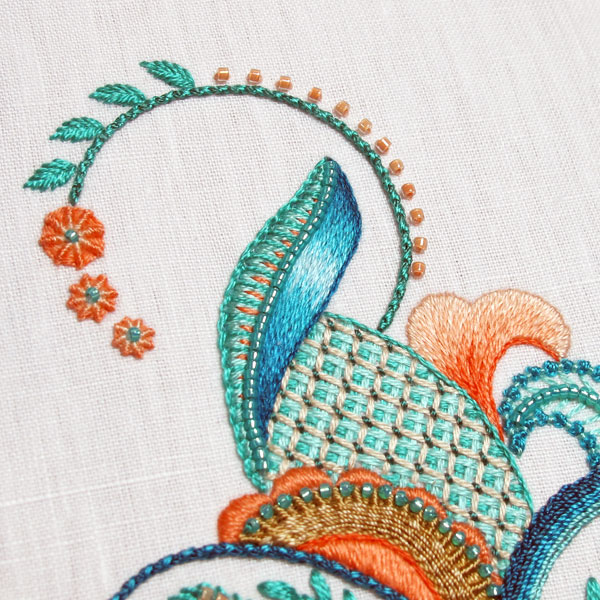
I’m rather fond of the swirl at the top of the design. I’m not sure why – is it the ribbed wheels that look like candy, dripping off the end? Maybe.
The stem here is the chain stitch in Soie Perlee again, whipped both ways with a strand of Soie d’Alger.
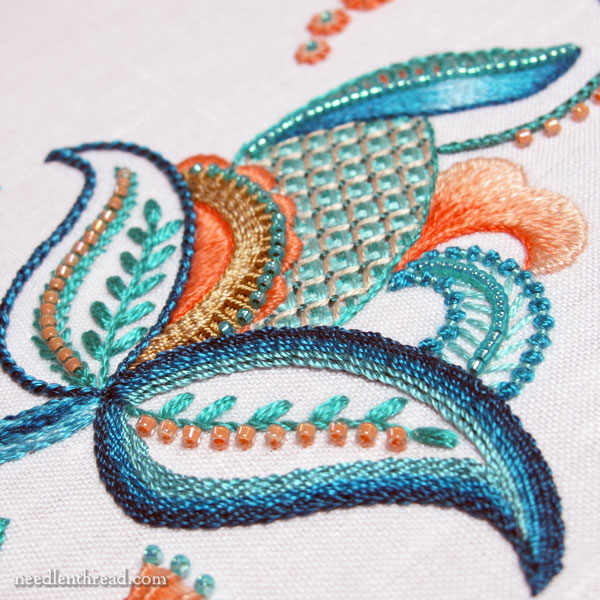
Aside from the main stem on the piece, it all started with this area, the main element at the top of the design. I was feeling my way through things somewhat tentatively at this point. I didn’t quite know where the design would take me, although I had some ideas of what I wanted to do with it.
Many of those ideas changed as I worked through the whole design.
It’s funny how this happens, because I might map out pretty clear ideas of what stitch to use here or there, or what color combinations, but then, while I’m actually stitching, I make abundant changes in the area I’m working on. Those changes necessarily affect anything I’ve mapped out previously.
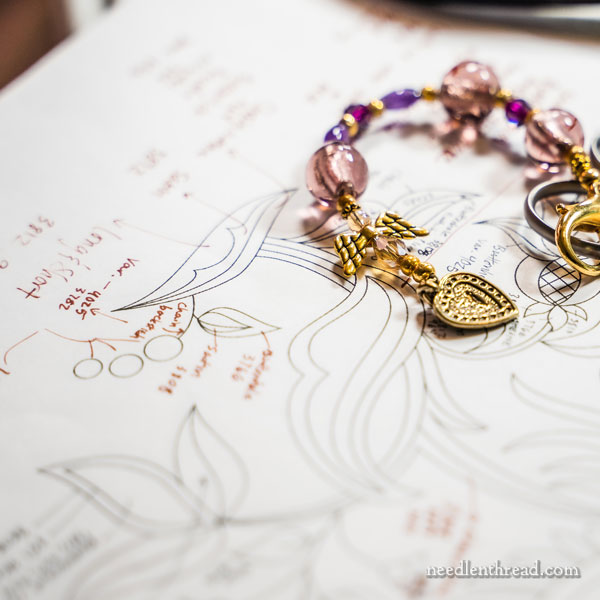
To keep up with changes – and there are many of them! – I keep a couple print-outs of the design and a pen on my work table.
Every time I finish an element satisfactorily, I note on the design exactly what I did in that spot – what stitches, what colors and threads types, etc.
Sometimes, because there might be a lot going on in a particular design, I have to use more than one copy of the design to do this, because I end up with so many lines and arrows and notes and so forth all over the paper. But at least I have a pretty clear record, at the end, of what I actually did.
And most often, it is a far cry from what I initially thought I was going to do!
So that’s this project, for now. I consider it officially finished, though there could be one or two minor tweaks before I frame it.
I’ll make a project index for all the articles that cover the development of this embroidery project, and list the project index in Tips & Techniques in the main menu here on Needle ‘n Thread, under Hand Embroidery Lessons & Step-by-Step Projects.
The index will post as a regular article first, as soon as I have a chance to put it together for you.
Now What?
So, what’s going to happen with the project? Many of you have asked if it will be an e-book, a kit, etc.
It will most likely be a combination – an e-book and a kit in a limited run – depending on the supply chain. I’ll get back to you on that as soon as I know. I have to work up the instructions, though, and that will take a little time. I’m still trying to get together the voided monograms and the floral heart designs from earlier this year. That’s been a bear! Lots of stuff going on with that one.
In the studio, other projects are already underway, too. I have a beginner’s silk and goldwork piece that’s in the works – I’ll share some bits of that with you next week. I’m also working on an ecclesiastical embroidery project and preparing a small number of ecclesiastical projects for some folks who wanted a custom class. We’ll see how that pans out!
I’ve also got a bunch of other techy things I’m working on behind the scenes. I can’t wait to share the results of that… if I could only conquer the learning curve a little faster.
Finally, you’ll find ALL the ready-to-stitch towel sets now in stock in my shop. The newest restock is the Folky Flakes set, but they’re all there at this point, so if you’ve been waiting, you’ll find every design available!
Happy Independence Day weekend for those here in the US! And a jolly weekend to everyone all around!
See you Monday!
