Years ago, I wrote a series of articles on hand embroidered writing. The articles take you step-by-step through different embroidery stitches that work well for embroidered writing.
Today, we’re going to add a stitch to that list – particularly, a stitch known today as the “Quaker Stitch” because it was formulated to work as the stitch used for the text on the Quaker Tapestry. The stitch is a combination of split stitch and stem stitch, so, in effect, it is a split stem stitch.
While at first glance, it might look like stem stitch, the ingenious splitting of the “inside” portion of the stitch raises the stem stitch line up to make a nice, precise, slightly raised line ideal for writing with thread.
Let’s take a look at it!
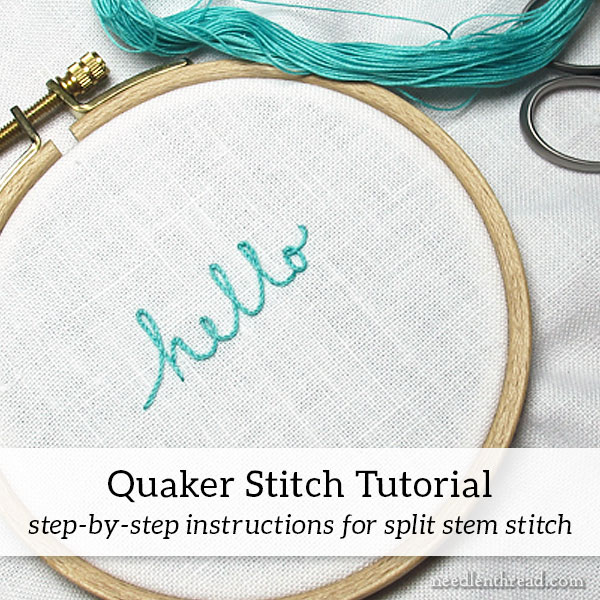
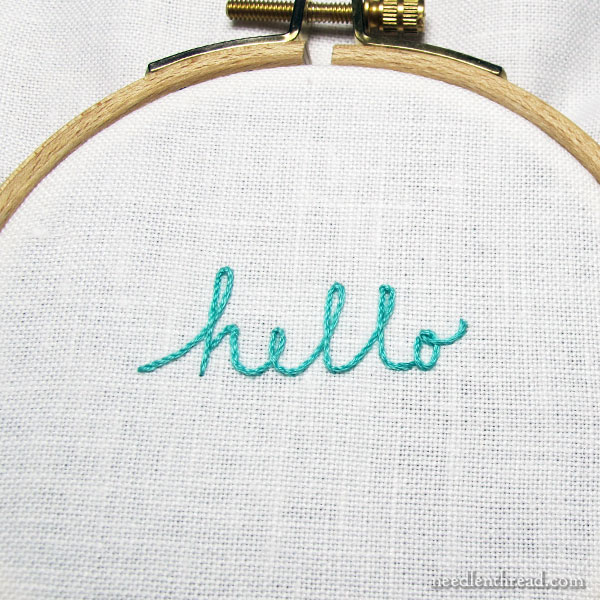
See what I mean? At a glance, the embroidered “hello” above looks pretty much like it was worked in stem stitch. But there’s definitely something about it that’s slightly more chiseled, or defined, than stem stitch.
Quaker stitch makes the script sit up just a little more proudly, a little more clearly, and little more precisely on the fabric.

From the side, you can get a good sense of the raised look of the line.
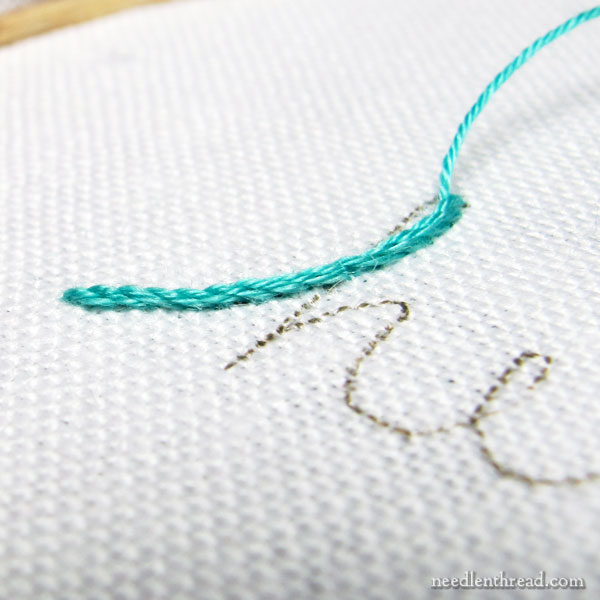
On the “bottom” side of the stitch (imagine the lower side of the stitch, when you’re working from left to right, and looking at the lower portion of the stitch), you see a well-defined stem stitch.
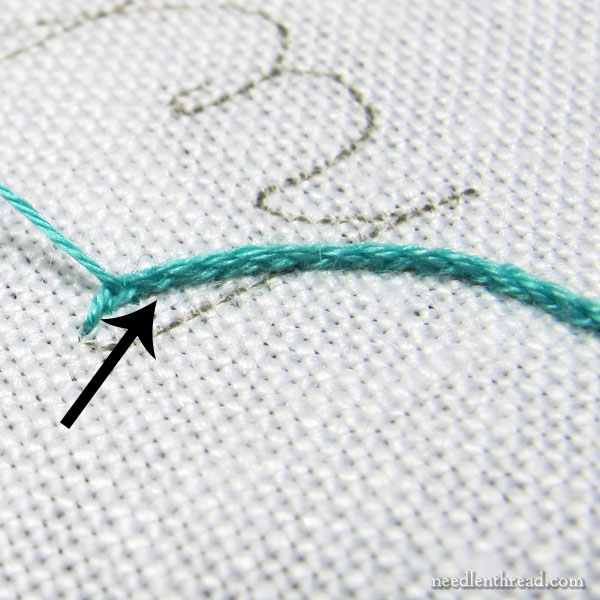
If you look at that left-to-right line from the top down, you’ll notice that there’s a somewhat braided look to the line as it sits right next to the fabric. You can see what looks like an extra layer of stitching underneath.
It’s not really an extra layer of stitching – it’s just a modification on the stem stitch.
So let’s take a look at how to achieve this.
In this tutorial, I’m using coton a broder #25, also known as broder special – I’ve written about coton a broder here, if you’re not familiar with it.
I chose coton a broder because split stitch invariably works best on thread that is non-stranded. That is, the thread is not meant to be split into smaller threads for stitching. It is meant to be used exactly as it comes off the skein. Perle cottons are non-stranded threads, but they are much more tightly twisted than coton a broder and they are made out of fewer (and fatter) plies.
You can definitely practice the stitch with three strands of regular stranded cotton embroidery floss.
I’m stitching on linen, using a #7 crewel needle.
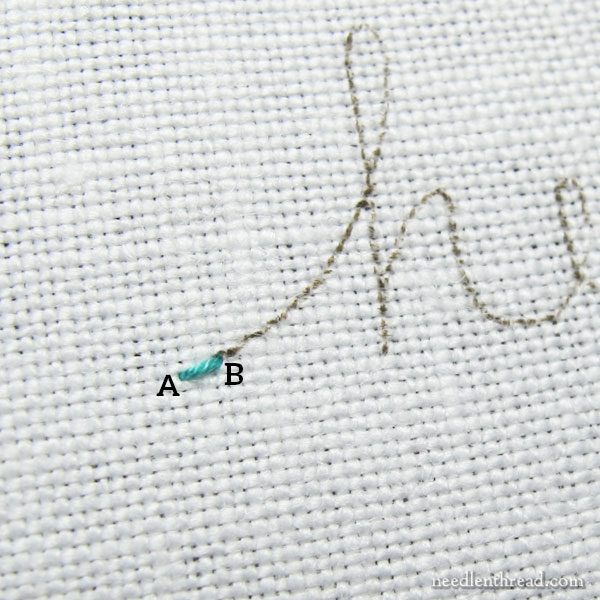
Begin at the beginning of your line, making a small straight stitch from A to B. This stitch is about one-half to two-thirds the length that your stem stitch will be. This stitch is probably about 1/8″long. How long you make your stitches will depend on the thread you use and the look you want. Practice and experiment!
You don’t have to be super precise on the measuring of the stitch.
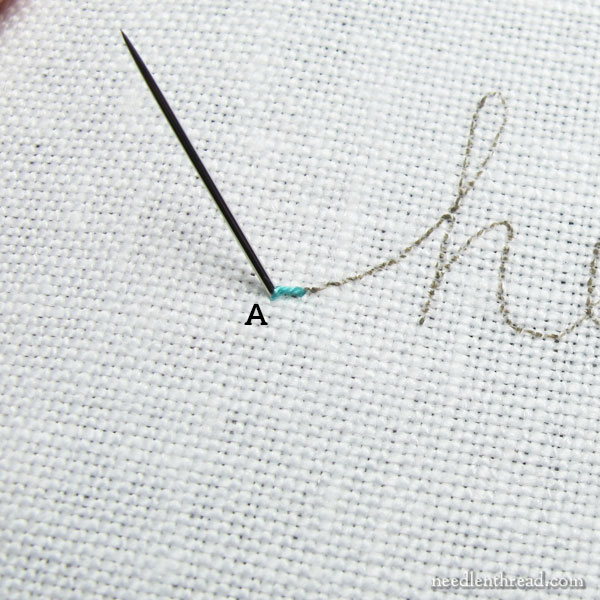
Bring your needle and thread to the front again at A (same hole).
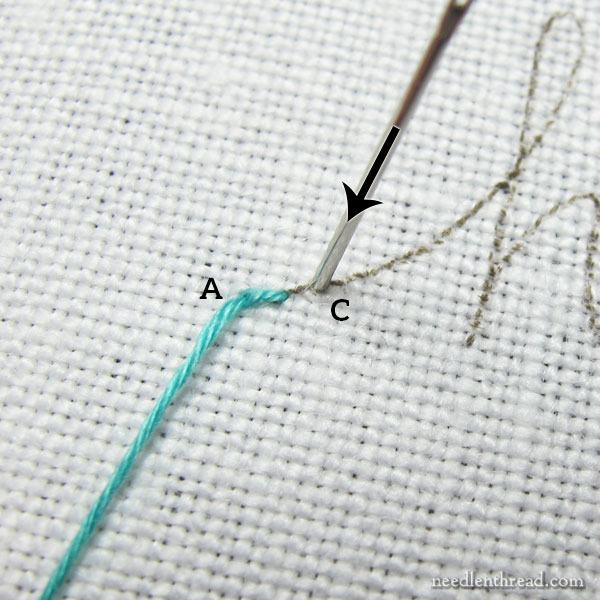
Then, moving past B, take your needle down into the fabric at C, which is about one-third the length past the straight stitch A-B.
Don’t pull all the way through. Just like regular stem stitch, this stitch is easier when you leave a small loop of working thread on the surface of your fabric for working the next part of the stitch.
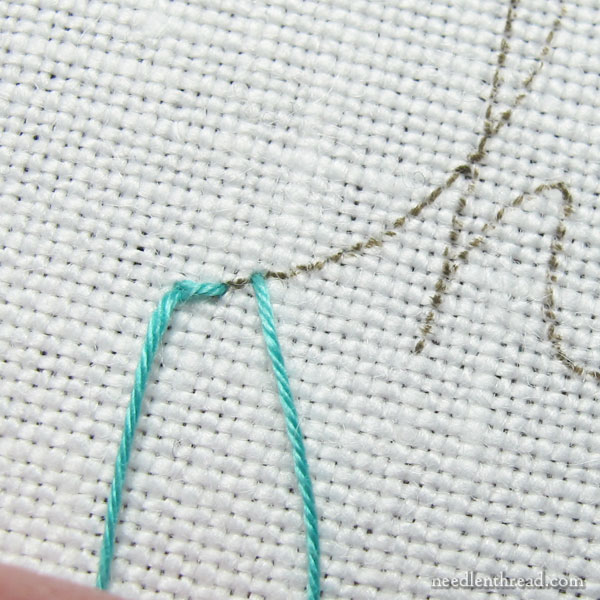
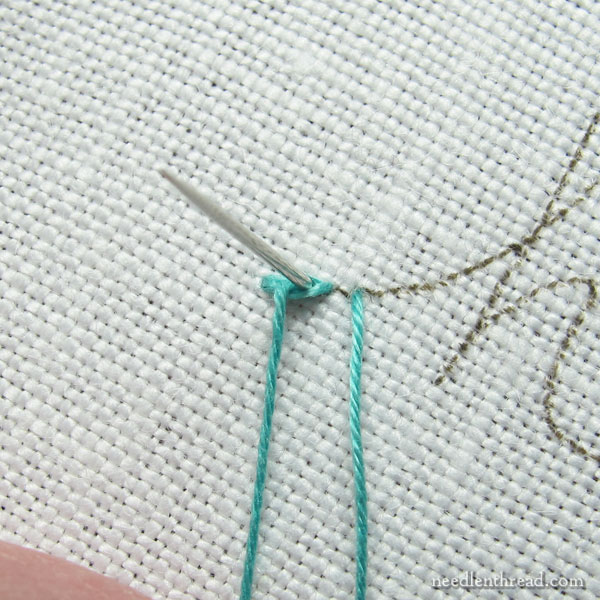
This should be your configuration of thread after pulling your thread mostly through and leaving a small loop on the front of the fabric.
Hold the loop below the line (working left to right) so that the stitch A-B is clearly exposed.
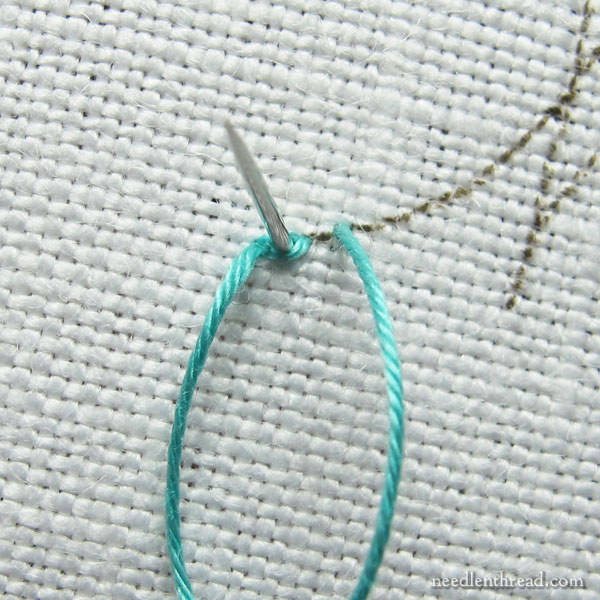
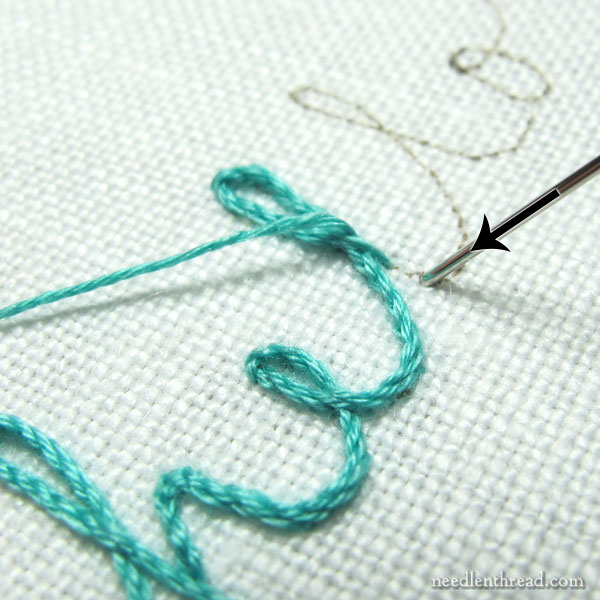
Then, bring your needle and thread to the front again, splitting A-B, as shown above.
This is the split stitch portion of Quaker Stitch.
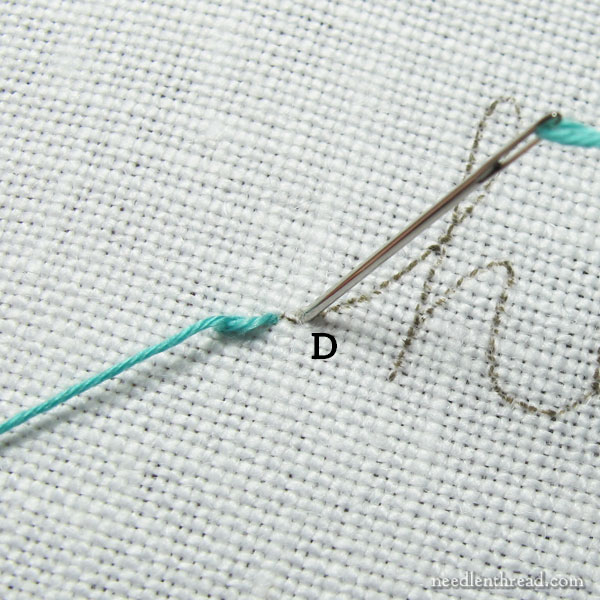
Pull your thread through, so that the stitch A-C lies on the fabric, and move forward to D, about one-third to one-half the length beyond C.
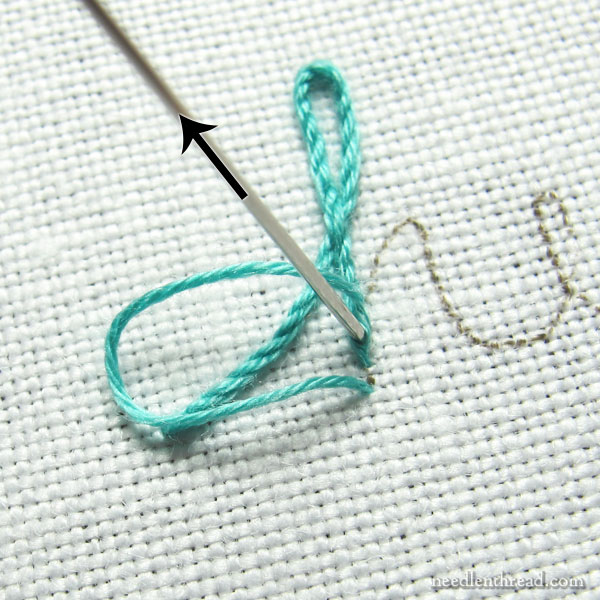
Take the needle down into the fabric, leaving a small loop of working thread on the top of the fabric.
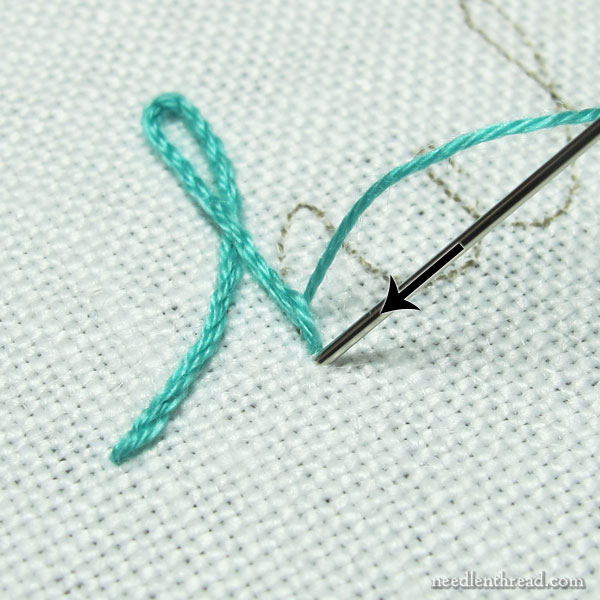
Come up into the stitch A-C, in the forward half of the stitch, splitting it, as shown above.
You can see at this point that the whole sequence of this stitch is simply a stem stitch, but that, instead of coming up in the fabric in front of the previous stitch, you’re going to come up into the front portion of the previous stitch and split it.
When it comes time to end a line of split stem stitch, work the splitting portion of your last stitch…
…and then pull through, then take your needle and thread to the back of the fabric just past the end of the stem stitch.
Starting a New Thread
If you need to start a new thread while working Quaker stitch, here’s how to do it:
After splitting and pulling the thread through, take your stitch forward for the straight, long portion of the next stitch and pull the thread all the way through, without leaving a loop on the front of the fabric.
This will cover up the stitch you’re supposed to split, but that’s ok.
Turn the work over and end off your old thread.

To start your new thread, bring it up in the portion of the stitch you’re supposed to split, before the last long straight stitch you just took. You’ll need to nudge that straight stitch to the side, to access the stitch behind it and split it.
Now just continue forward as before!
Why, hello!
Wasn’t that fun?
This is a wonderful line stitch, and definitely worth adding to your embroidery repertoire! Take some time to practice it, and I think you’ll agree that it’s a great stitch for fine lines and for writing with thread!
You can read more about the Quaker Tapestry here on their website. It’s a fascinating community embroidery endeavor!
If you happen to be a patron of Needle ‘n Thread over on Patreon, you’ll find a PDF version of this tutorial over there shortly. Don’t forget to stop by and pick it up!
