Do you stitch with a laying tool?
There was a time when the laying tool was an infrequent visitor at my stitching spot, but over the years, it’s become a tool that I use more and more frequently. On some types of embroidery, I can’t do without it!
Today, I’m going to recap what a laying tool is, talk about how to use it, and explore what to look for in a good laying tool.
A laying tool is a smooth tool that you hold in your non-stitching hand, that the working thread you’re embroidering with can pass over or cross in order to keep the thread smooth or to keep tension on the thread while you stitch. In short, it’s a stick of some sort used to manage embroidery threads.
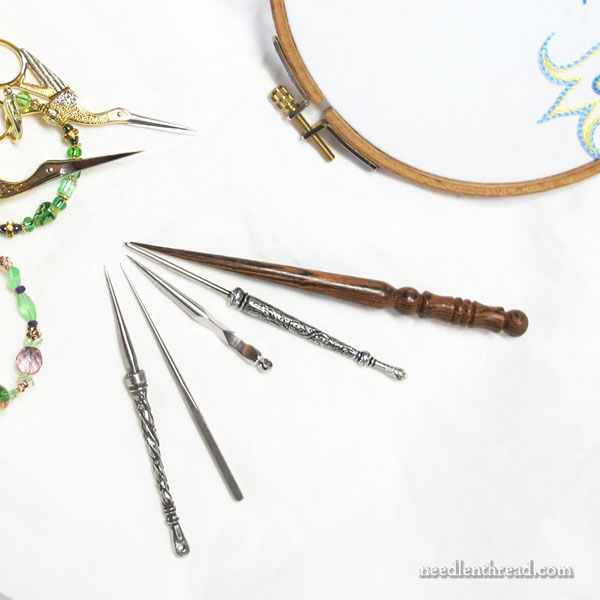
Laying tools come in all different shapes, sizes, and materials. They can be long and slender, short and stout. They can be made out of metal, wood, bone, glass. They can be simple or elaborate, expensive or cheap. They can be specifically made as laying tools – or they can be some other thing, adapted to work as a laying tool.
The One Main Requirement of any laying tool is that it is smooth. It can’t be fissured, splintered, or rough in any way. It must be as smooth as glass in order to do its job well.
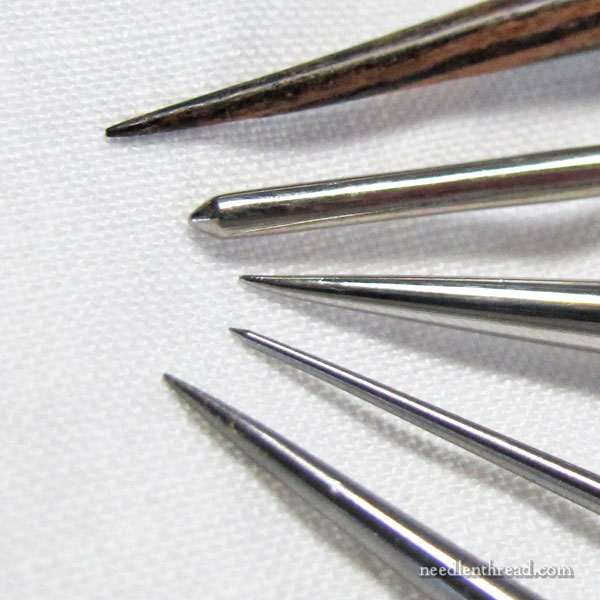
Laying tools can come with a variety of points – from sharp, needle-like points that could do serious damage as a weapon (surely there’s some kind of murder mystery out there, where the victim fell prey to a mad embroiderer wielding a laying tool?), to blunt, softly rounded points, to anywhere in between.
The shape of the shaft might be perfectly straight and long, or thick and tapered, or short and stubby. It might be thinly tapered and delicate.
It really depends on what you want to do with your laying tool.
If the tool is to serve a dual purpose – if it is meant to act as a stiletto (to pierce or open holes in fabric) or an awl (also used to open wider holes in fabric) – then it stands to reason that the tool would have a sharp point, and that the shaft would taper somewhat, to give you the ability to gradually open a hole in fabric by pushing the tool through and forcing the hole open.
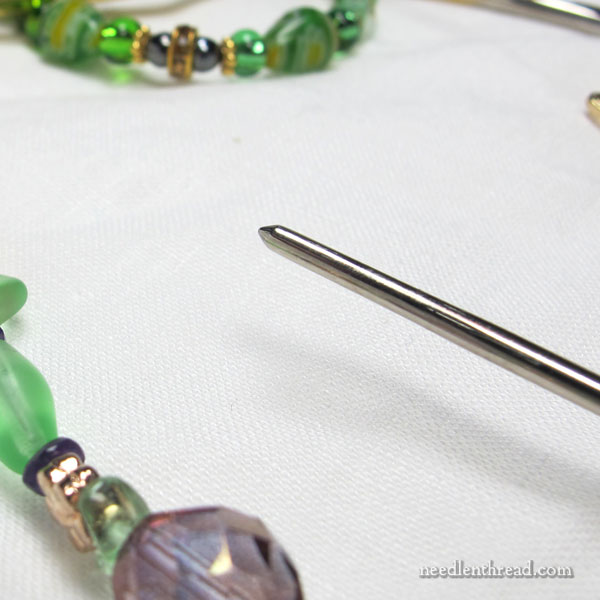
If, however, your laying tool is simply meant to manage your working thread while stitching, then a blunt tip and a straight shaft will do the job just fine.
How To Use a Laying Tool
Normally, a laying tool is held in your non-dominant hand while stitching, so that it can hold the working thread away from the fabric while you’re taking a stitch and then slowly move the working thread towards the fabric to place it just so, while you pull the stitch through.
You’ve probably guessed that both hands are free from holding your hoop or frame while you’re stitching. So, in most circumstances, a laying tool is used when your frame or hoop is held in a stand of some sort, leaving both hands free for stitching.
As you get used to using a laying tool and get super comfortable with using a hand-held hoop or frame, it’s very possible to use the tool while you’re holding your hoop or frame, but it is more efficient and simpler if your work is held in a stand and both of your hands are free.
To see how to use a laying tool to keep your threads under tension and smooth, take a look at my video here for using a laying tool. It is essentially how you’d use a laying tool, even if you’re just using it to keep thread under tension, rather than trying to keep multiple strands of thread from twisting as you take a stitch.
For the Beginner
There is much to be said for investing in the right tool for the job. However, you might not want to spend a lot of money on a laying tool at first, because you might not be convinced you’d ever use one.
So, instead of investing in a laying tool, you can make use of some things that you might already own, in place of a laying tool. For example, if you have a very large needle (the kind you’d use for upholstery or something similar), you can use it in place of a laying tool. If you have a knitting needle, you can use it in place of a laying tool. Any shaft-like thing that’s perfectly smooth and easy to hold works.
If you’re ready to invest in a laying tool, you might look around first at the various types and sizes available. If you don’t have a local needlework shop that you can browse through, then you’l have to go online to explore.
Here are some links to previous articles I’ve written about laying tools that I like. Maybe you’ll find something in here that appeals to you, too:
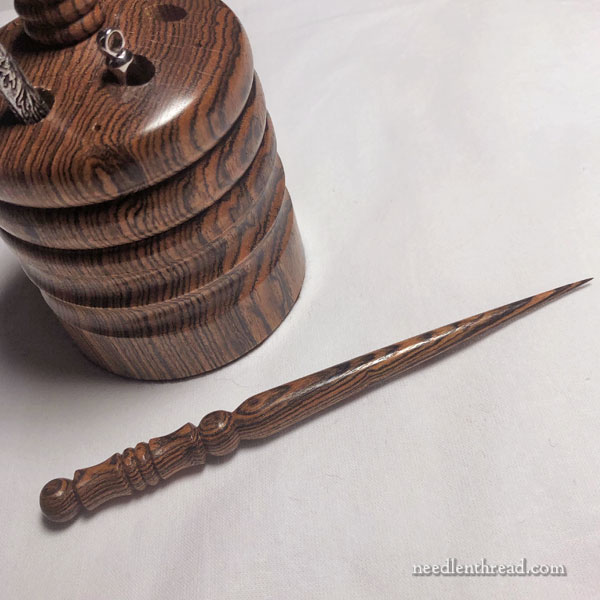
Laying Tools & Tool Blocks – These wooden laying tools and matching tool blocks (holders for your tools and scissors) are beautifully made by James Carter at Stitch-in-Turn. He’s got all kinds of laying tools, matching tool blocks, and other needlework tools for the stitcher who likes to accessorize.
Aficots & Laying Tools – I recently reviewed these wooden laying tools and matching aficots. If you’re not too into satin stitch, the aficot might be superfluous, but the laying tools are gorgeous. They have very sharp tips and a delicate taper. The square handle keeps them from rolling and makes them comfortable to hold.
The Dull Tool & Why You Need One – this article explores my blunt-tipped laying tool that I use especially when I’m working on already densely-stitched embroidery. I don’t want to snag previous stitches with a sharp tool!
Jenny’s Little Laying Tool – this is my review of Jenny Adin-Christie’s little stiletto / laying tool, which is a short, nicely weighted, tapered, somewhat sharp-tipped tool. I love it for close, precision work and for when I’m working in a small hoop.
What’s a Laying Tool – this is an earlier article I wrote on laying tools. I’ve developed certain likes and dislikes about laying tools since that article, that I guess come with experience. For example, I don’t like laying tools that have odd finishes on them (like sparkly or glitter paint, that have been highly varnished), and I don’t like laying tools that have bead accents on the ends of wooden shafts. The accent pieces are often snaggy and, frequently, these types of accents will bend or break off.
Mellor for Goldwork – This is an article about the mellor, a tool used for goldwork. It can also be used as a laying tool.
Trolley Needles
There’s also a tool called a trolley needle that fits over your finger and has a laying tool shaft connected to it. Once you get used to using it, it’s a nice tool! But it does take some getting used to – and in the meantime, it’s a good idea to keep your hands away from your face!
Try It!
I’ve recently been using a laying tool with this project that I showed you last week. I use the tool primarily to keep tension on my thread while working tiny stem stitches with floche. It keeps my thread from over-twisting and it helps ensure a perfect placement of each stem stitch. It doesn’t really slow me down, since I’m pretty used to using the tool, anyway. And – as a bonus – it keeps my thread from knotting, because I keep it under slight tension the whole time I’m stitching.
Give a laying tool (or a substitute) a try!
With a little practice, it will become a great stitching aid and you’ll be glad you learned how to use one!
