I love little embroidery tutorials. And I love autumn. And I love pumpkins.
But if you’ve been following along on Needle ‘n Thread for a while, you probably already know all this. There are quite a few fall-themed embroidery tutorials, patterns, and projects floating around here!
The other day when I was sorting beads, I decided to play with some orange beads. The next thing I knew, I was working up this little pumpkin. So I’m sharing it with you, so that you can stitch it, too.
Maybe you’re a crazy quilter and you’d like to add a touch of fall to a square? Maybe you’d like to make up a little autumn card and add a bit of embroidery to it? Or maybe you just want to embroider a little beaded pumpkin, just for the fun of it!
Whatever the case, if you’re a pumpkin enthusiast, if you like embroidery, if a little beaded bling is up your alley – I’m sure you’ll find a use for it!
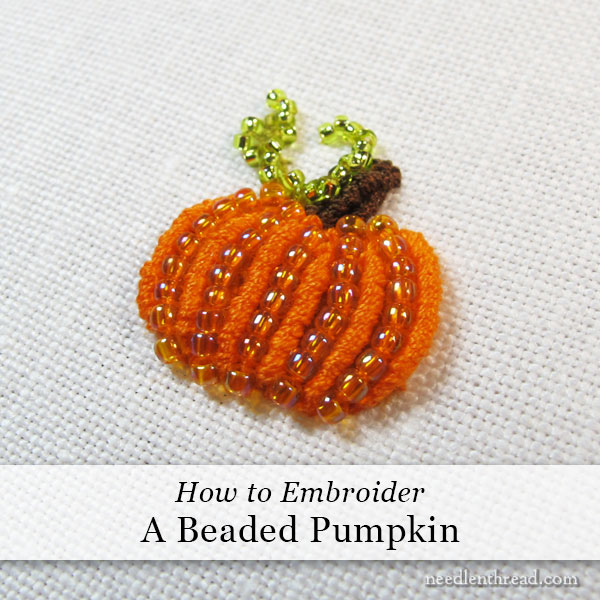
This little project is not too complicated. It consists of a felt foundation, some lines of beads (strung and then couched), some bullion knots, and that’s about it.
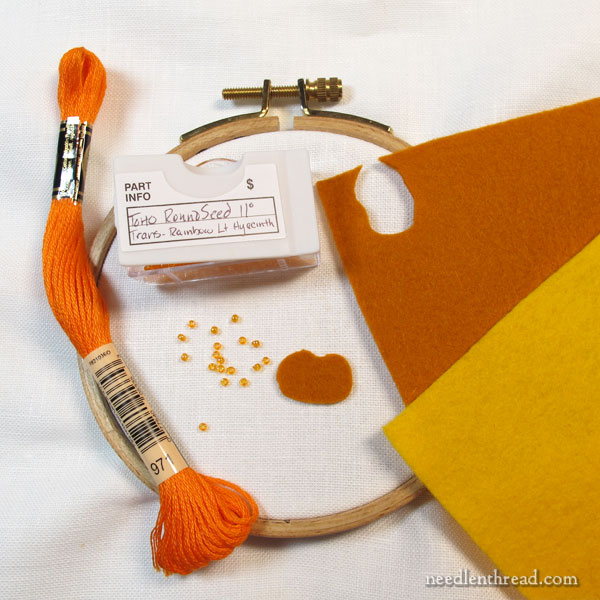
I started out with these supplies: a scrap of linen, a hoop, some 11/0 seed beads, some DMC thread (in 971), a #7 and a #10 crewel needle, a #7 milliner needle, and some wool felt.
Since I didn’t have a bright orange felt for an orange-orange pumpkin, I opted for a rusty orange. Not much felt is visible on the finished pumpkin, but I think the brightness of the felt can have an affect on how the beads look, especially if the beads you’re using are transparent (as mine are). My overall finish is somewhat muted, for such bright beads and thread.
Some other colors you could use for the felt foundation would be other shades of orange, deep golds, or deep bright yellows.
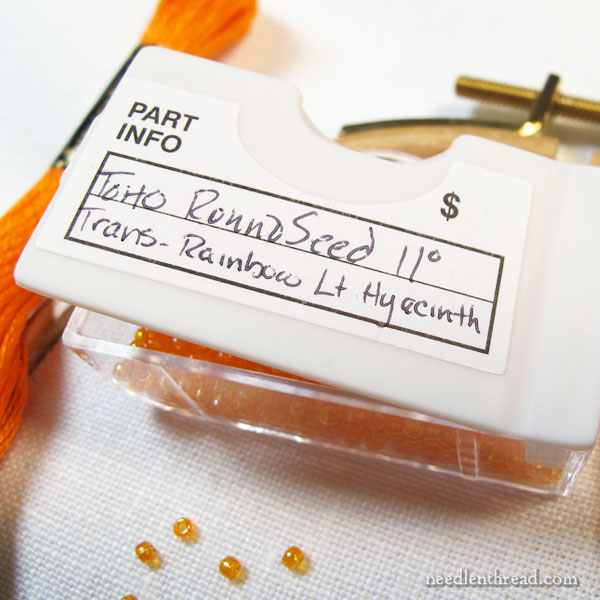
The beads I used are TOHO 11/0 round seed beads, in “Light Hyacinth,” with a transparent rainbow finish. Sorry I don’t have the color number for you – for some reason, I didn’t write it on the label when I classified these.
I cut the shape of my pumpkin out without drawing it and without a pattern. I like low, flat pumpkins, rather than perfectly round pumpkins.
Use very sharp, small scissors when cutting very small wool felt shapes. If you need to trim tiny bits off, this can only be done effectively with sharp, small scissors.
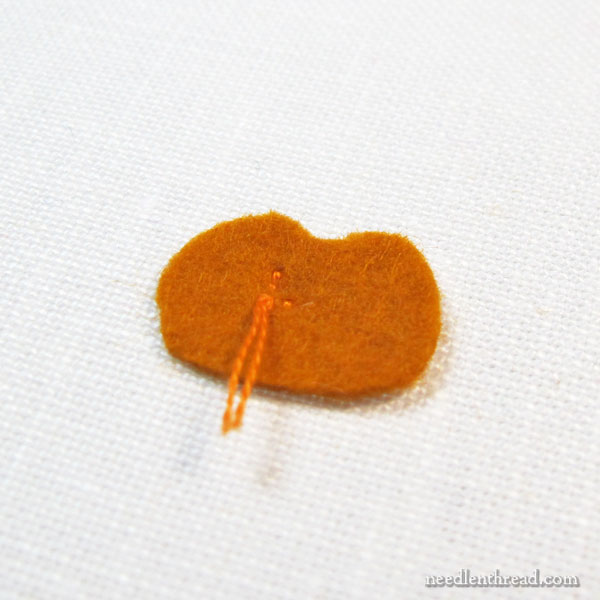
I used two strands of floss to tack the felt shape to the fabric.
Begin with a knot in the floss, and take the needle down into the fabric in the middle of the shape. Then, work three tiny stab stitches and cut the knot off. The felt is then secured to the fabric.
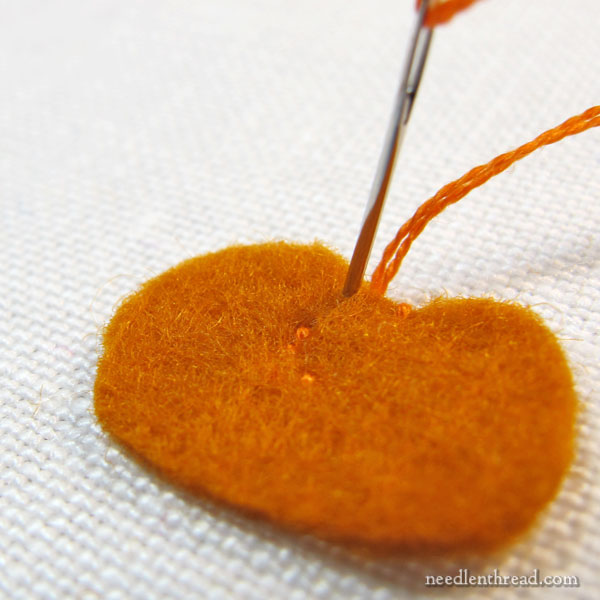
To secure the felt foundation’s edges, bring the needle up outside the edge of the felt and take it down a tiny bit into the felt, perpendicular to the outline of the shape.
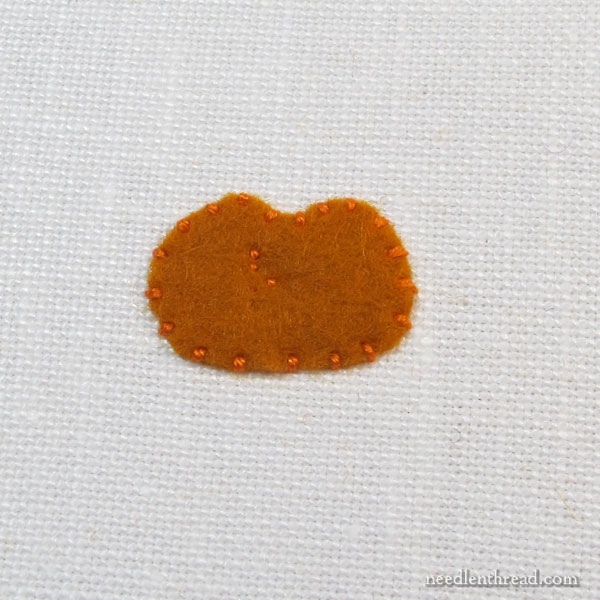
Work small stab stitches in this manner all around the shape, spacing them evenly, so that the edge is secured.
This is pretty much how you work any felt foundation for embroidery, if you want to embroider over a felt foundation – something which is commonly done in goldwork, for example.
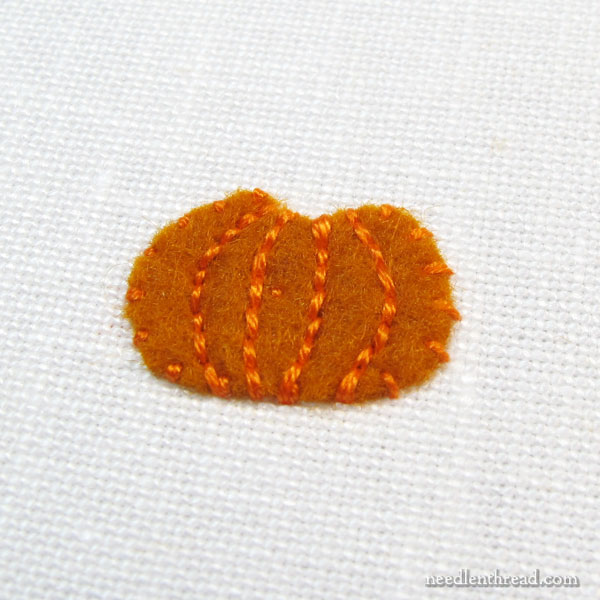
I didn’t want to draw lines on my pumpkin, because it’s a pain in the neck to draw on felt. So, instead, I backstitched my pumpkin lines on the felt, just eyeballing their placement.
It doesn’t have to be perfect! Few pumpkins are perfect.
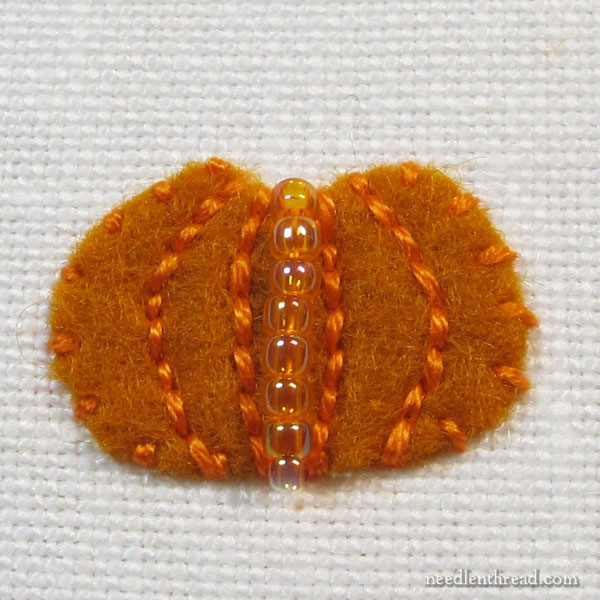
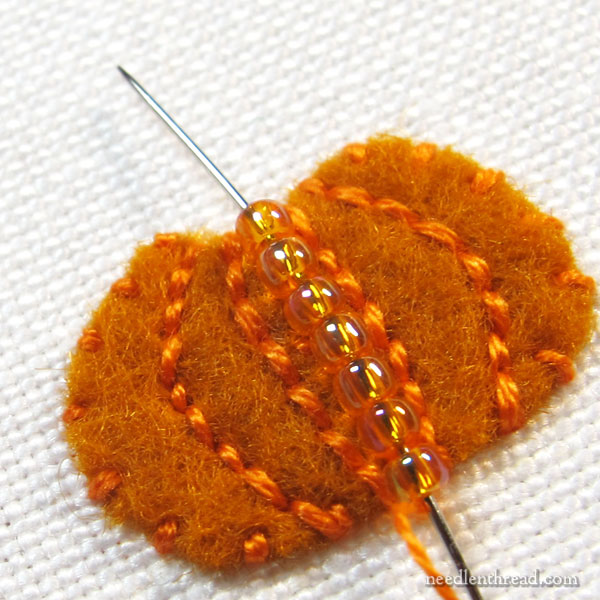
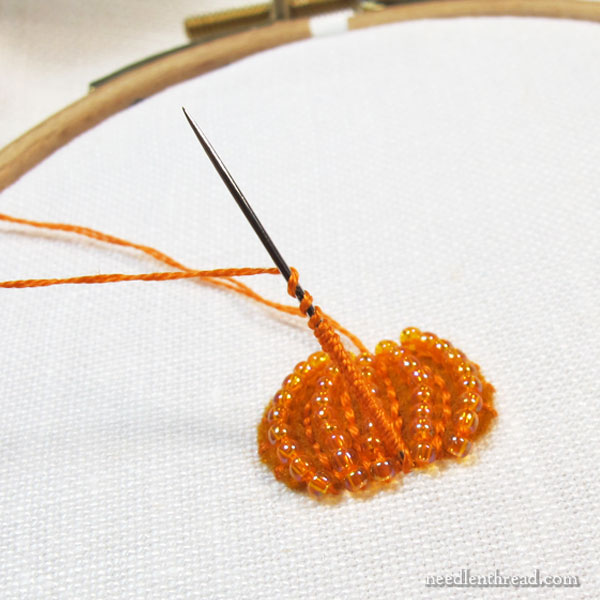
Then, using one strand of floss and a #10 crewel needle, I strung a line of beads onto the floss and stitched it down in one long stitch from the top to the bottom of the pumpkin, between two lines of backstitch.
Use as many beads as it takes to cover your shape. When you want the line of beads to curve or bow outwards, add an extra bead or so.
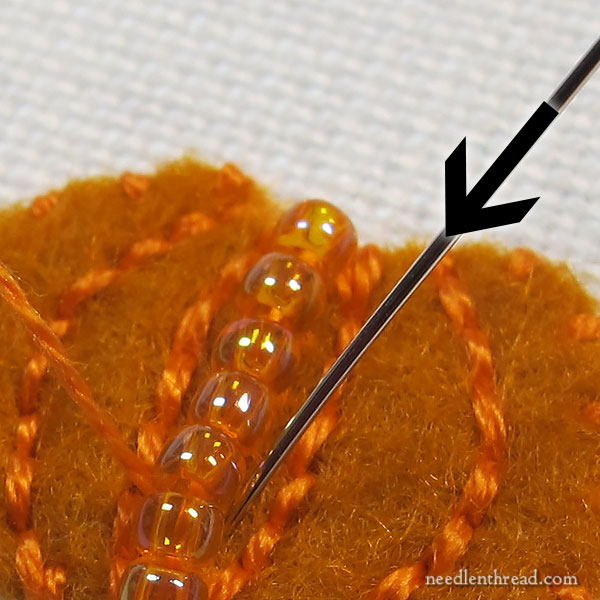
Then, go back up the string of beads and couch the thread between each bead to secure the line in place.
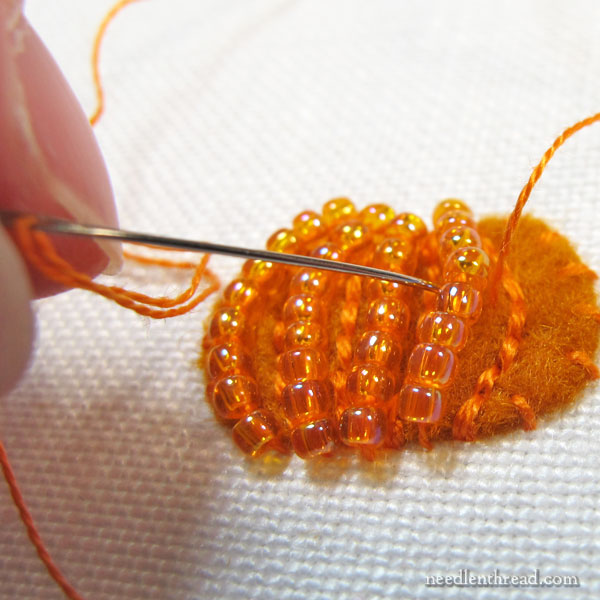
For extra security and to keep the line of beads ship-shape, pass the needle and thread one more time between the entire line of beads, and then take the thread to the back of the fabric.
Do this for every subsequent line of beads between each of the backstitched lines.
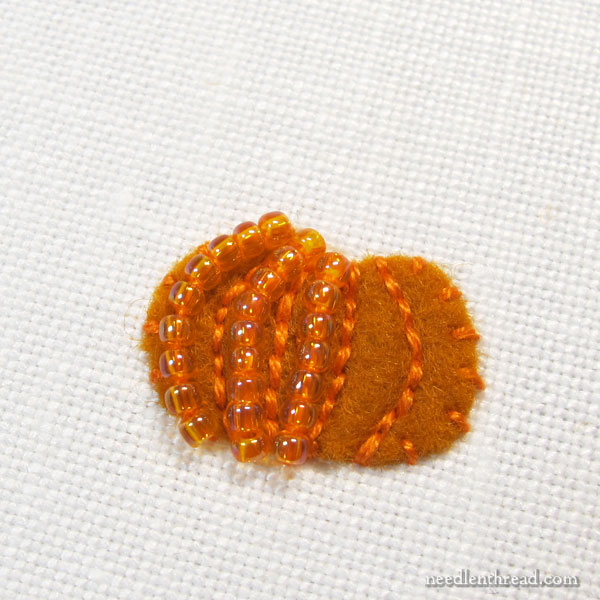
See how the side lines of beads are bowing towards the outside of the pumpkin shape?
I simply added an extra bead or two on the line to make it bow, and then I couched it where I wanted it.
When couching the bowed lines, I start in the middle of the line, so that the beads are pulled all the way out to the “apex” of the arch on the bowed line.
Once the bead lines were in place, I decided I’d alternate them with bullions.
You can always stitch your bullions first – it might be easier – but since I wasn’t sure I’d use bullions, I started with the beads. In fact, it wasn’t hard to work the bullions after the beads. You can do it either way!
I worked the bullions with two strands of floss (DMC 971), using a #7 milliner needle.
The bullions have anywhere from 25-30 wraps on them, depending on how much the knot needed to bow outwards.

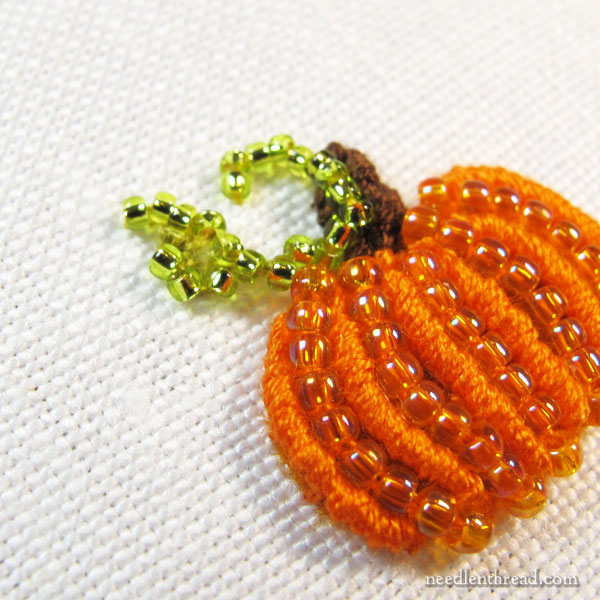
Here’s the pumpkin with alternating bead and bullion lines.
I like it! It’s not perfect, but I like it!
Next up was the stem and some tendrils.
I grabbed a length of DMC in dark brown for the stem, and I worked three bullions next to each other for the stem, leaning off to the side. The center bullion is a little longer than the two side bullions.
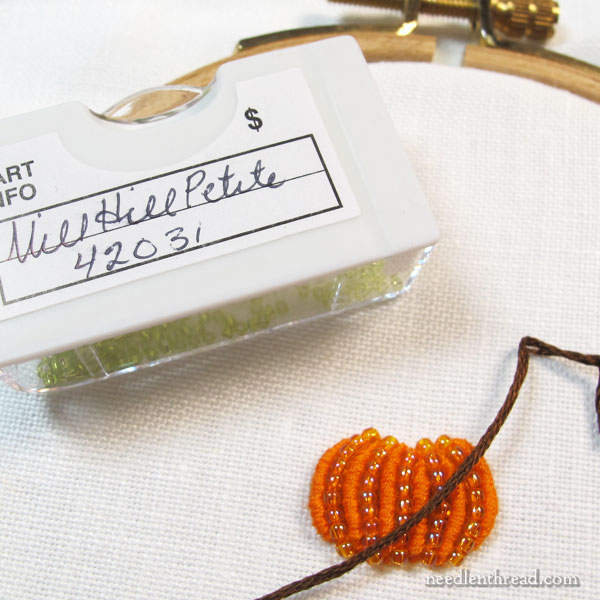
Fumbling through my bead trays, I found some green Mill Hill petit beads that would do the trick for tendrils.
I got the bright idea that I would work a beaded drizzle stitch for the tendrils.
And normally, this would work out, I think…. but…. I got a knot in the thread and I twisted the final bead out of place, so I just made do and kept going!
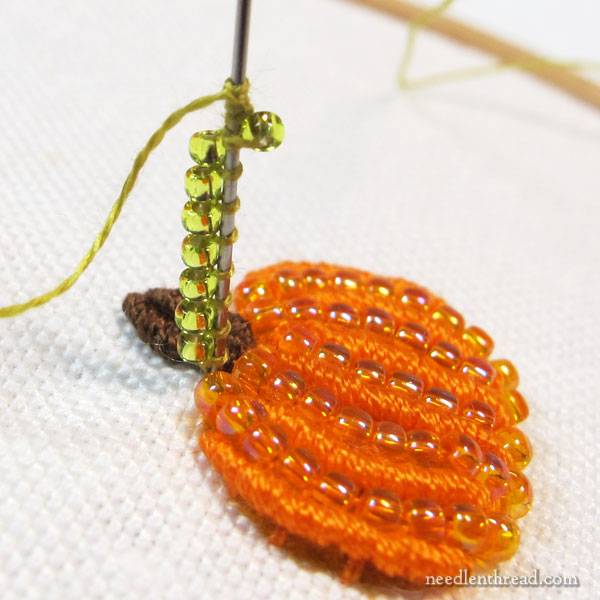
Using one strand of whatever green DMC floss was at hand, I attempted a beaded drizzle stitch.
I liked it at this point… except that I had one bead going the wrong way. This should have been a sign.
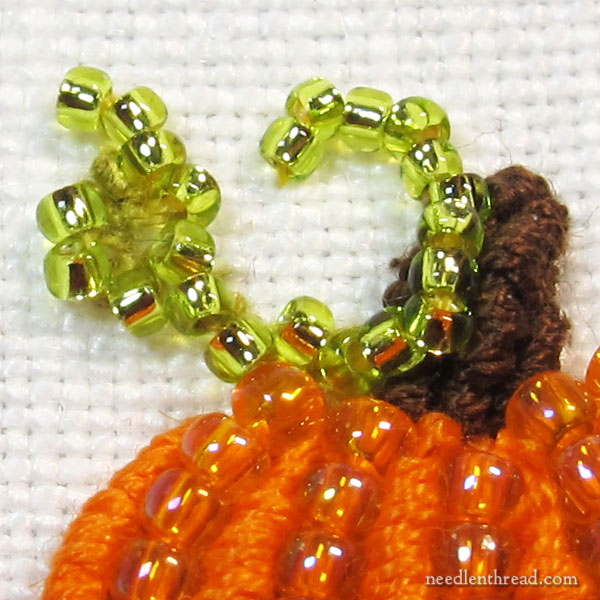
It went a little wonky, thanks to the knot in the thread and the stray bead, so I just stretched out the resulting blob of beads and couched them here and there, to get the look I wanted for a tendril.
You see how it is. Sometimes, you just have to fudge it, to get it to work. And that’s ok!
The second tendril (closer to the stem) is just a strung line of beads, couched where I wanted them to fall (in the same manner as shrining and couching the beads on the pumpkin).
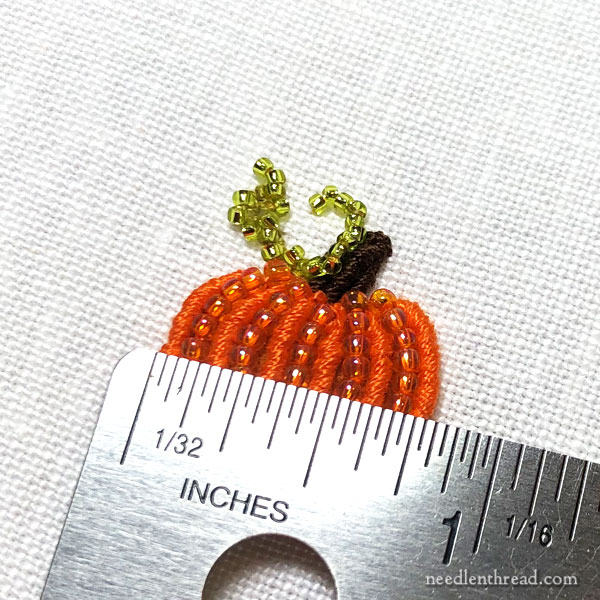
And this should give you an idea of the size of the pumpkin.
And there you have it – a fun little exercise in embroidery with beads, creating your own little pumpkin for fall.
I hope you enjoy this tutorial and find it useful!
You can find all kinds of tutorials here on Needle ‘n Thread. If you’re looking for extra reading, why not browse through Tips & Techniques here, or perhaps you’d enjoy the Stitch Fun series here?
You’re bound to find something to keep you entertained with your needle and thread!
