I’ve been trying to tie up loose ends lately, finishing up smaller embroidery projects here and there. There’s something rather satisfactory about being able to put a completely finished project away – to tidy up the work table, to put threads in their place, and all that!
This piece of ecclesiastical embroidery that I showed you earlier is finished, so it’s ready to pack up.
I’ll show you the finish, talk a bit about trimming, blocking, and so forth, and then we’ll chat about (literally) putting it away and how I go about doing that.
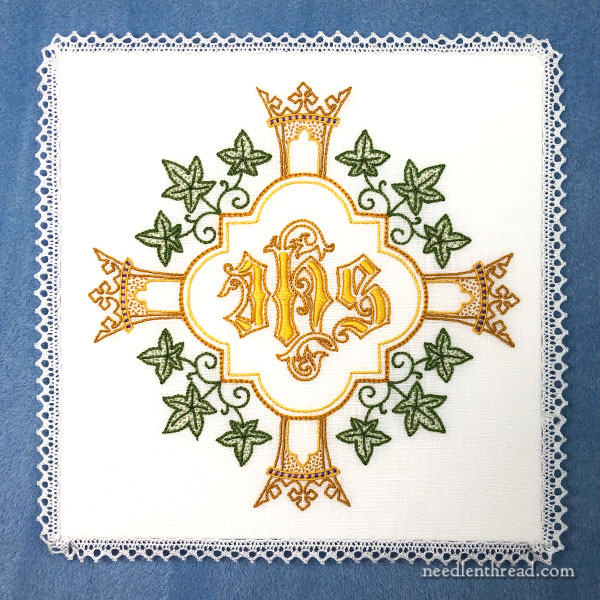
This is the finished pall.
In previous articles on this project, I’ve explained what a pall is, so we’ll skip those details, and I’ll link to the previous articles at the end in case you’re just joining in and you want to read further.
I regret that I didn’t photograph it under better lighting conditions, so I will do that before I wrap it up and put it away.
For me, I could embroider palls until the cows come home (I have no cows) or until my fingers fall off, and I’d enjoy every minute of it. The part I don’t like is finishing. I’m just not a great finisher of things like this! But it has to be done, so when it’s time, I set aside a few hours when I won’t be disturbed, and I put all my efforts and concentration into it, and just get it over with!
For the structure of a pall, you can look at this earlier article I wrote ages ago.
Essentially, it’s just a folded piece of linen (folded on the short side to make a square and machine-sewn up two sides) into which is slipped a stiff insert, and then the third side (opposite the fold) is hand-sewn closed.
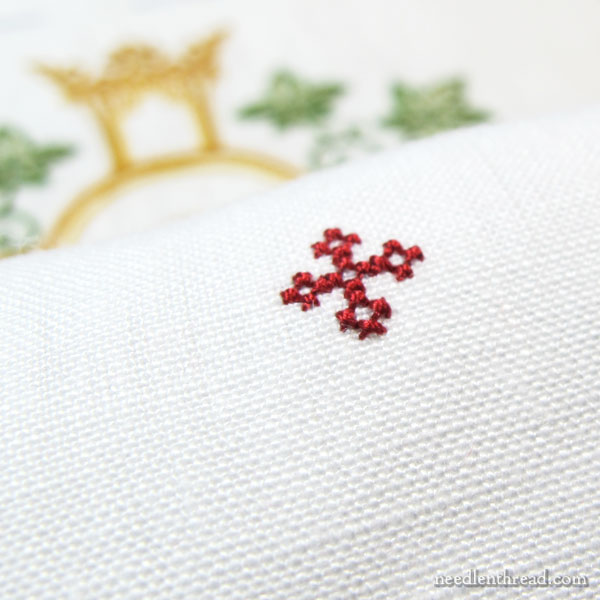
Before sewing up the pall, the back needs a tiny red cross embroidered onto it. I use this layout for the cross.
Even though the fabric is not even-weave, it comes out fine. I usually just eyeball the spacing and size for the cross stitches, if the plain weave linen is “too” plain weave.
On this particular pall, I had to stitch this red cross three times.
The first time I stitched it, I stitched it on the wrong side of the fabric, so that, when the pall was sewn up, the back of the stitches on the cross would have been showing to the outside.
So I picked the tiny thing out with tweezers and dabbed the area with tape to remove any red thread residue and proceeded to stitch the cross the second time.
The second time, I did Exactly the Same Thing! I couldn’t believe it! So out it came. Same procedure. And the third time, I got it right.
Gee whiz.
I used red silk for the cross – specifically, Soie Gobelin.
Adding the Lace Edging
Once the cross is embroidered on, I damp stretched and blocked the whole piece and then sewed it up.
Once the construction is complete and the pall is sewn closed, if you want, you can sew on some trim. I like to put a tiny, fine lace around the edge.
Wait. No.
Let me put it correctly:
I like to see a tiny, fine lace around the edge of a pall. I don’t actually like to put it there myself. That’s the part of finishing I don’t like. It has to do with the fact that the lace is sewn on after the construction is complete. It requires sewing the lace invisibly and very carefully onto the pall, with that stiff insert in there. And it’s just awkward.
And, of course, you have to join the lace up somewhere, when it comes around and meets its beginning.
Some day, I’m going to create a needle lace edging that is a complete square and requires no sewn-up join, and then sew it onto a pall. Now, that would be a nice challenge!
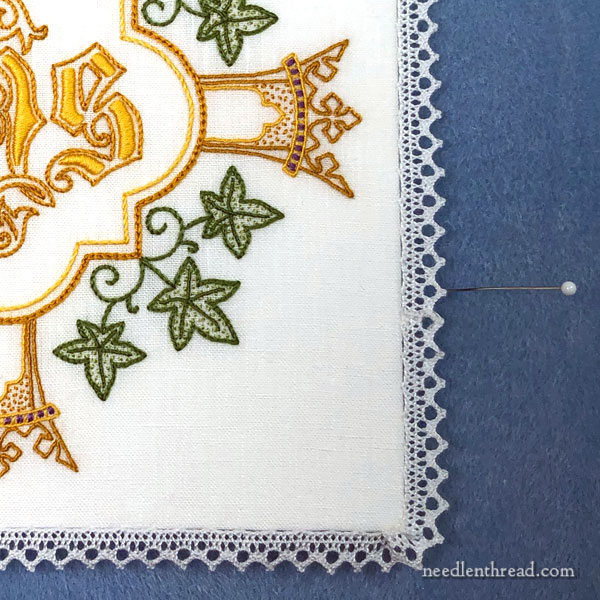
In any case, this is a very fine white cotton lace from France. It’s about 1/4″ deep. I sew the lace on the very edge of the top of the pall, by passing the needle and thread under the fabric and bringing it up from behind the lace, catching the lace, and entering the fabric again and moving forward to the next place I’ll catch the lace. I try to keep the tacking stitches as evenly spaced as possible.
On the corners, with this particular type of lace, I work a couple tiny pleats in the lace to get it to smoothly round the corner without causing the lace to fold downwards.
Normally, I use a fine curved beading needle for sewing the lace on.
As it happens, I broke my last fine curved needle half way through the finish on this. It’s much more difficult with a straight needle!

There’s my lace join.
I overlapped the lace so that the design on both ends matched and the ends could lie on top of each other. Then, I used a very diluted archival PVA glue and the tiniest paint brush, and carefully dabbed the very ends of the cuts. I then sewed over the cuts and secured them together with a very fine white sewing thread.
I think it worked out to a fairly good join, so I’m not unhappy with it.
It’s just such a pain in the neck to do, and it always causes me excessive worry as I work towards the area where the join has to happen.
Why don’t I join on a corner? I used to, but then I realized that one corner always looked off. I think it’s better to join on a straight edge, and to try to manipulate the join so that it is as discreet as possible.
Packing it Away
When I have a finished pall that wasn’t made for someone specific, I store it away until needed.
To store the pall, I wrap it in archival tissue paper. This is acid free, PH neutral, lignin free, unbuffered tissue paper. I use two sheets and carefully wrap it so that the lace is not crushed. The pall then goes into the equivalent of a kind of handkerchief box, about 6.75″ square and half an inch deep. The box itself is not archival (because I can’t afford to have custom archival boxes made), so I make sure the tissue paper is. I don’t want the pall yellowing if it ends up being stored very long. In fact, they’re never stored very long, but one never knows…
And that is my pall-making adventure! I plan to set up another pall shortly, because I need to have three or so on hand over the next year.
Shortly, we’ll chat about my efforts to clean up this heavily yellowed pall and I’ll show you the final results on that.
More on this Project
Here are the previous articles on this project:
Introduction to the Project – information on palls in general and first stitches
Progress on the Pall – with some stitching information and tips
If you want to read more about palls, these links might be of interest:
Ecclesiastical Embroidery: Pall Design (grapes, IHS pall design)
Finishing Work on Hand Embroidered Pall – the small red cross
Cross & Lily Pall Pattern
Simple Stitches for Beautiful Results on a Whitework Pall
Adding Texture with Seed Stitch on a whitework pall
Whitening Yellowed Linens – cleaning a heavily used pall and bringing it back to a natural white – first efforts
