Towards the end of last week, I tucked into my Sea-to-Stitch Monogram M project, to try to finish up the background color on the M.
I didn’t get as far as I wanted to (isn’t that always the case), because I found myself pausing the play with around with colors.
If you caught up with the project last week here, you’ll see that the water elements on the monogram were finished, and I was just starting to stitch in the background color. Today, we’ll talk about where things went from there, and why!
This is where I am now:
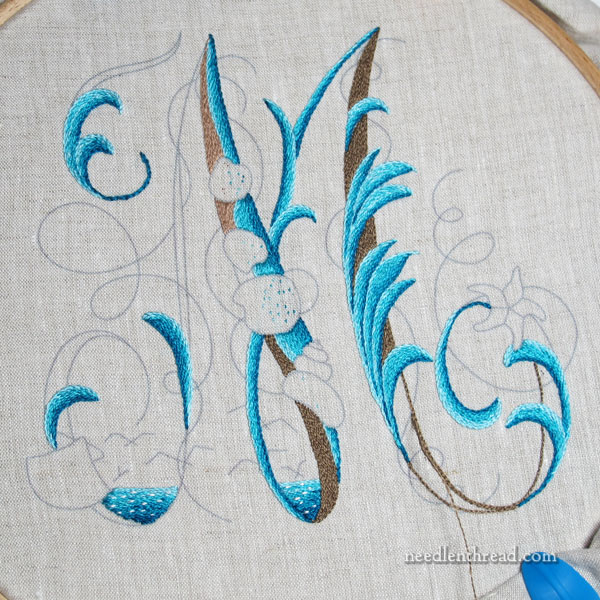
About my colors overall: I chose a completely different color set from those found in the book. Personally, I love every color option in the book – each one has its own perfect beauty. They work well together!
But I wanted to embroider mine with Au Ver a Soie silks in different weights, and play around a bit. I opted for a much brighter, turquoise-sea look, which corresponds with some of the shades I used in my Jacobean Sea project.
What led me in that particular direction? I wanted to go with corals and reddish-corals on the shells on the monogram, and I like the coral and turquoise combinations that I used in Jacobean Sea, so I turned back to some of those color selections.
I fell a little short on the “earthy” tones, though, for the background of the monogram. When you look at last week’s progress report on this particular monogram, you might notice that there’s a slight tinge of green in the darker background color that I was just beginning to stitch in.
Silk being the way it is, whether or not the greenish element was noticeable depended a lot on the lighting. But it caught the light enough to emit a swamp-green glow now and then, which really put me off! Plus, at the time, I thought the choice was a bit too dark.
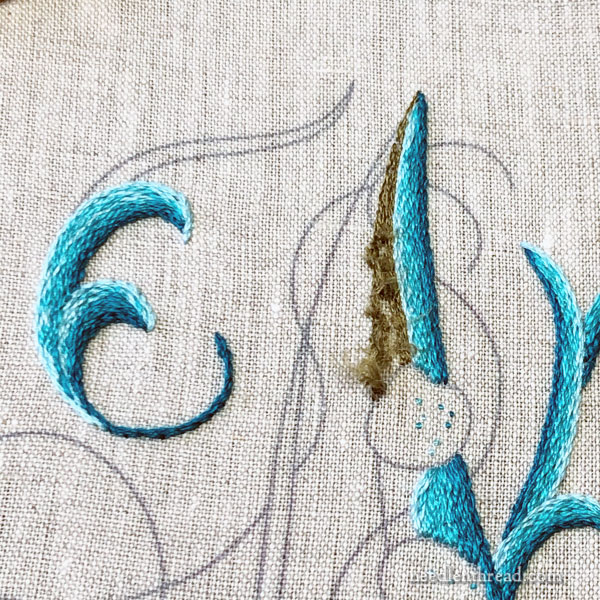
So out it came.
Wouldn’t it figure? The areas that I chose to work with one strand of silk, in split stitch no less. Split stitch is such a bear to pick out!
I tried another color in its place and it didn’t work at all. So out it came, too.
Then, I settled on a color that I thought I would really like.
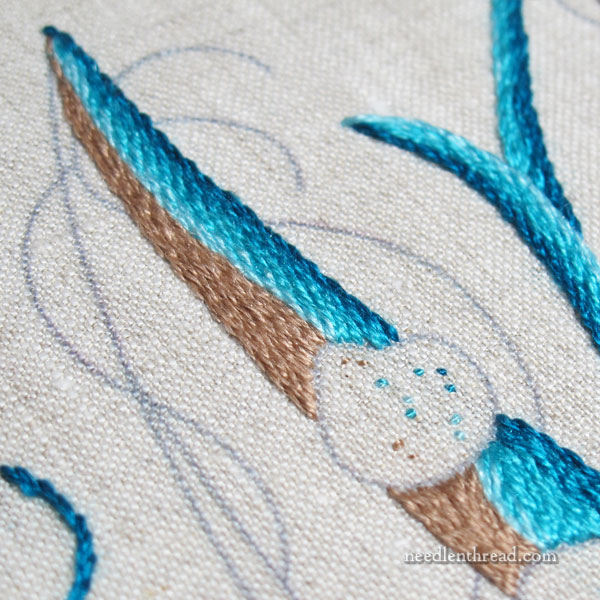
It’s this color. Well, not really. It’s sort of this color, sometimes.
That’s the thing about silk. Because of the way the light plays off the natural sheen of silk, depending on what angle you’re looking at something, the shade can look much deeper or much lighter.
In this case, in the photo above, this particular color looks like it has a decent contrast on the background fabric, and it also seems to afford a decent contrast with the blues.
There’s a pinky cast to it, though, that is somewhat insipid-fleshy and somewhat clayish. And from afar, the contrast with the background fabric and with the lighter edge of the blues is not as drastic as I’d like.
Plus, that pinkness doesn’t play out well with the other colors overall.
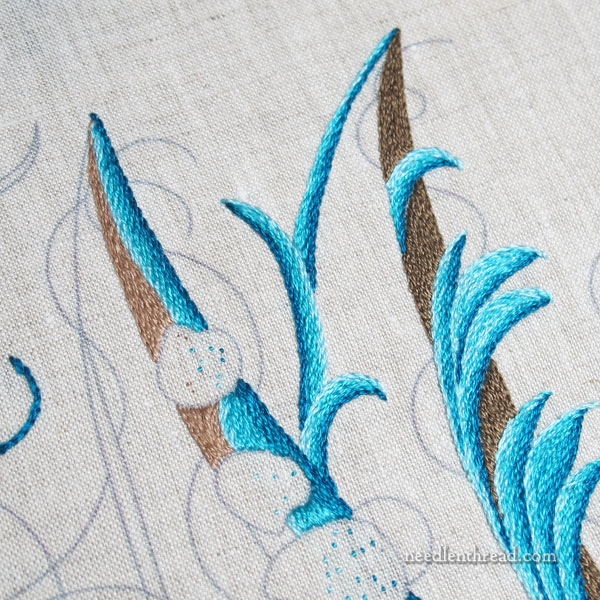
So I opted for a darker shade again, without a greenish tinge but still somewhat with a more grayish-clayish cast to it. This time, I stitched it elsewhere and left the questionable color in, so I could compare the two.
I like the darker background much, much better, especially with these blues. The blues seem to leap off the dark background (which is kind of what you want, with this design), and the contrast with the ground fabric brings the whole letter out.
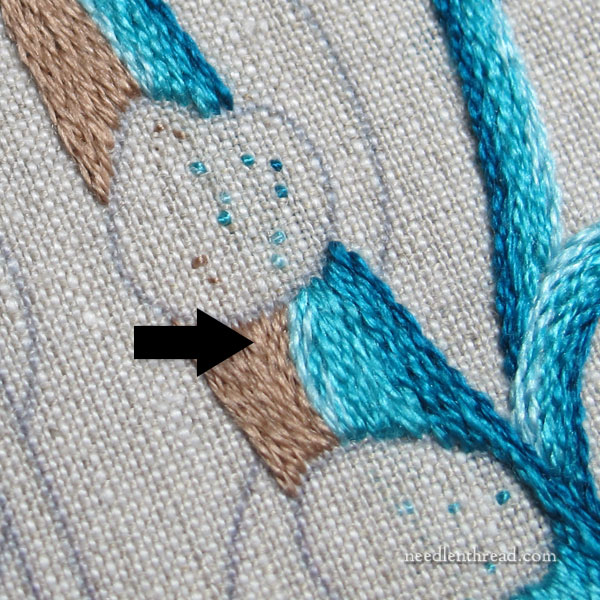
So, once again (third time’s a charm), I’ll re-do the lighter colored area. And it works out well, anyway, because see the arrow in the photo above? I don’t like that segment.
While the water should be following the curve, I think the background stitching should remain straight, not following the curve of the water, but the straight edge of the letter. I will be glad to get that re-stitched.
Linen
When I pick out this kind of stitching, I rejoice in the fact that I’m USING GOOD LINEN!!! (I never yell in all caps when I type, but good linen deserves a Huge shout-out!)
We will talk more about this linen a little bit later – be patient! – but for now, suffice it to say that linen is such a resilient fabric that it can handle stitching, unstitching, restitching, unstitching, restitching, unstitching and restitching again, like no other fabric can. The better quality linen, the better it stands up to the ordeal!
I will have more linen information for you shortly! If you wrote in about stitching cuts last time I mentioned it, I appreciate it! I’m working on a solution for you.
Picking Out
When I pick out something like split stitch, I start on the front of the work with a fine pair of scissors, very carefully slicing through the stitches perpendicular to their direction (and, if possible, away from any other stitched areas). Then, I turn the work over and do the same on the back.
Then, I use my favorite handy-dandy tweezers and pluck the threads out carefully. This can be tricky when you’re up against another line of stitching that you’re not removing. Always make your “slices” of the stitches away from other stitched areas! Take your time. Don’t over tug. Work the bits out piece by piece.
Finally, because most threads will leave fuzzies, I roll a piece of regular Scotch tape around my finger (that’s cellophane tape, the kind you have lying about for wrapping presents and such), and I dab all over the fabric area, sometimes rolling the tape gently back and forth. I avoid getting the tape on remaining stitched areas as much as possible.
This cleans up the fabric well, so that I can start with a like-new surface. No fuzzies.
Supplies
As soon as I work my way through the letter, I’ll add a list of the colors I’m using to these updates on this project. Because my colors will probably change frequently as I try out combinations, I don’t want to give a list at the start. If you decide to use the same colors, you’d be overspending on threads!
If you’re interested in working through your own Sea to Stitch monogram, you’ll need your own copy of the book. You can find it available here in my shop. I have a few in stock right now. Yay!
Hopefully, I’ll have time to finish up the background this week and start those seashells. I’m dying to get to the seashells!
