Last time we visited my M monogram from A Sea to Stitch, I was contemplating the tulip shell – that conch type shell in the center of the M. I wanted to make it striped, remember?
And it ended up a bit wonky some five times, and I had to keep picking it out.
I finally quit picking it out, determined just to consider it an anomaly: a wonky seashell.
I call it an anomaly, because most seashells are pretty nigh-on perfect. They don’t all look the same, but within their own little construct, they usually reflect a marvelous perfection of coloring, pattern, shape, and structure. Golly, I love seashells! I could contemplate them all day and never grow bored.
Maybe not this one, admittedly… though I’m not unhappy with it. I can see clearly what the problem is, but I’ve moved on to my overzealous crusty starfish, and I’m not going back. No siree, Bob.

Here it is, on its side, and from here, it’s not so bad. I tried to wrap the bullions between the sections so that they skinnied out at one tip and fattened out at the other, but I didn’t quite get it.
I was also trying to wrap them in a more S-like manner down the seashell, to follow what I imagine the curve of the seashell to be.
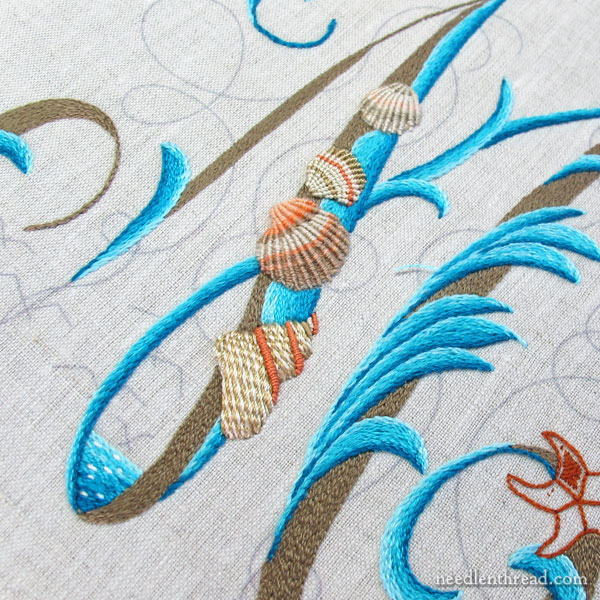
It’s that center section. The stripes are going upwards instead of downwards. I really wanted them to wrap in a downward direction from upper left to lower right, but somehow, I kept getting it backwards.
Oh heck. I may have to revisit it. We shall see!
I tried various colors for the bullions between the layers, but none of them worked that great, so I stuck with coral. I like it! Nope, I’ve never seen a seashell with that feature, but hey! That’s ok. I think we can agree that it is a seashell in concept, right?
Sooooo…. moving on!!
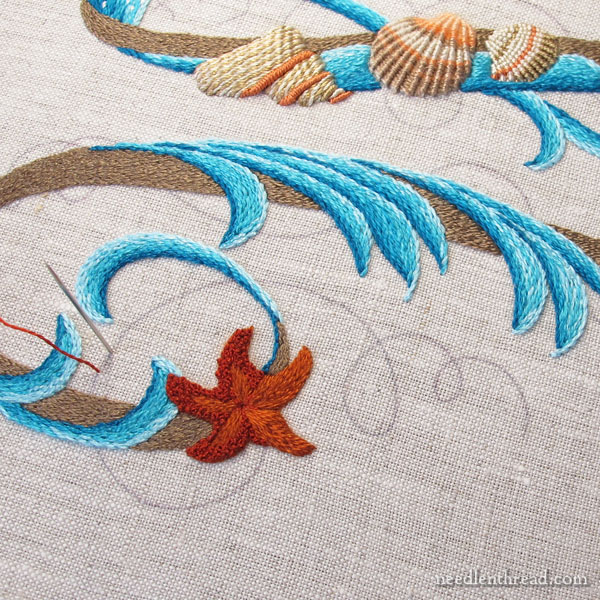
The wee starfish on the right leg of the M is my current fascination.
What I wanted was a rusty red on this little invertebrate. And I wanted him to be really crusty and bumpy, because that’s how I remember the starfish from my seaside days of yore.
So I started with a base that’s an orangier rust.
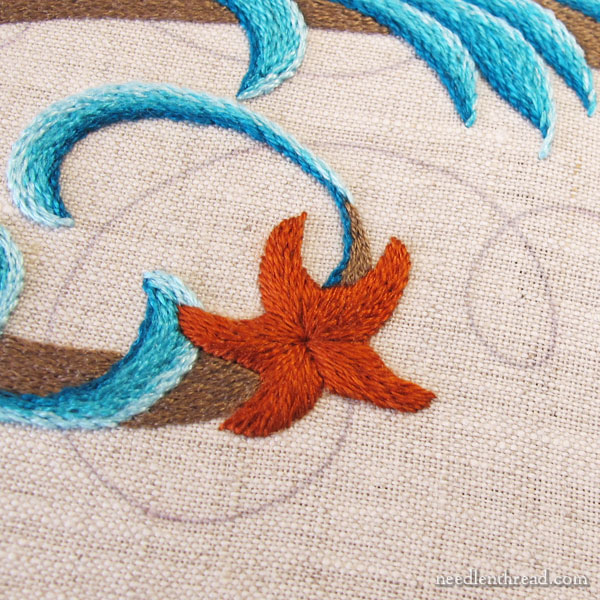
I built up quite a bit of padding underneath to lift it off the M, and then I long-and-short stitched over the padding, to make sure that, if the base shows through, it looks somewhat like something.
Naked, it’s sort of hairy and fluffy and cute and happy.
(I almost added a face at this point!)
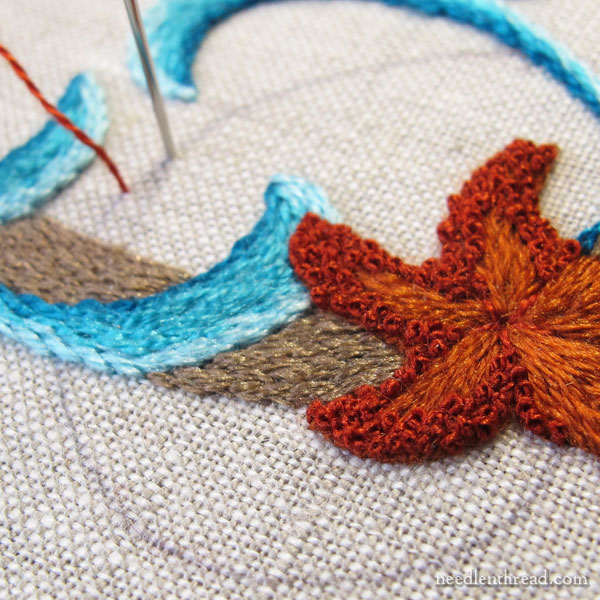
Then I started working tiny French knots in a rusty red, using one strand, with the intention of covering most of the surface with the knots. Towards the center, my plan was to mix the two colors – the rust-orange and the rust-red – in French knots.
Oh good grief. What was I thinking? A gazillion French knots over about six layers of padding worked in a very small space is a bit much. And if you don’t believe me, ask my fingers!
Still, I like the little creature.
I halfway wanted to stitch him upside-down, because I think the undersides of starfish are fascinating. But I thought that might be a bit intrusive.
So that’s where things are floating right now on the Sea-to-Stitch M. I want to finish up all the seashells today so that I can work the finishing touches – birds, ropes, and beads – which will probably stitch up quite a bit faster.
Looking for More?
This design comes from Elisabetta’s Sforza’s beautiful monogram book, A Sea to Stitch, which is available here in my shop. For my version, I selected my own color scheme and I’m working it in Au Ver a Soie silks. I’ll be adding some beads, too, for a sparkly, sandy touch.
If you’d like to follow along with this project from start to finish, here’s a list of all the articles so far, in chronological order:
My review of A Sea to Stitch
Selecting silk threads & beads for the monogram
You can see the beginnings of the monogram in this article.
Progress update – wherein I claim the monogram will be finished by the end of January. Ha ha.
Changing some colors on the monogram project
Seashells in Progress
The Striped Shell – stitching details
Happy Wednesday!
