Time to take a break from Strawberries!
I thought I’d show you how I embroider the wee ladybugs on the Garden Party ready-to-stitch towel sets I released a couple weeks ago.
I love little garden critters, and the ladybug (or “ladybird” depending on where you’re from) is always a favorite to add to whimsical floral designs like Garden Party.
At the end of the tutorial, we’ll talk about when and why you might make a slight alteration in technique on these little buggy dots.
You can add a ladybug to any design – they’re easy and fun to stitch! Embroider one on a flower stem, a leaf, a branch, and you’ll find that your embroidery seems suddenly to come to life!
To embroider a ladybug, you don’t really need a pattern at all! You really just need a dot.
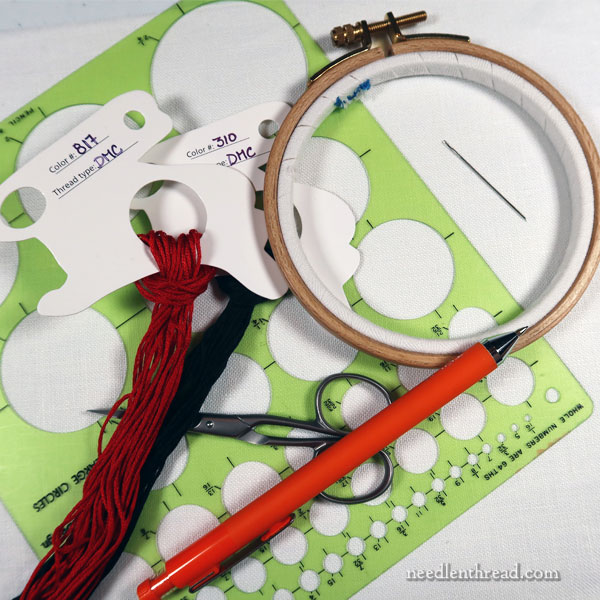
So, for this tutorial, I’m using white linen, a hoop, some red and black DMC floss, a #7 and a #9 crewel needle, scissors, a circle template, and a fine-tipped mechanical pencil.
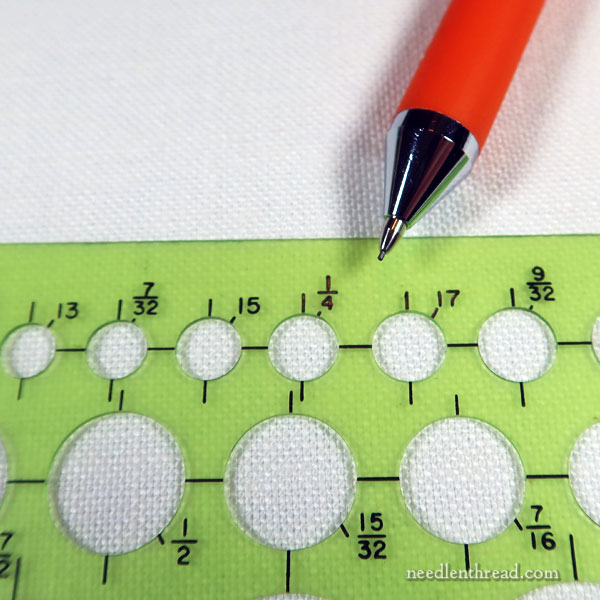
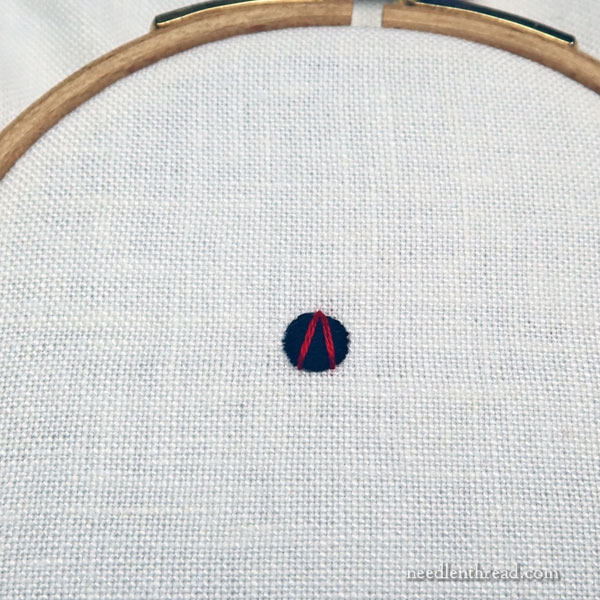
I selected a 1/4″ dot for my ladybug. It’s small! It will look larger in the photos, because I’ve cropped so you can actually see what’s going on.
You’ll find this easier to do in good lighting. Black thread is often difficult to work with, but it’s a real bear if you’re lighting isn’t good, especially if you’re working on something small!
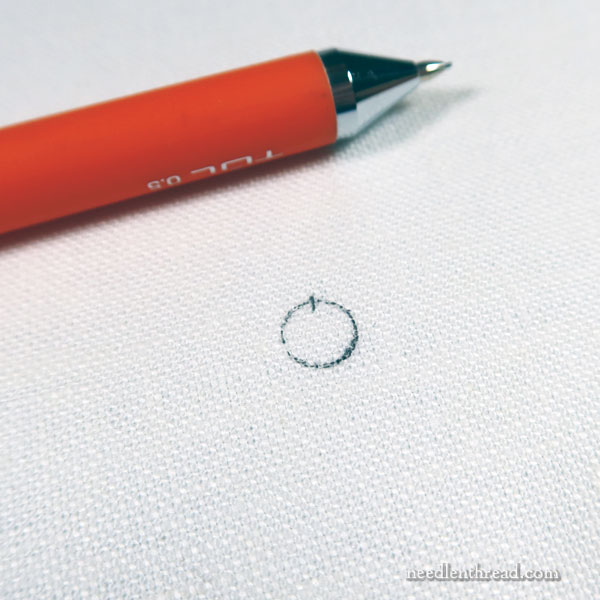
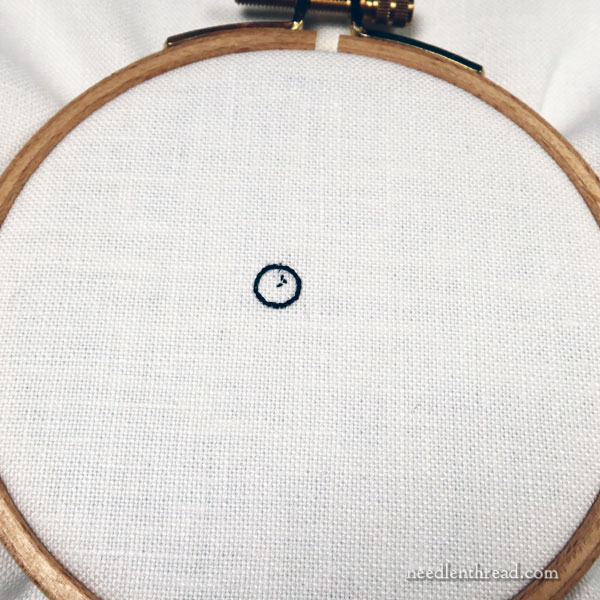
There’s my wee dot. I marked the halfway point that indicates the center top of the ladybug. The head will go across there and cover that mark up later, but I want the mark (which extends just beyond the circle) to be visible until I embroider the head.
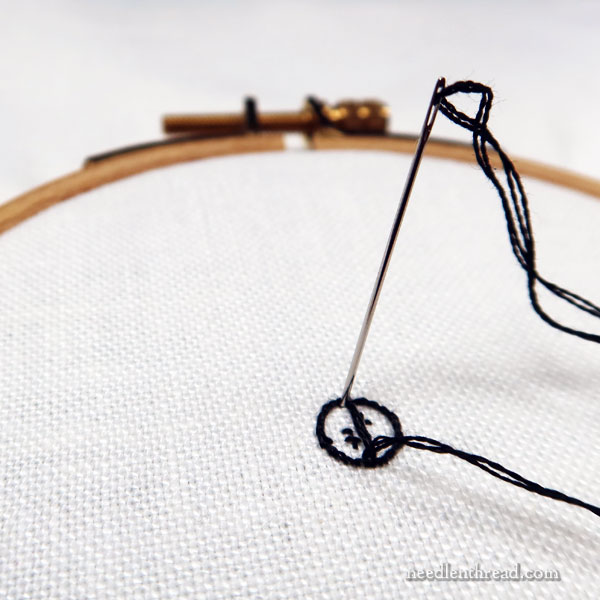
Using one strand of black floss and the #9 crewel needle, I split stitched the outline of the circle, right on the line.
If split stitch isn’t your thing, you can just do backstitch. It won’t make that much – if any – difference in the final outcome on this.
Those little dots of black thread inside the circle is where I used tacking stitches to begin my thread. They’ll be covered.
Now, switch to two strands of black in the #7 crewel needle, and fill inside the split-stitched outline with padding stitches in surface satin stitch.
The padding stitches should be worked vertically inside the dot. Remember that center mark at the top of the circle? That’s how you know where the top of the circle is, and these stitches should be long and vertical, from the top down.
To work surface satin stitch for padding stitches, you’re not carrying the stitch across the back of the fabric.
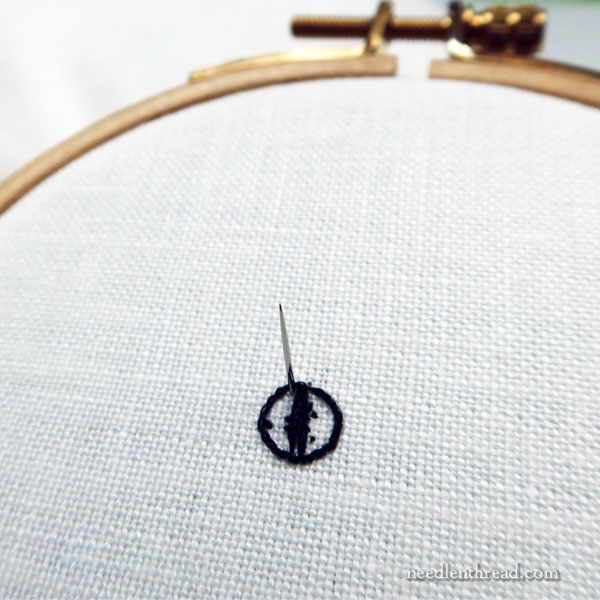
Instead, you bring the needle up to the front of the fabric for subsequent stitches right next to where you went down to the back of the fabric for the previous stitch.
This type of surface satin stitch helps you avoid the heavier build up of stitches on the back of the fabric behind the dot.
You don’t have to be super picky about thoroughly covering the fabric with these padding stitches inside the split stitch outline, but you do want them to fill the area pretty well.
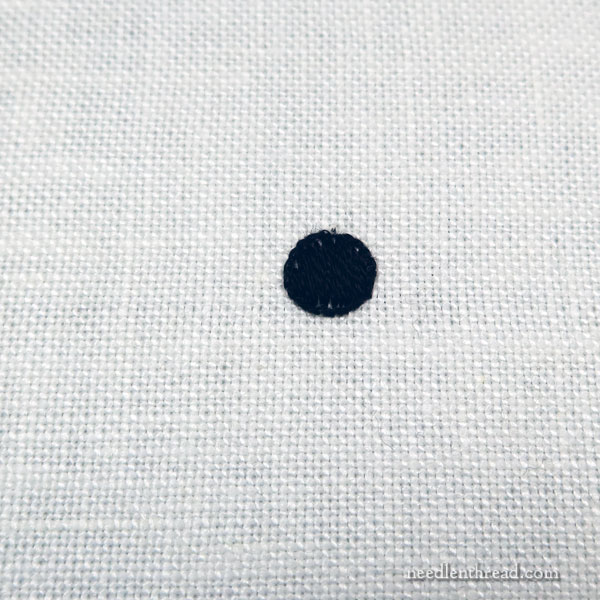
It would be an exercise in futility to photograph black satin stitch being worked over black padding.
You’ll just have to take my word for it that, after working the padding stitches, I satin stitched over the whole dot, using two strands of black floss, and working the satin stitch horizontally across the dot.
The top satin stitch layer is perpendicular to the padding stitches, and it is worked over the split stitch outline.
If you want a little more information on how to satin stitch a padded dot, this tutorial here goes through the steps. There’s a bit more padding involved, but you’ll see how it’s done. It’s done using wool in yellow, so it’s much easier to see!
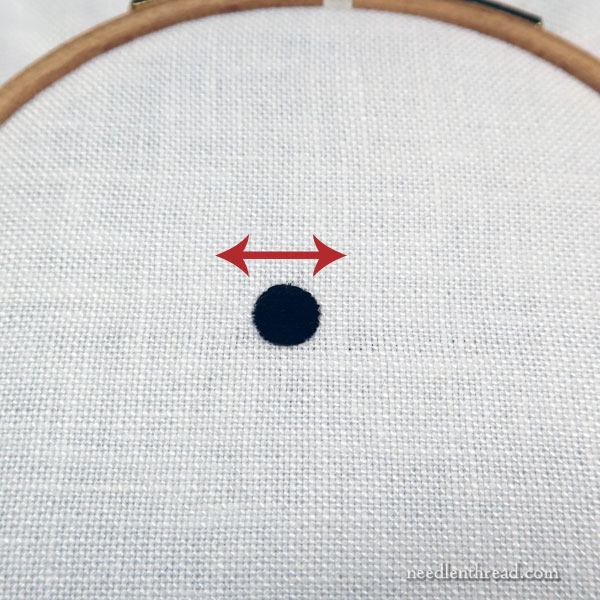
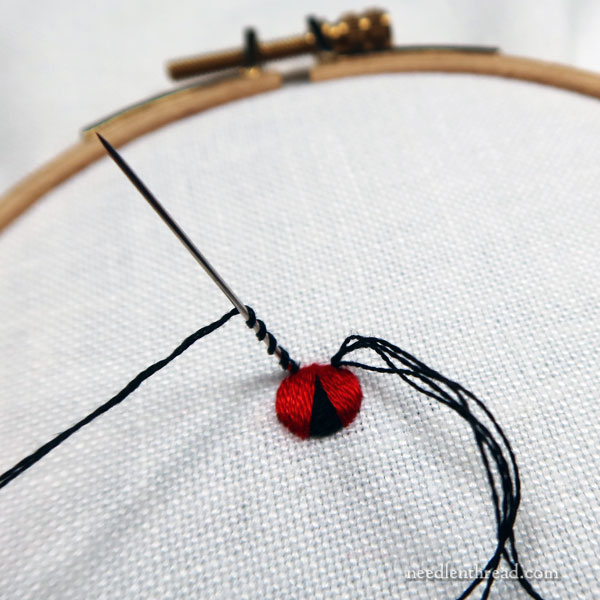
Now switch to red floss, two strands, and work an upside-down “V” over the black dot, using the center mark at the top of the dot as the “apex” of the upside-down V, as shown above.
It’s important, with the red satin stitching from this point onwards, to do your best to keep your stitches smooth and flat. You don’t want the two strands of floss to twist over each other, but to lie perfectly parallel to each other.
You might want to use a laying tool or a larger, blunt tapestry needle or something similar to help you achieve this. You can find a tutorial for using a laying tool here.
Or, you can “railroad” the satin stitches and that will help keep the threads from twisting. “Railroading” is simply taking your needle down into the fabric between the two strands of floss that are in the needle.
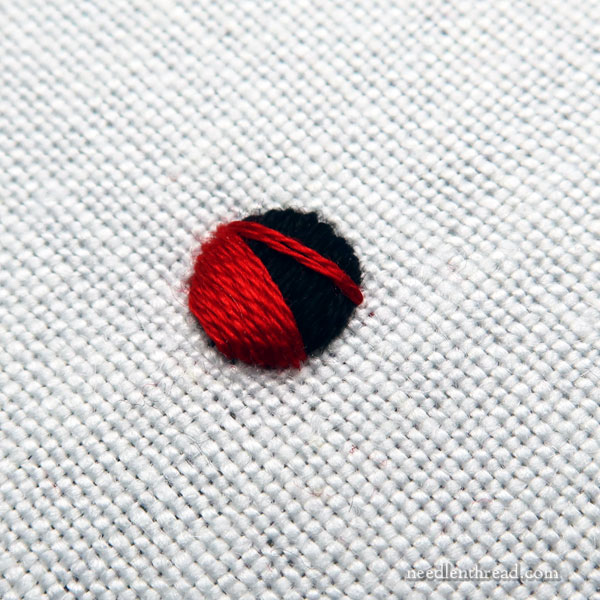
Using the angle established by the upside-down V, satin stitch each side of the ladybug out to the edge.
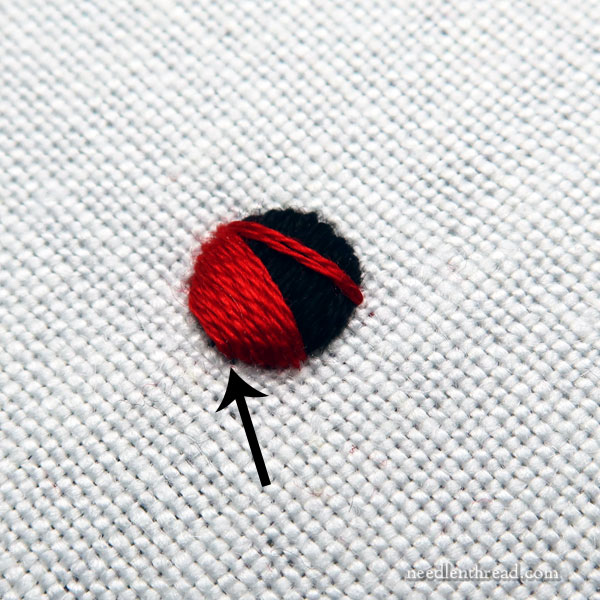
Notice that my last stitch here is relatively long, and it seems to create a flat side to the dot.
If I tried to keep stitching that area narrower and narrower, the dot would elongate into a football shape.
When satin stitching a dot, rely on the padding or the outline underneath to “fill” that round edge. End your satin stitching while the last stitch is still rather long-ish on the edge. It won’t look like a flattened circle – it will look round. And even if it did look slightly flat on the very edge of the dot, that’s better than stitching the dot out into a football shape.
Here, you can see both sides satin stitched in red.
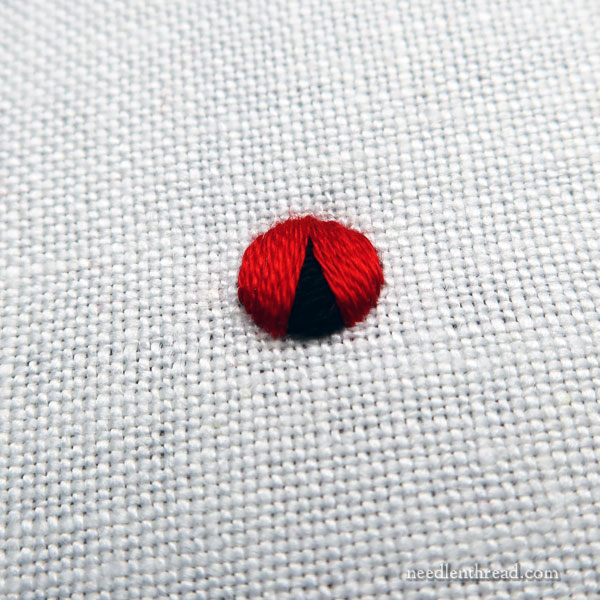
Using two strands of black in the needle, work a bullion knot across the top of the ladybug, for the head.
You’ll want the bullion to wrap around the curve of the edge, so make it right next to the edge, at the top where the red converges, and wrap a few extra times on the needle so that the bullion stitch bends along the circle and hugs it.

Awwwww!
It really could just stay just like that, and everyone would know what it is. But… a few more details!
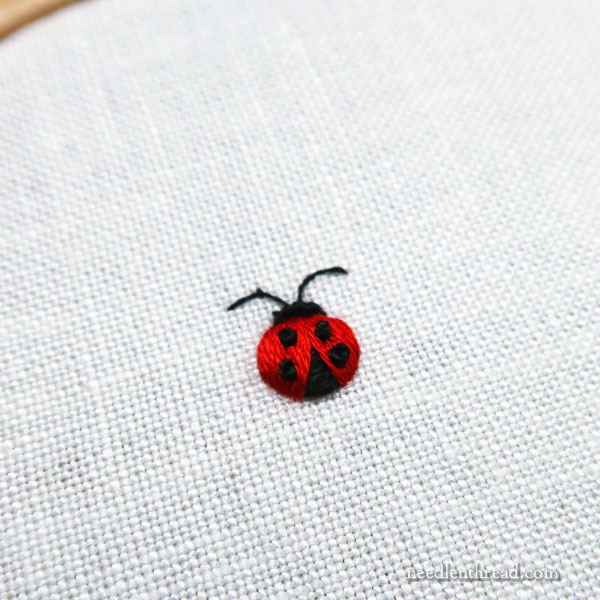
Using the same thread you used for the bullion, you can work tiny French knots in the red area, to represent spots.
To tell you the truth, I just prefer to work a tiny straight stitch in black on each side, and leave it at that. The small straight stitches are smoother than the French knots, and in this small of a space, I think two spots on each side make it somewhat crowded.
But everyone seems to expect spots, so … feel free to use French knots, or just use tiny straight stitches.
The key is that the spots are evenly placed on each side. Even if the spots aren’t symmetrical on a real ladybug, when you embroider one this small and they aren’t symmetrically placed, the ladybug ends up looking a bit odd. So just try to keep your spot placement somewhat symmetrical.
Finally, you can add antennae if you like. You can make them long – as above – using wide fly stitches and one strand of floss – so that people see them as antennae. If you want to be really technical, though, I’m pretty sure ladybugs have short little antennae. And I think they actually curve in towards each other. They almost look like pincers.
I didn’t add legs. It doesn’t really need them. If you want to add legs, you’d add two in the front right next to the head area (one on each side), and they could be jointed. Then, add one on each side near the middle, and then add two towards the back. The two towards the back could be jointed, too.
If you want to get even more precise, you can also add two tiny white stitches towards each end of the head.
This little ladybug is very small, though. Lots of detail isn’t necessary, and would end up crowding it.
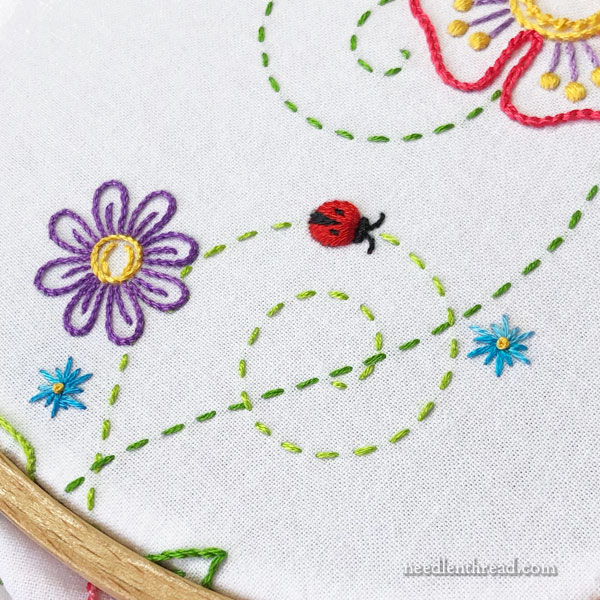
On the Garden Party design, the simple lady bugs end up looking pretty cute, and they’re really quick to stitch.
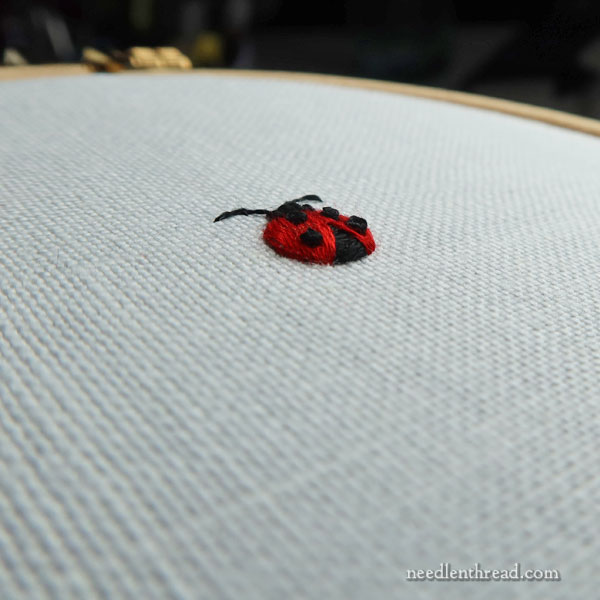
Oh, and here’s another reason why I’d probably tend to opt for straight stitches for the spots rather than French knots.
Ladybugs are so smooth and shiny. The French knots make this fellow a bit too bumpy!
But – up to you! You can vary the approach in any way you want. You could even eliminate padding the dot or split stitching the outline. I find that these two steps help to create a much rounder dot, though, so I usually don’t skip them. Entirely up to you – these are just suggestions on how you can embroider your own little ladybugs.
I hope you enjoyed this tutorial! And I hope you have a chance to put it into practice on your own stitching!
Have a wonderful weekend!
