Good morning, and happy Monday!
It’s spring here in Kansas (no comment about the expected 2-4″ of snow tonight and tomorrow!), and what better time to start thinking about embroidering summer flowers – specifically, daisies! Or, if you want, any of the daisy’s many varieties and relatives – from ox-eyes to marguerites to gerberas to asters, black-eyed susans, common sunflowers, and on and on and on.
What I love most about daisies is their distinct petal pattern and overall shape and structure. And while I like the simple common daisy, I’m drawn mostly to colored versions, like asters or gerbera daisies, or Kansas’s ubiquitous common sunflowers that grow wild by the roadside or more tamely in garden beds.
No matter what variety, daisies are happy flowers. There’s just something ever-so-cheery about them!
And that’s why the daisy is the focus of this third collection of lessons on How to Embroider (Blank).
In today’s first installment, you’ll find the design and the materials used for the stitched sample.
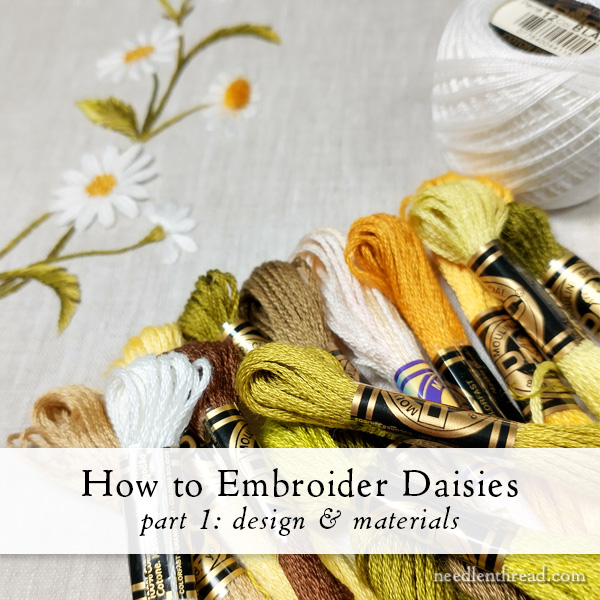
The ground fabric for the sample is a natural-colored linen, so that the flowers, which are white, really stand out. The natural-colored linen also provides a beautifully rustic touch that goes really well with daisies.
If you have one of my natural linen fabric sample packs (there will be more available soon), there are two excellent high count linens in there that would be perfect for the daisies. But you can also work out of your stash – and you don’t have to use a natural colored linen. You can use any colored fabric that you want!
You can even use a white ground fabric and change the color of your daisies. Maybe you’d like to play with the blue-purples of asters or the bright corals and pinks of gerbera daisies or the vivid yellows of the sunflower. So many possibilities!
The only thing I’d really consider not choosing is a white ground fabric with white daisies. The end product might be disappointing!
Threads
Here’s the list of threads used on the sample. They’re all DMC.
DMC stranded cotton:
whites: 3865, 4150 (Variations)
yellows: 783, 725, 727
browns: 898, 422
greens: 165, 166, 610, 730, 731, 733
Perle Cotton #12: blanc
Other Supplies
You’ll need some needles. I suggest #7 and #9 crewel needles and a #24 or 26 tapestry needle.
Small, sharp embroidery scissors.
A hoop or frame that will accommodate a design that is 5.5″ tall. A 7″ hoop works well. An 8″ square set of stretcher bars works well, too. If you happen to have the square-round hoop that I reviewed here, it is the Perfect Size. (As soon as I have those back in, I’ll be notifying you, so if you requested advanced notice, you’re on the list!)
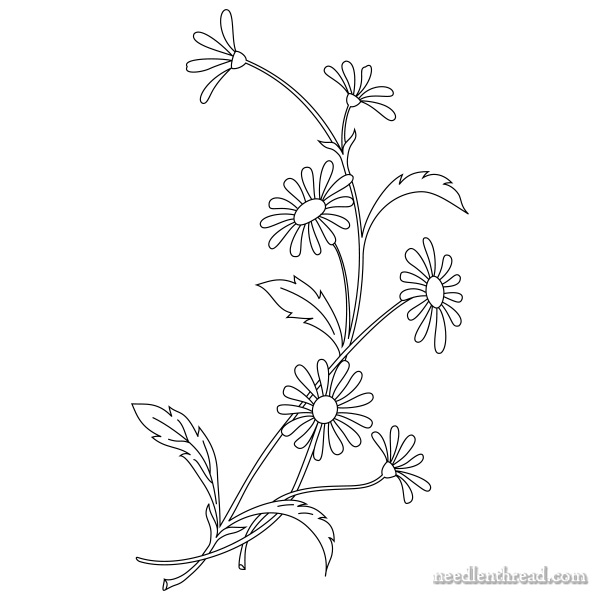
Daisy Design
For this daisy design, you’ll notice that there are six flowering parts.
And once again, we’re going to look at five different ways to embroider these elements. (It seems like five is the magic number – I’m sure we will drift from that in future projects!)
The approach on the embroidery goes from the least complicated approaches to slightly more advanced approaches, but the whole project is definitely suited to beginners and beyond. As long as you know the basics – how to transfer your design, how to thread a needle and start stitching, how to follow stitch instructions – you’ll be fine!
Here’s the printable PDF for the design:
How to Embroidery Daisies – Design (PDF)
Process, Timing, and Pacing
With a tutorial series like this on Needle ‘n Thread, I usually space out the installments for a couple reasons: 1. to give those who are following along ample time to prepare, to stitch, to keep up; and 2. so that I can continue to provide other embroidery-related content on the website.
The break between installments also gives me time to make adjustments, correct any aspects of the stitching that will be helpful for you, and work through my own thought processes so that I can provide you with some worthwhile suggestions.
The nice thing is that you can work at your own pace once the installments are published. You’ll be able to find all the tutorials here on Needle ‘n Thread under “Tips & Techniques” in the main menu, under the How to Embroider (Blank) index. You can go directly to that index through this link.
If you want to keep up with these tutorials and when they come out, you might consider subscribing to my newsletter. You can do that through the subscription form in the left column of the website if you’re viewing on your computer, or through the drop-down menu if you’re viewing on mobile, or you can go directly to this page and sign up there. The articles will show up in your email, so that you don’t miss any of them.
But you can always find them on the website, if you do miss any of them!
Members on Patreon
Each installment of these tutorials is provided to members over on my Patreon page as PDFs that you can download and save to your computer and print. They’re formatted for easy printing and they often include extra stitch instructions or helpful hints that don’t fit into the online articles.
The pacing for members is sometimes a little different – the printable tutorials might cover more, or might work out in a different order. I hope the printables come in handy!
You can look for the first installment on the daisies over on Patreon a little later today!
Coming Up on Needle ‘n Thread
Besides more daisies, there’s other stuff coming up on Needle ‘n Thread!
For example, I’m going to share with you a project organization tip – a small adjustment I’ve recently made to how I keep track of my projects. It might be something you want to try, too.
There’s a little tool talk coming up.
And I’ll share some sampler progress and tips and so forth. Can’t wait!
Hope you’re having a Marvelous Monday!
