Over the years, I’ve solidified how I keep track of my embroidery journey – whether it’s ideas I’m trying to develop, designs I’m working on, projects and their materials, mistakes and adjustments, and so forth.
While my website Needle ‘n Thread is probably the most thorough record of my journey, I keep lists and notes while I work through projects, and all of these lists, notes, designs, ideas, adjustments, and what-have-you end up in a project notebook.
Still, with each project or each idea, I still find small adjustments that I make in the information that I record and my methods of recording it.
Keeping these notes and tidbits of information all in one place helps me in numerous ways, not just in developing ideas for projects, but also in answering your questions, ordering supplies, or simply remembering!
Lately, I’ve started adding real-thread color cards to my project notes. Let’s look at The What, The How, and The Why!
A real-thread color card is a card with real thread on it.
Manufacturers of threads often produce real-thread color cards so that designers, retailers, and consumers can see real samples of threads in their true colors, rather than relying on printed blocks of color to make decisions about threads.
In a nutshell, the reasoning is simple: color on thread looks and performs differently from color on paper. You will have a much better understanding of a color of thread when you see the actual thread, rather than a printed representation of it. (We won’t go into the nitty-gritty of print processes, digital representations, and so forth – I’m sure it is obvious that the real thread will give us a better understanding of its color than any printed or digital representation would give us.)
Lately, with my projects, I’ve started keeping very simple real-thread color cards with them.
It’s quite simple to make up the color cards.
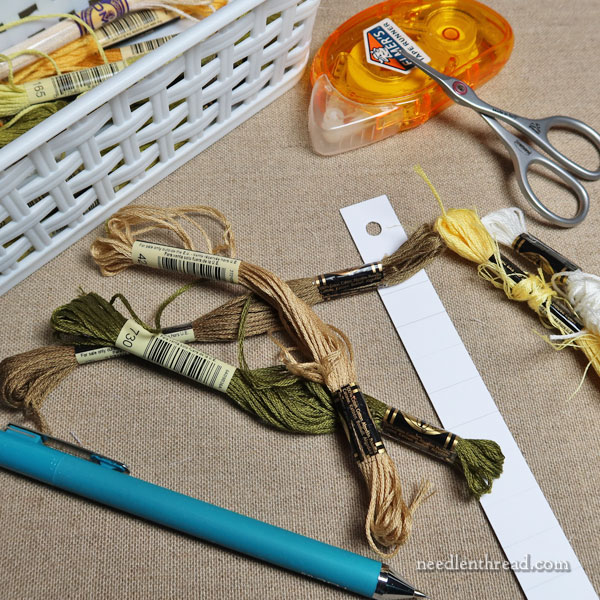
I cut 3/4″ strips of heavy card stock, in white. The card strip might be long – the one I’m using here is 8″ – or it might just be a 2″ or 3″ strip.
At first, I was measuring 1/2″ intervals on those strips (and I still do this for some applications – but that’s a Whole Different Article which we will get to a little later – I’ve got a fun organizational project going on that I can’t wait to share with you!).
For these project-specific color cards, I’ve found that I don’t really need to measure intervals between the threads, as long as I leave enough space to write the thread colors in.
At first, I used strip glue (the Elmer’s stuff you see in the photo above) but I ran out, and I started using double-sided tape on the back of the card stock strip. I find the latter works better.
I use a pencil or pen for recording color numbers on the strip.
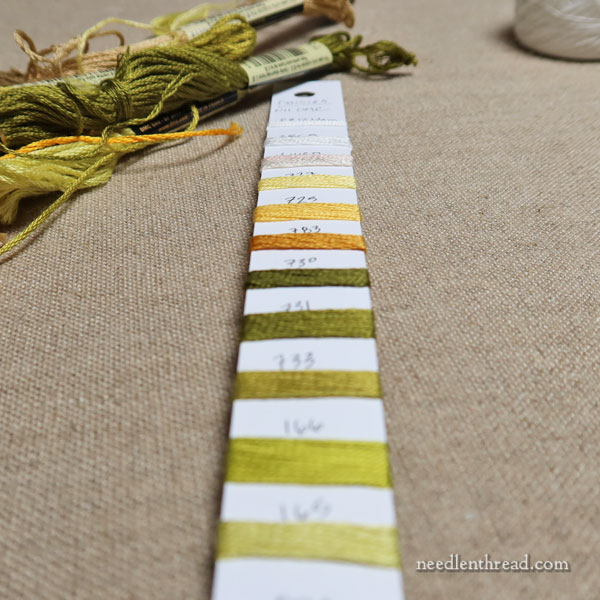
At the top of the strip, I write the name of the project and the thread type for that particular card. If all the threads are the same manufacturer, I write the manufacturer. If I’m using threads from different manufacturers, I make a different card for each manufacturer.
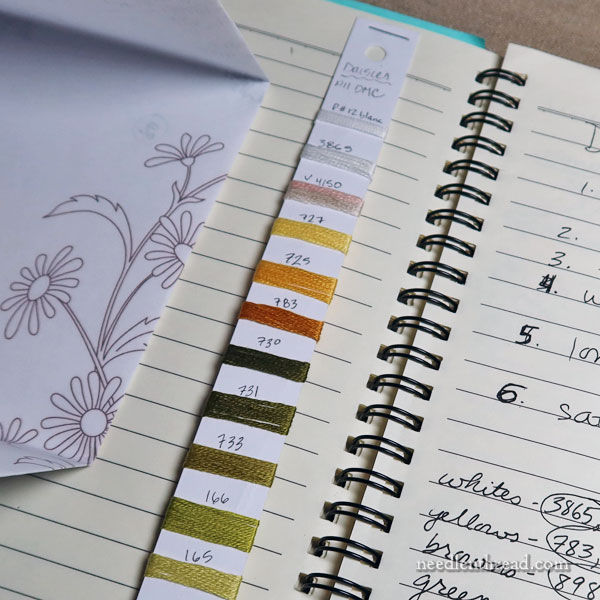
The card I made up here is for the Daisies project we started the other day. All the threads are DMC, so I wrote “Daisies” at the top, and “All DMC.”
When the thread is a different type of thread from the same manufacturer (like perle cotton instead of stranded cotton), I’ll use abbreviations like “P#12” for “Perle #12” followed by the color. On this card, the top thread is P#12 blanc. So I know it is DMC perle cotton #12 in blanc.
When the project was finished and all my thread choices absolutely solidified, I used mostly scraps (pre-cut pieces I didn’t use all of, for example) and wrapped the bits of thread around the strip of card stock, leaving space to record the color number.
I put a tiny piece of double-sided tape on the back of the card strip where the thread would be wrapped, to hold the thread in place.
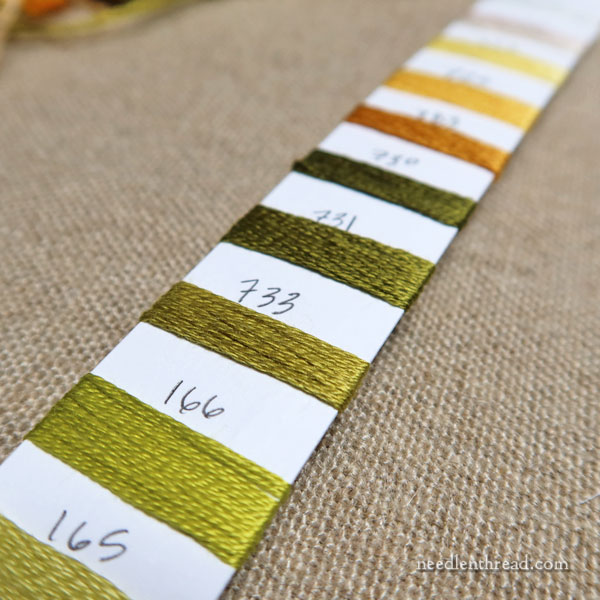
I used approximately 5-6″ pieces of thread and wrapped around the card about 4-5 times – sometimes a little more, or less, depending on the actual length of the cut piece I had on hand. You definitely want several wraps on the card, because you want the color block to be very clear. If you have to use it for reference later, it’s easier to compare other things to a larger block of color than to only a small bit of color.
Once the card is complete, you can either dab glue (a PVA glue is a good choice) on the threads on the back of the card to further secure them, or you can run a strip of archival tape down the back of the card over the threads. This helps cover any uncovered sticky bits from the double-sided tape, too.
If you’re just going to put the whole thing in a notebook, though, you don’t really have to worry about covering sticky bits, and the double-sided tape will hold the threads well.
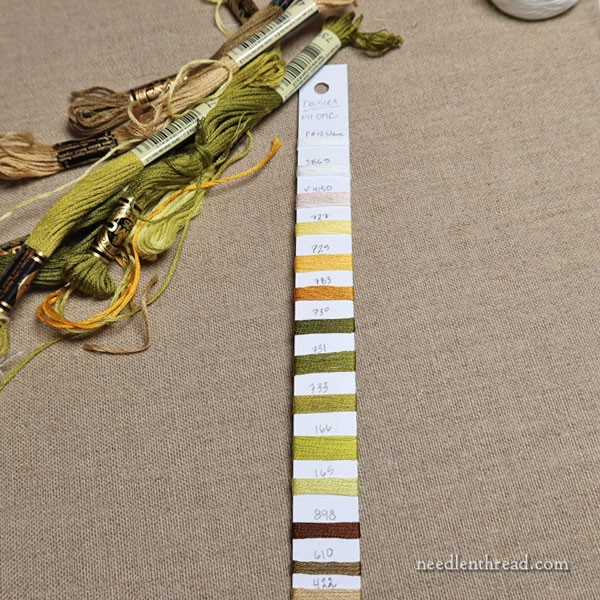
This card represents all the colors and threads used in the Daisies project.
Why?
Do you need to make real-color thread cards that are project specific?
You might not need to. You might not want to.
But you might want to, even if you don’t need to. I know many people who keep track of their projects with notebooks and keep scraps of each type of thread and fabric and whatnot tucked in the notebook. It gives them a sense of ownership over the project, a sense of organization, of progress, and finally of satisfaction upon completion.
Is it essential? It depends on what you’re doing.
For me, keeping project-specific real-thread color cards is extremely helpful for several reasons.
I find it helpful to see, at a glance, the specific colors I used. If I want to repeat those colors, if I want to find them in my thread drawers or if I want to order them, it is nice to see them and not just refer to a number.
It is invaluable when it comes to cross matching threads for conversion.
What do I mean? Say I used a certain color of stranded cotton in a project, but now I want to work it in silk – or visa-versa. Or maybe I like the color scheme a lot and I want to use the same color scheme in a crewel project. Having a real-thread color card makes it really simple to find thread conversions for the crewel wools I want to use.
And finally – perhaps not as important, but still legitimate – it establishes a much more complete documentation of the project for my own future reference, or just for the satisfaction of having a thorough documentation of all the supplies I used.
The color strip (or strips, depending on the project) are stapled into my notebook with all the notes on that particular project.
So, if you like to track your projects, this might be a great addition to your project notebook. It doesn’t take any time at all, really. I do it right when I’m doing the project clean-up, as part of the sorting and clean-up process.
Later on, I’ll show you a completely different thread organization project that I’m enjoying. I always find certain organizational projects to be relaxing and at the same time, purposeful. So more on that project soon!
