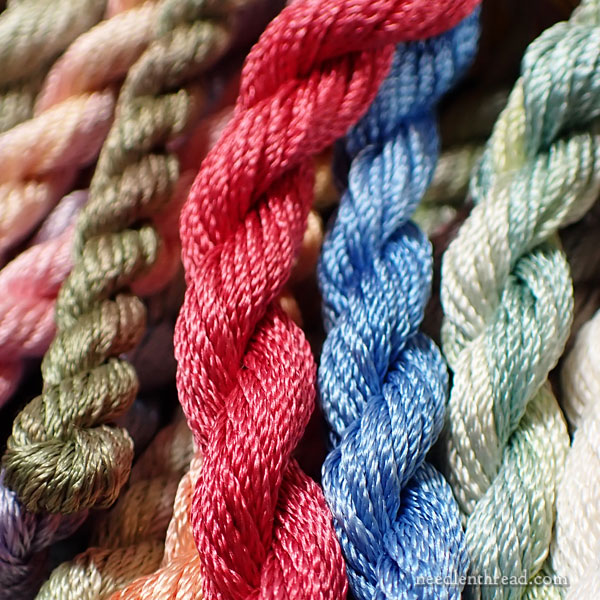
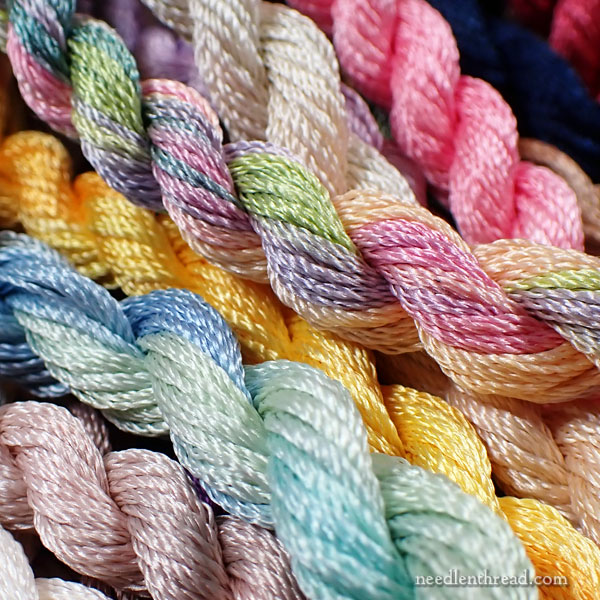
To my rather tunnel-visioned brain, there’s nothing quite as lovely as an abundant collection of glorious silk thread all gathered into one mass of twisty, colorful, smooth, shiny Possibilities.
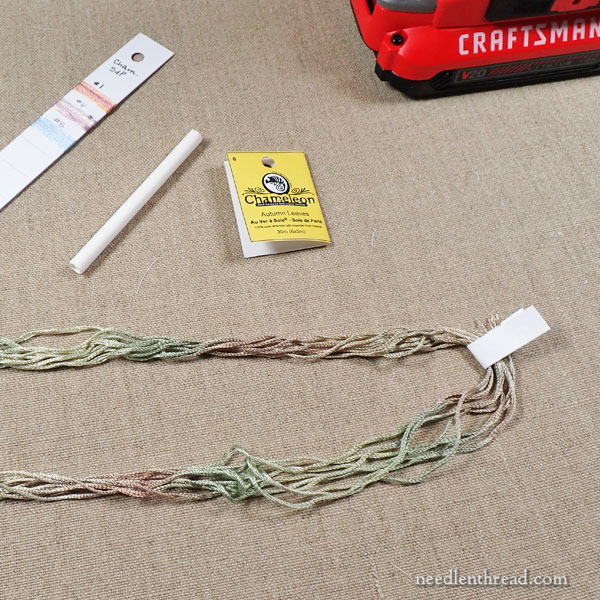
A few weeks ago, we chatted about this collection of overdyed Soie de Paris from Chameleon threads that are new to the studio, and since then, I’ve started some tentative planning with them.
I have Ideas, you see.
When you see something like this, does your heart rate speed up? Do you suddenly feel swoony? Does your mind start whirling with a gazillion plans and possibilities?
Uh huh. I can relate.
But.
(And there’s always a but!)
But… those beautiful twists – as beautiful as they are – also hint at future frustration.
The Problem
It’s not unusual to have problems with embroidery threads that are put up in twists. I understand why manufacturers use twists – they are much more affordable, and I’m grateful for that! But they do pose certain problems for the embroiderer if a little care ahead of time isn’t taken.
And the more slippy the thread, the more likely there will be problems once the twist is broken into.
Once you open a twist, if you don’t have something to do with the thread to keep it tame, organized, and labeled, you can end up with problems – like knots, messy bundles, wasted time, unlabeled and unidentifiable thread, and even wasted thread.
So before I start stitching with these threads, I know I need to do two things:
1. I need to make a thread card, so that I can reference colors easily as I work and document the threads I use; and
2. I need to solve the twist, so that I can be more efficient in my stitching process, so that I can keep the threads organized and clearly labeled, and so that I’m not wasteful.
The Solution
When the threads arrived, then, I pondered a bit. How can I solve the twist?
I eventually turned to the notion of spooling.
There’s a reason thread has been spooled for centuries, after all.
I already know that Soie de Paris on a spool is much, much easier to handle than Soie de Paris in a skein. In the US, Soie de Paris is distributed by Access Commodities on spools, thankfully. In other counties, it comes in skeins. It is so much easier to store, organize, and handle on a spool.
So, spooling it was!
But (there it is again)… how to do so in a moderately efficient way and an affordable way?
I explored buying spools in bulk and I came up empty: either the wrong sizes, or too expensive, or simply not practical in shape, type, methods to label, and so forth.
Then, I turned to the notion of the thread cop.
A thread cop is a cylindrical tube, somewhat like a spool but without a flange (or flat end) on either side. It’s just a cylindrical tube. Normally, they’re made of stiff board in a tube shape.
If you’re familiar with threads like Pipers silks, then you’re familiar with thread cops, because that’s what they come on – and so do several other brands.
Well, tubing is not inexpensive, either, especially if you’re looking for a particular size that’s pre-cut.
I went back to pondering.
Could I make my own cops out of paper? Yeeesssssss…. but that would involve a lot of time. No, there had to be another way. And there was!
Enter: The Drinking Straw.
And more specifically, the heavy duty paper drinking straw.
It can be cut to size. It can be written on. And I was pretty sure I could somehow rig my drill to make spooling onto the makeshift thread cop (straw) significantly faster.
So, I invested a whopping $7 into a box of 250 paper drinking straws, which gave me 500 makeshift 3″ thread cops (plus 250 1.5″ leftovers), and I started testing to see if my theory would work.
And it does!
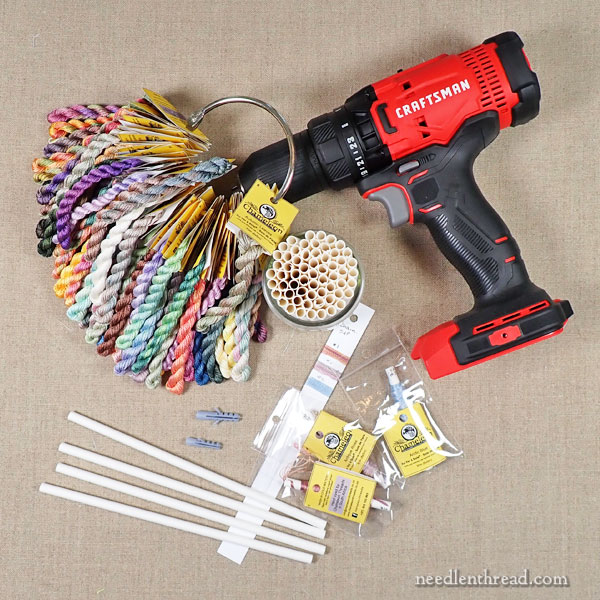
Tools & Materials
This is what I’m using:
- Heavy duty paper drinking straws, cut (with a guillotine cutter) to 3″ tubes
- A drill
- A molly that fits snuggly inside the straw and in the chuck on the drill
- A micron pen for marking the tubes with color numbers
- A single hole punch
- 3.5″ x 2″ zip bags
- Jump rings
- Strips of heavy card stock for making thread cards (in the same manner as these)
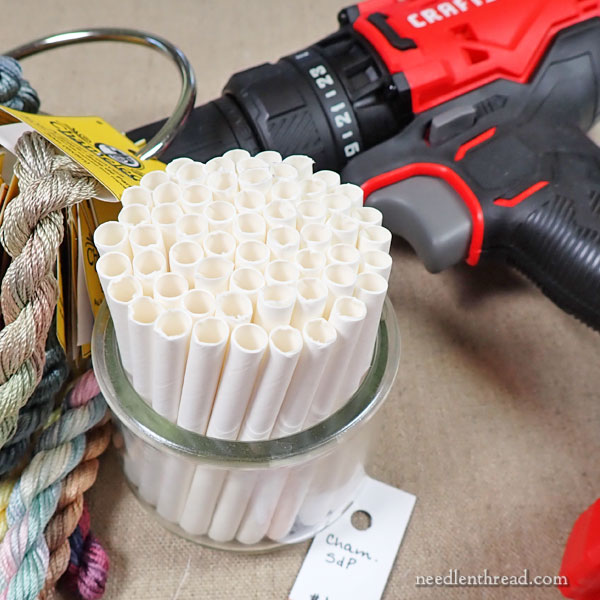
First, I cut a bunch of the straws down to 3″ long. This is very easy using a guillotine paper cutter.
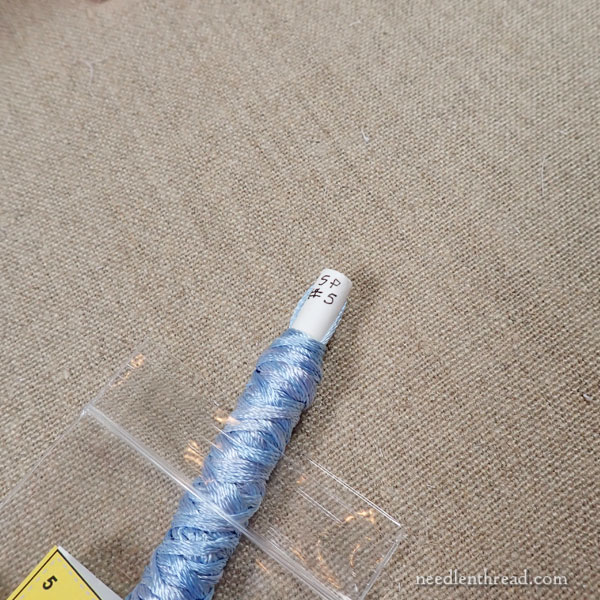
As I work with each thread, I label the straw on both ends with the thread type (SP for “Soie de Paris” + the color number), and I clip two tiny slits in each end of the cut straw, to hold the thread ends.
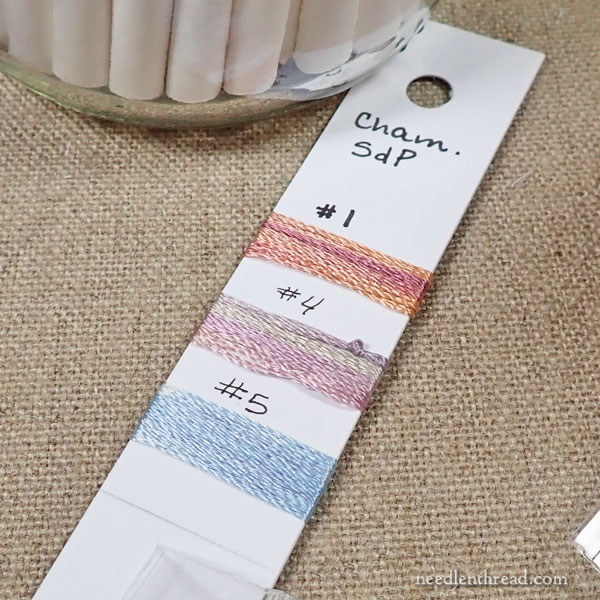
Before spooling up the thread, I cut about a 6″ length of each thread color, and wind it onto heavy card stock strips (using the method discussed in this article), to make up my own real thread color cards for the set.
Now, I realize that the colors are for hand over-dyed threads, and there will be slight variations between dye lots, but having the thread color card will help me with designing and with choosing colors, as I’ll be able to get fairly close to the colors I want, even if the dye lot changes somewhat.
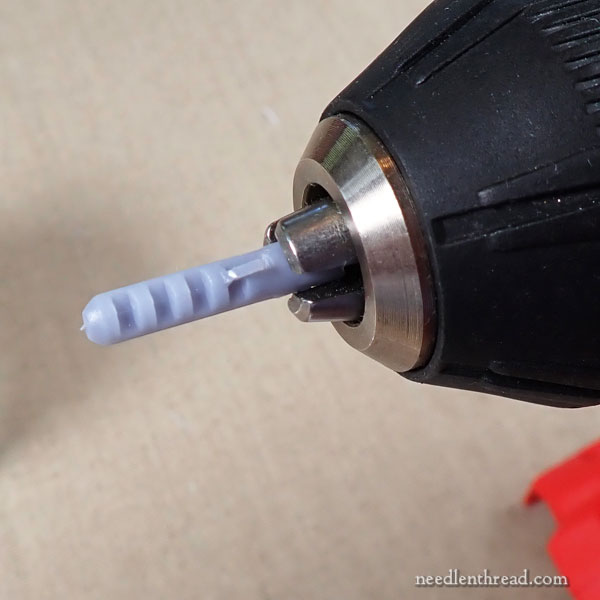
A molly is a small plastic thing that you stick in drywall to help hold a screw in place. I found that I could stick the end of the plastic molly into the chuck on the drill, and that the straw would slide onto it, and the plastic “arms” on the molly would help hold the straw onto the molly, so that the whole straw turns with the molly.
It works! You just have to find the right sized molly for your straw. It might take a little testing.
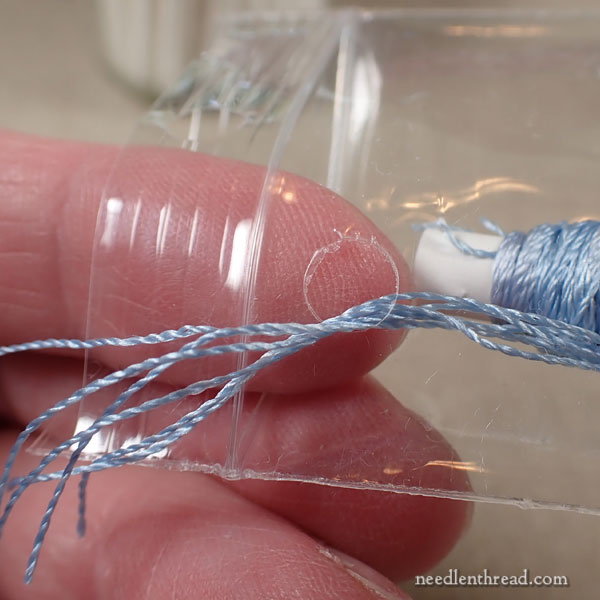
I remove remove the staple from the outer yellow product tag, and untwisted the skein of silk. I open the whole twist up and unwind it completely into one long piece, re-piling it on my work surface so that it will run straight onto the straw while the drill is on, without twisting or knotting.
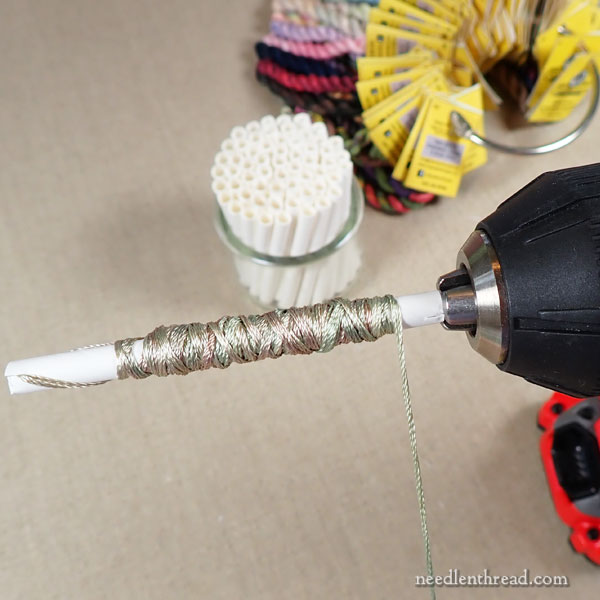
I label the straw piece with the thread type and color number (you can’t see it in the photo above – it’s on the other side of the straw) on both ends by the cut edge of the straw, slide the cut end of the thread into the slits at one end of the straw, mount the straw piece onto the molly that’s in the chuck on the drill, and, with the drill running, I feed the thread back and forth with one hand (running the drill with the other), so that winds onto the straw.
You have to keep the thread under a little tension. Occasionally, stop the drill and let go of the thread to smooth it a little and let it untwist. It wants to twist while the drill is on, but it looks better (you get a better sense of the color, too), and it goes on more smoothly if you let it untwist now and then.
The small bags already have a hanging hole above the zipper, but they don’t have a vent, and I don’t like to store fibers without access to air.
So, in the prepping stage, I hole-punched one side of the bags, up towards the zipper. It helps to hole punch a small scrap of paper with the plastic bag – you’ll get a much cleaner hole, and the whole piece of plastic will punch out. If you just punch the plastic, you’ll probably need to trim with scissors.
The punched hole in the bag provides a vent, and it also provides a feeding hole for the thread while you’re using it. You can feed the thread out of the hole, leaving it in the zip bag if you want.
Then, if you have thread leftover at the end of a stitching session, you can wind the leftovers back on the straw and tuck the straw back into the bag with the tail inside the bag to keep things neat.
I also keep the original product tag for each color inside the bag with the makeshift thread cop.
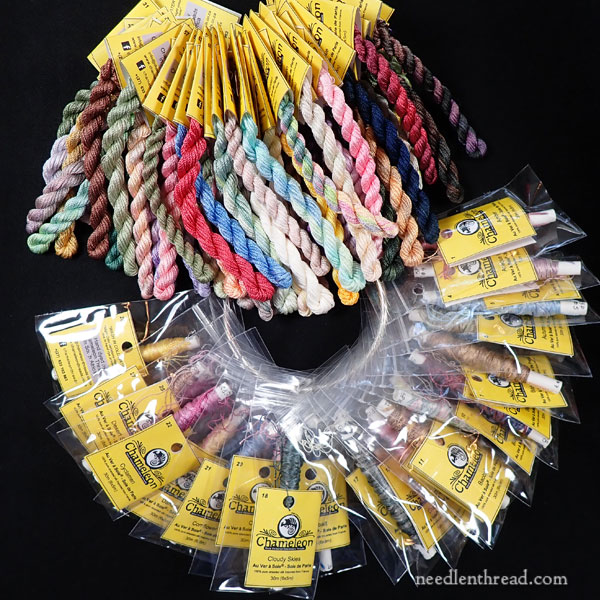
By the time I finish all of these, they’ll probably be stored on two separate jump rings. I’ll also store the thread card strips on a jump ring, in numerical order.
You’ll probably agree that the zip bags with the thread straws are not quite as attractive (not even close!) to those glorious twists.
The twists are beautiful!
BUT…
I think in the long run, I’m going to be very happy with the organization and efficiency of working with the threads off the straws rather than from the twists!
So that’s been my thread project lately. It’s actually Very Fun! I love doing it!
It’s a great way to familiarize myself with the colors, too. All the while, I have all kinds of ideas blooming in my head while those glorious silks run through my fingers onto their new little homes of straw.
It really is fun.
I might be nuts.
But it is fun!
Have a wonderful weekend!
