On Monday, we looked at how to make a really long woven picot without using a pin or needle.
Today, we’re going to look at one thing you can do with a long picot. We’re going to roll it!
For this first foray into rolled woven picots, I’m not using a very long picot. I did use a moderately long pin to create the picot, but overall, the picot isn’t much longer than one that you’d make with an average quilting pin.
Let’s take a look at the rolled woven picot!
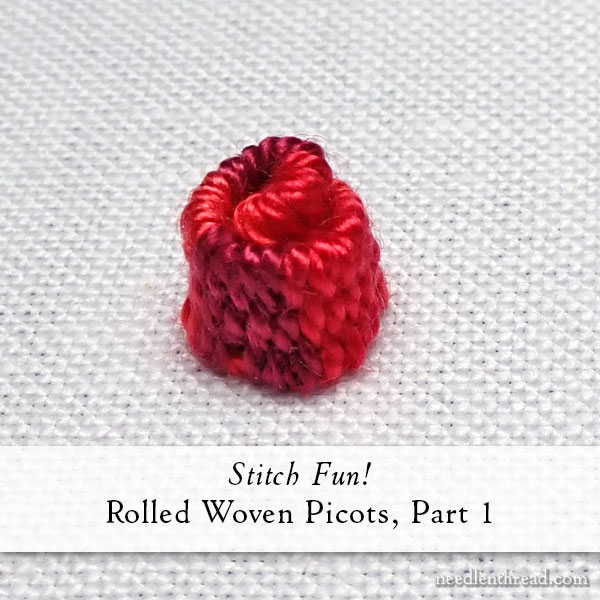
The rolled woven picot creates a dimensional stitched element that can be used in all kinds of needlework applications, from stumpwork to canvas work, to … wherever you want to use it!
Its rolled, bud-like structure opens up a lot of flower-related possibilities. Once you start playing with the basic element, you’ll probably find yourself thinking of ways to add more layers, ways to dress up the roll, and so forth. I think there’s loads of scope here for some stitch play!
For this tutorial, I’m working on linen using DMC perle cotton #5. I had some DMC Variations (variegated threads) on hand, so that’s what I used.
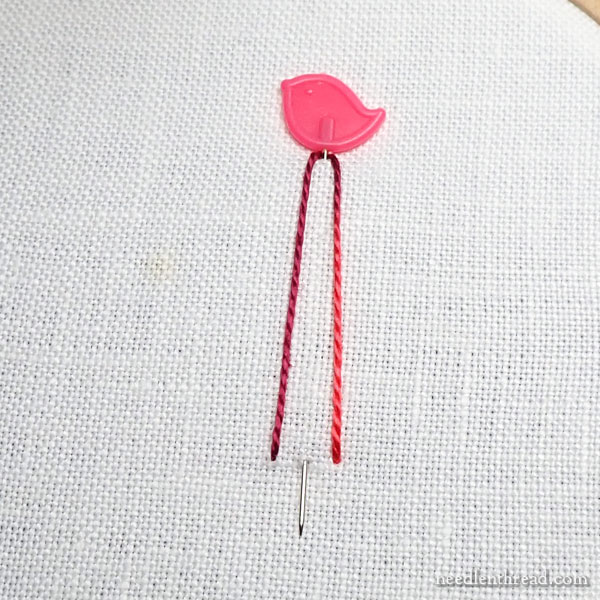
We’re going to start with a medium picot – perhaps about 1.5″ – 1.75″ long.
These little chick pins are slightly longer than average pins and they worked well for this exercise. But any longer quilting pin will do, or you can use the anchor stitch method that we employed on Monday if you don’t have any longer pins.
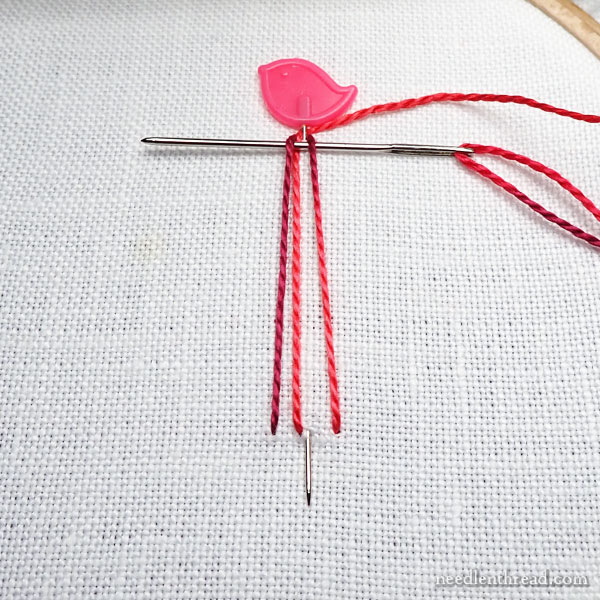
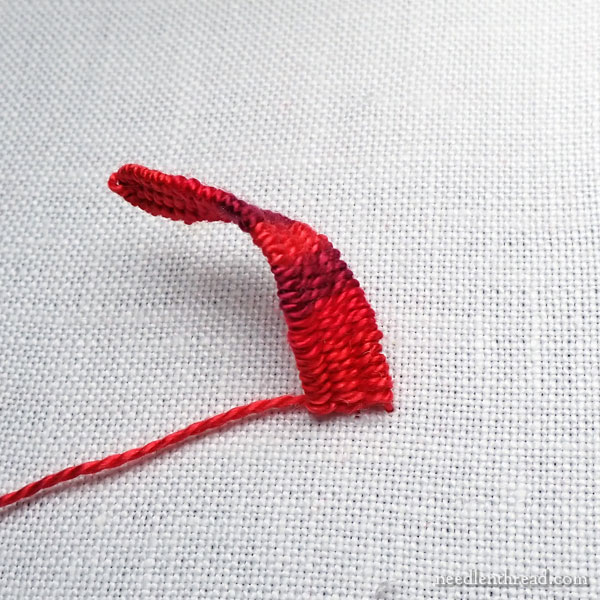
Work the picot just as you would when following the woven picot tutorial.
It helps greatly to use a tapestry needle as you weave the picot, because the blunt tip is less likely to snag on the foundation threads.
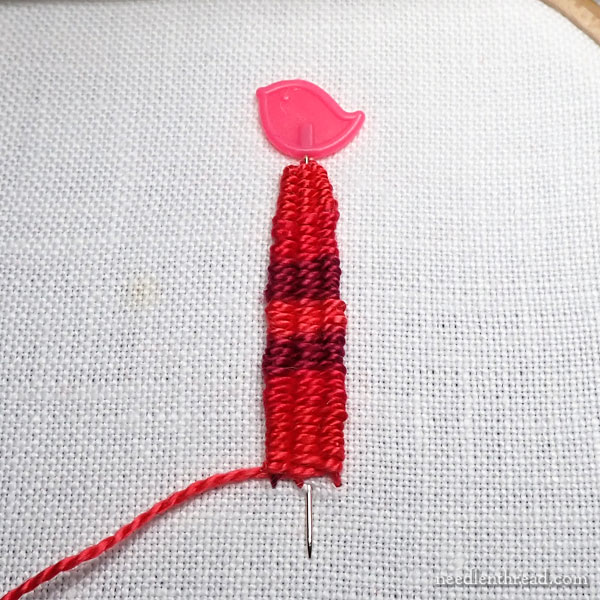
When your foundation threads are fully woven, take your working thread to the back of the fabric as if you are going to end the picot, but don’t cut the working thread! You’ll need the rest of the working thread to anchor the rolled picot to the fabric.
Remove the pin from the picot (or cut the small anchor stitch, if you used an anchor stitch).
My favorite part!!

Manipulate the picot so that it lies on its side. You might have to wiggle and jiggle some of the foundation threads, but it shouldn’t be too difficult to the turn the base of the picot so that the base is somewhat perpendicular to the fabric and the picot is lying on its side.
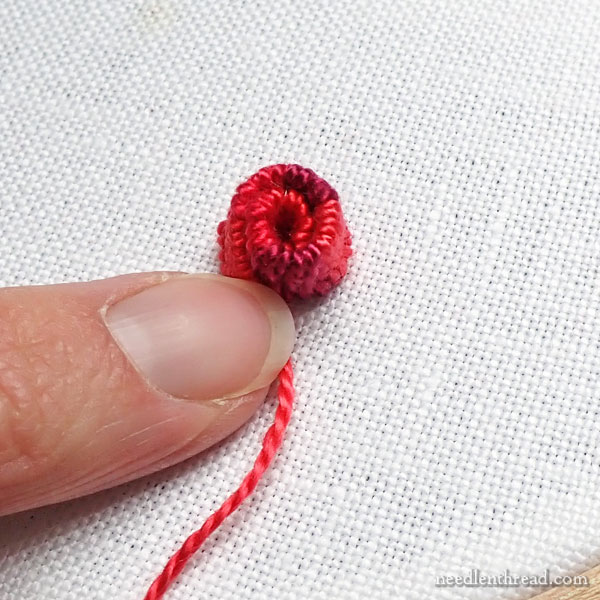
Then, roll the picot around itself, with the base in the center, rolling the rest of the picot around the base.
It will look like the inside round of a cinnamon roll at this point – which is not a bad thing!
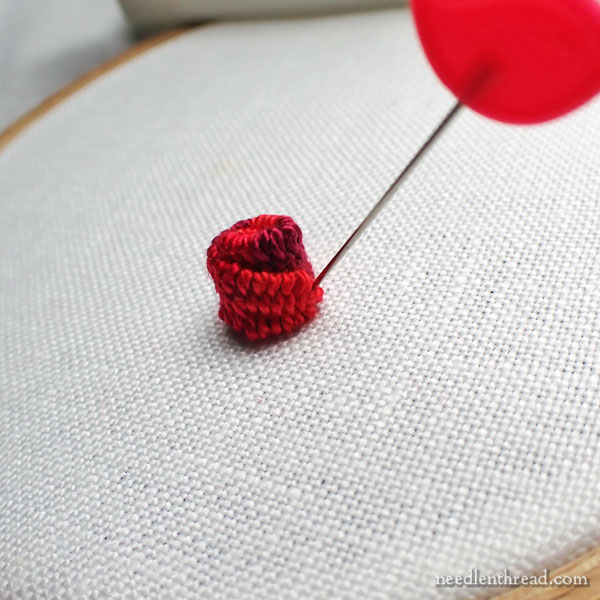
Use a pin to anchor the picot to the fabric, by sticking the pin into the end of the picot (the tip) on the outermost roll, and down into the middle of the roll through the fabric. This should hold the picot in place for a little bit while you anchor it.
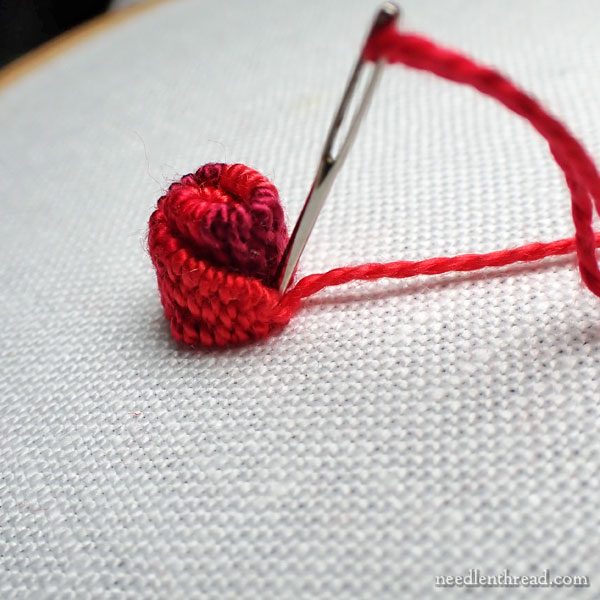
Using the same working thread you used to weave the picot, bring the needle and thread up into the fabric under the outer edge of the picot roll, and take the needle through the tip of the picot or the edge of the picot very near the tip, and then back down into the fabric, to anchor the tip to the fabric.
You want these anchor stitches to be as subtle as possible, so try to bring your thread up just underneath the edge of the picot roll, and go down just underneath the picot, so that you can’t really see the stitches.

Slip the needle between the woven stitches on the picot when you make these anchor stitches.
Work around the outside of the roll, anchoring in about four or five equally spaced spots, to fix the roll to the fabric.
For a small roll like this, anchoring around the outside will work fine. If you have a much larger roll, you’ll have to anchor the picot a little differently – and we’ll look at that on Friday!
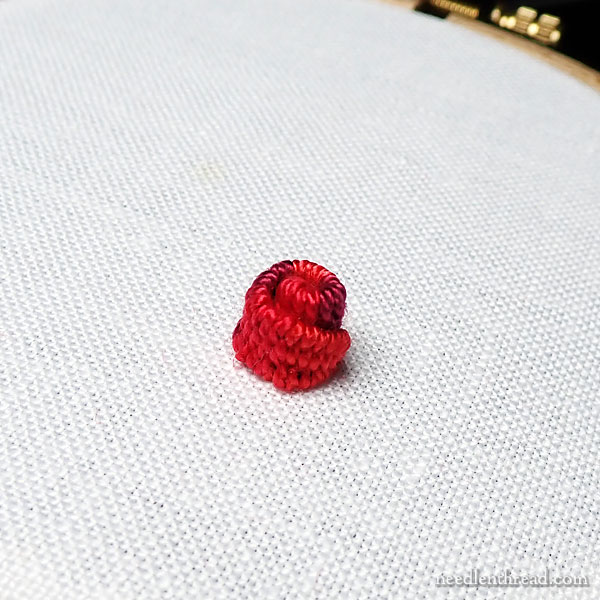
Here’s the little rolled picot, ready to go!
This variation of a woven picot opens up some fun possibilities. We’ll look at once of those on Friday, as we explore the stitch a little farther.
Take some time to play with some rolled woven picots and see what you can come up with! Hope you enjoy it!
If you’re looking for more Stitch Fun! tutorials, you’ll find a whole list of them here.
I’m currently away on a short trip, but I’ll be back soon. If there’s a delay in publishing blog comments or replying to email, that’s why! Feel free to leave comments on the website if you’d like, though. I’ll get to them as soon as I can! If you can hold off on any email question until next week, it’ll be easier for me to address them then. Thanks!
