Have you ever tried to transfer an embroidery design onto dark or brightly colored fabrics and ended up dissatisfied with the results?
Pencil lines and dark ink don’t show up, chalk pencils rub off during the process of stitching, tacking stitches over tissue paper is time intensive and might not deliver the detail you want – all of these are problematic when trying to get a design from paper to darker colored ground fabrics.
A reader recently wrote in frustration, looking for a solution. She wrote:
I’ve tried every kind of chalk pencil out there, but the marks don’t last. I’ve tried white and yellow dressmaker’s carbon, but the fabric surface is too rough. They seem to work better on a smooth fabrics, not bumpy linen. I’ve tried tacking stitches like you recommend for tacking over tracing paper, but the detail isn’t fine enough. What can I use to draw lines on darker fabrics that won’t disappear and that are visible and fine enough for embroidery?
I’m opening the question up for all of you to chime in! Please, offer advice to Stacy!
And in the meantime, I’ll offer this suggestion for those facing a similar dilemma:
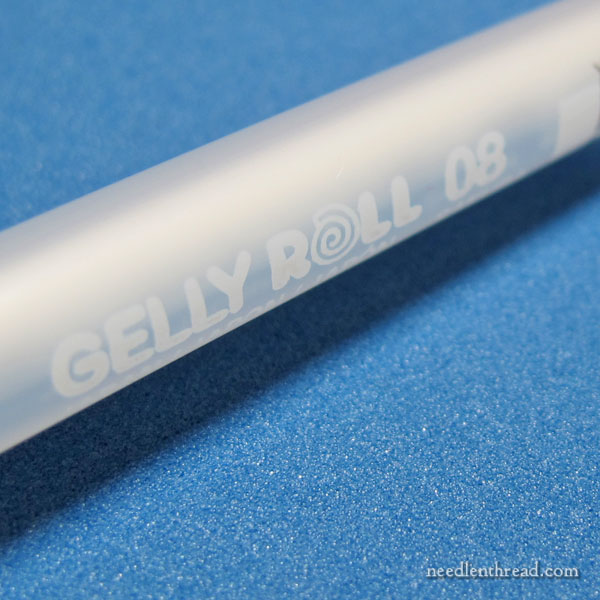
Sakura, the company that makes the Micron pens that I like to use for tracing fine permanent lines for embroidery transfers, also produces the Gelly Roll pens, and in the Gelly Roll Classic line, you’ll find a medium-tipped (size 08) opaque white available, which is great for writing on dark papers.
The white Gelly Roll creates a somewhat-permanent line for embroidery transfers (more below). The thickness and brightness of the line depends on how you use the pen.
Now, the pens are not made for use on fabric that’s intended to be washed, because the gel ink can wash out … although it may not wash completely out, which is where the problem comes in.
So, I recommend these pens for a certain type of use only.
I shall explain:
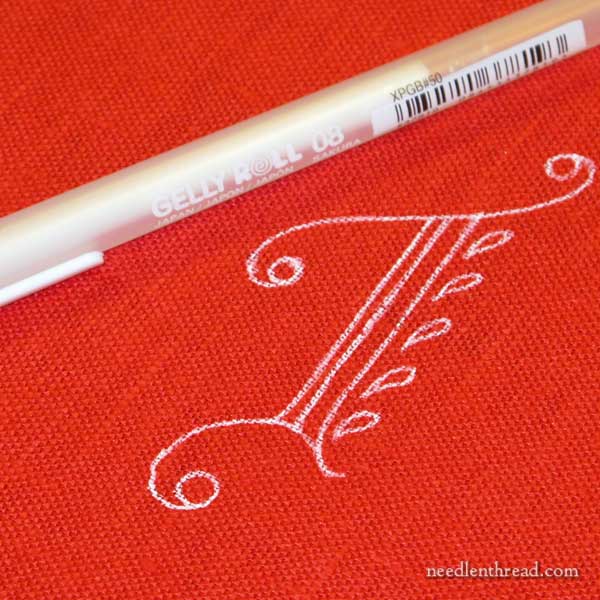
In the first photo above, on the red background, I used the pen to sketch free hand that letter design. I went over the design twice, to produce a very bright white line on the red fabric.
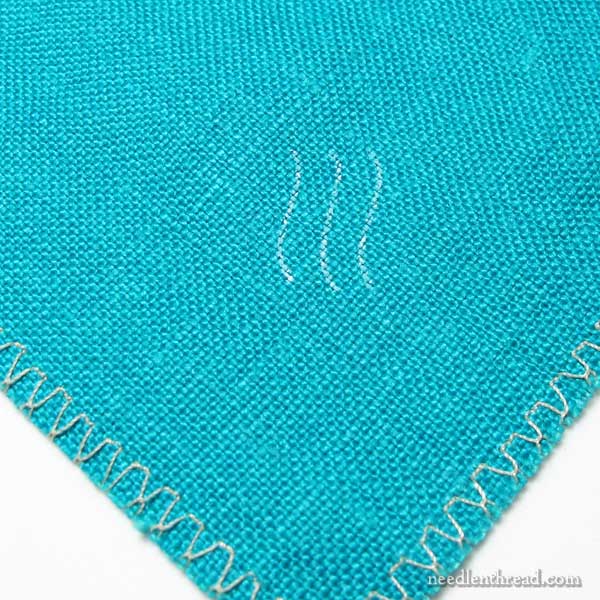
But on the aqua fabric immediately above, I drew three quick strokes, once only, with the pen. You can see that this produced a visible but not heavy or bright white line.
The lines don’t smudge off. While they are not super-fine lines, they are fine enough for an embroidery design transfer. They’re easy to see, even though not bright and heavy. And should you wish to wash the fabric after stitching, there’s not a lot of ink there (on the aqua background) that could cause problems if it runs or blooms. It would pretty much just fade into the background.
On the red fabric, though, that much ink may be problematic on two accounts: 1. It would be difficult to cover with embroidery; and 2. If you wash the fabric after embroidering, that much ink might cause a white glow on the fabric, if you can’t wash it completely away.
So, if you’re going to use the Gelly Roll to mark on dark fabric, use only quick single strokes – enough to make a visible line, but not enough to make a heavy, painted-looking line.
Tracing on Dark Fabric
Now, you might be thinking this is all well and fine, but how do you actually trace on dark fabric?
When I use darker fabrics, I use my LightPad for tracing. I’ve reviewed the LightPad here – if you do a lot of design tracing, it’s so very convenient, comfortable, and easy to have a good, flat, large light surface to trace on!
You can see in the examples on the LightPad review that it’s possible to trace on dark linens and silks, with the right light behind the fabric and design.
With very dark and heavy fabrics that don’t benefit from a lit surface behind them, then prick and pounce is the quickest way to get an accurate design onto your fabric. A white or a light grey pounce powder works well in these circumstances. You can read more about prick and pounce in the following articles:
Making Your Own Pounce, in three shades
Powdered Charcoal for Pounce (and resources)
Talc for Pouncing Dark Fabric
Making Your Own Pounce Tool
How to Transfer an Embroidery Design with the Prick and Pounce Method
Once you’ve pounced the design on, you can use the gel pen to connect the dots, but it is very important to wipe the nib frequently – between every stroke. The pounce powder interferes with the gel, so this part is really important.
Frankly, if I were pricking and pouncing, I’d go the extra step and use a tiny paintbrush and watercolor paint to fix the pattern onto the fabric, instead of messing with the gel pen. But if you don’t trust yourself with a tiny paintbrush, the pen is an option, if you are diligent about wiping it down as you use it.
The Pros and Cons of the Gelly Roll
Pros:
If you’re working on dark fabric that you can see through with a light behind it, the Gelly Roll, if used in single strokes and not sketched over and over heavily, makes a decent design transfer when tracing. It won’t smudge off while you’re working the project. The pen draws a good line that’s visible and not too thick.
Cons:
Remember that the pens are not necessarily made for fabric use like this. It seems to me that they last a lot longer with regular use on paper than they do when they are used on fabric. They can be a little ornery when writing on fabric – it helps to have a scrap paper near by to get the ink flow going smoothly again, and it helps to wipe down the tip of the pen occasionally.
Where to Find
In the States, you can find Sakura Gelly Roll pens through local art and craft stores and chain stores like Michael’s, Hobby Lobby, JoAnn’s and the like. You might be able to find them at some office supply stores as well. Overseas, I’d imagine you can find them at similar places – art and hobby shops.
If you can’t find them locally, they’re available through these affiliate options online:
Amazon carries this 6-pack of white Gelly Roll pens, though they are in and out of stock quite often.
You can also find this 3-pack of white Gelly Roll pens on Amazon.
Over to You!
What’s your advice for Stacy, for transferring design lines onto dark fabric? Please do add your bit below, as I’m sure it will help many of us!

