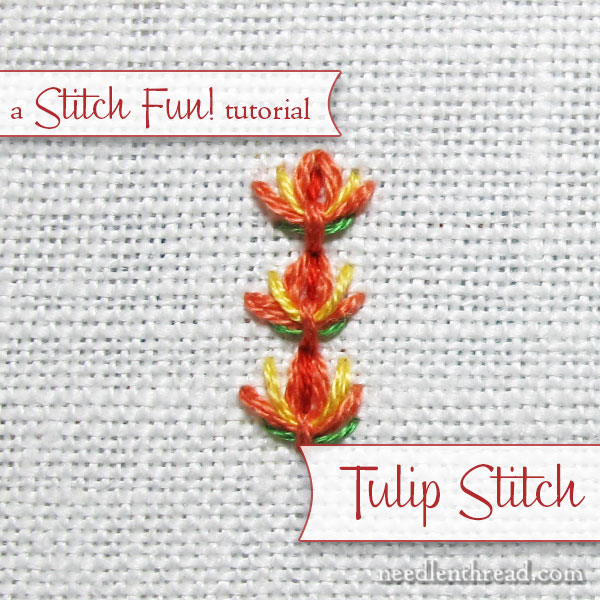
For your weekend stitching adventures, here’s a super-simple, really fun stitch with a whole lot of options for further experimentation.
The stitch is called tulip stitch – it’s a slipped, detached chain stitch, and while it can be worked singly, as a detached, lonely stitch, it also works up well into a line stitch.
Tulip stitch works well as an individual accent stitch, but it can also be worked in lines, in gentle curves, for seam treatments in crazy quilts, on lettering, in garden landscapes, as borders, and I’m sure you can come up with many more possibilities!
Ready?
In this tutorial, I’m working on linen, using stranded cotton and a #7 crewel needle.
I played with different colors of thread with this particular tutorial, but don’t limit yourself! You can mix up colors and incorporate different weights of embroidery thread, too, for a variety of results.
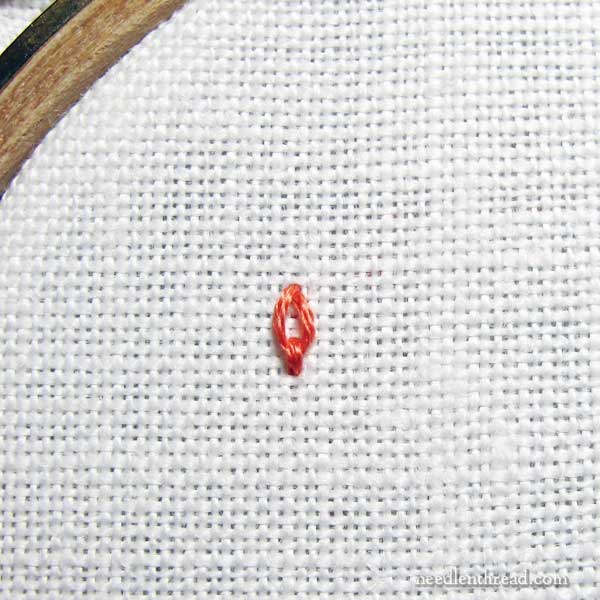
The stitch begins with a simple detached chain stitch (or daisy stitch), which I’ve worked above, using three strands of floss. You can find a video tutorial for the detached chain stitch here.
To get the tulip effect from which the stitch gets its name, the daisy stitch should be worked so that the anchor stitch is below the beginning point, or tip, of the chain stitch, as shown in the photo above. In short, you want the pointy part pointing upwards.
If you aren’t shooting for a tulip effect, it doesn’t really matter what direction the stitch is going in!
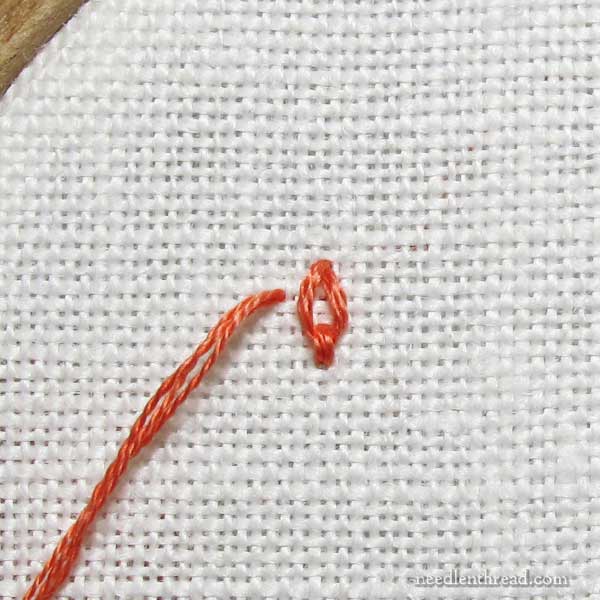
The next step here is where the “slipped” part of the name (slipped, detached chain) comes in.
When you slip a stitch, you’re just slipping in another element into an already-stitched stitch. I’ve brought the working thread up on the left of the detached chain, a little over halfway up in this case…
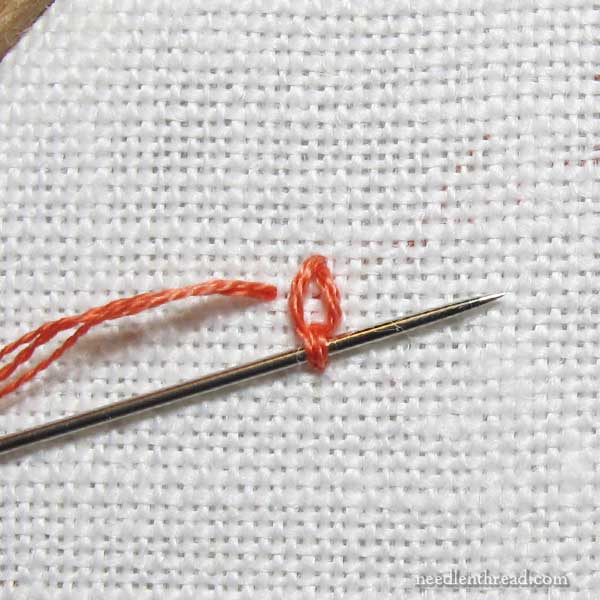
…and now I’m going to slip the thread underneath the anchor stitch on the detached chain, by passing the needle inside that anchor stitch without picking up any fabric.
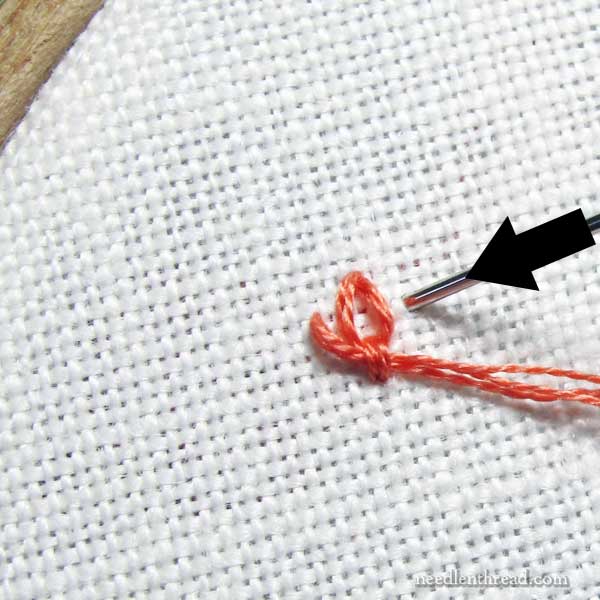
And now the needle and thread pass to the back again, just on the other side of the detached chain, directly across from where the thread just emerged.
When pulling the thread to the back, try not to put a lot of tension on the thread. You want the slipped stitch to cup around the base of the detached chain.
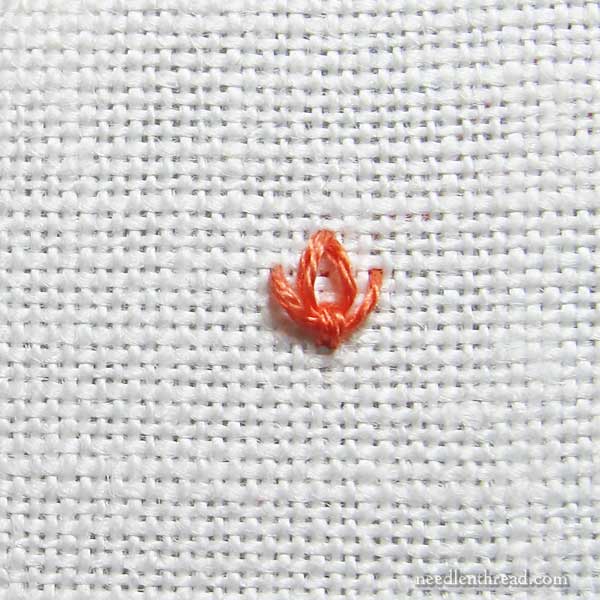
And that’s the tulip stitch in its simplest form – a very easy stitch!
This is the type of stitch you could scatter nicely in an open, airy area as an isolated stitch – much like tête de boeuf stitch (or bull’s head stitch), which is a detached chain with small slanted straight stitches on each side of it.
But let’s go ahead and take the stitch a little further, turning it into a line stitch.
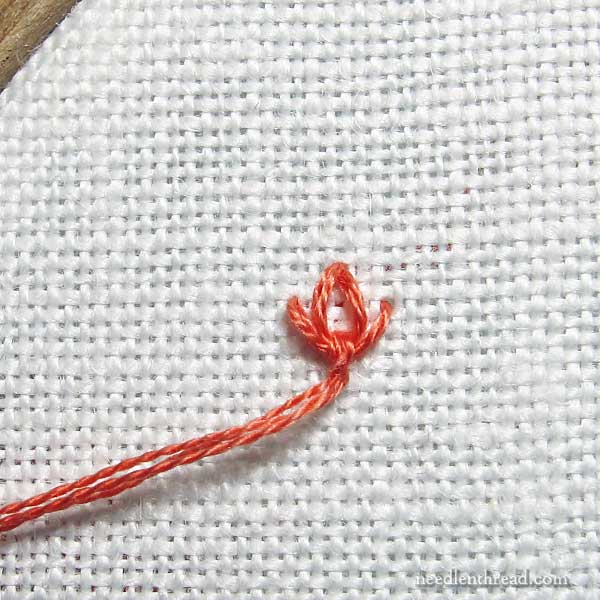
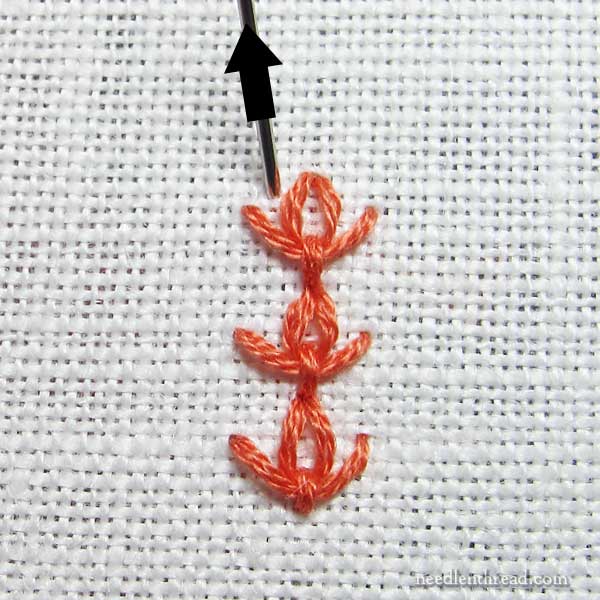
To continue the tulip stitch in a line, bring the needle and thread to the front again, coming up in the same hole shared by the base of the anchor stitch from the previous detached chain.
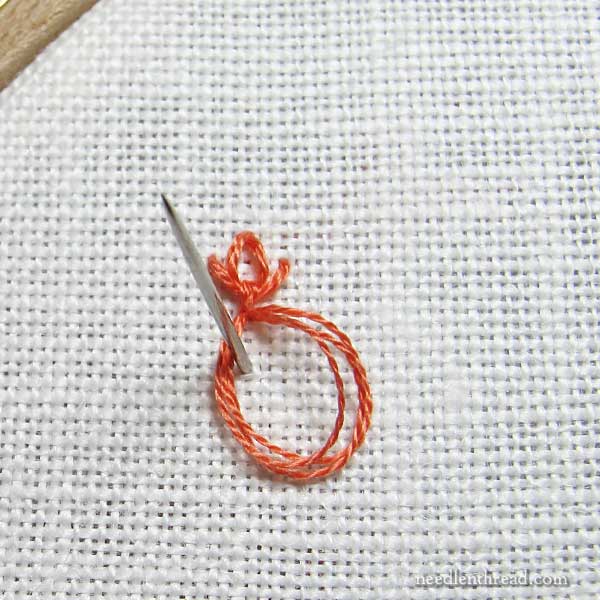
Make a new detached chain stitch. In the photo above, I’ve gone down into the same hole I just emerged from, and I’ve left a small loop on the top of the fabric. I’m bringing my needle up inside the loop, to create the chain stitch.
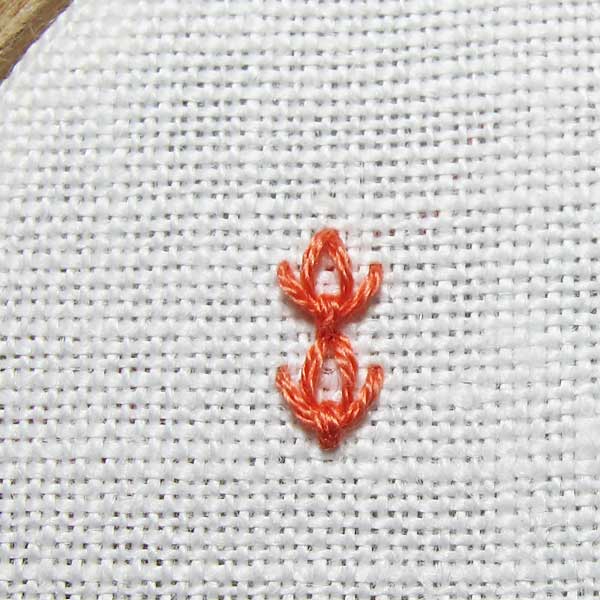
Here’s two tulip stitches worked in a line.
You might be tempted to think that the detached chain stitches are no longer detached chain stitches, since they’re worked in a line. But, in fact, each chain stitch is created separately – they aren’t interlinked at all. That’s why they’re still called detached chain stitches.
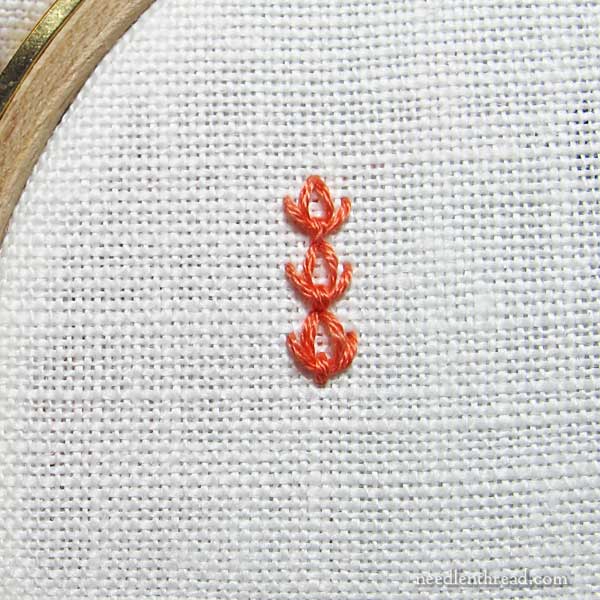
And here you have three! Cute, aren’t they?
Now, we could leave them just like this – it’s a nice looking stitch, very simple, and it makes a nice line stitch, too.
But let’s embellish it a bit more, shall we?
I’ve switched to a yellow thread here – three strands of yellow DMC in the needle – and I’m coming up just to the left of the chain stitch, a little higher than the first slipped stitch.
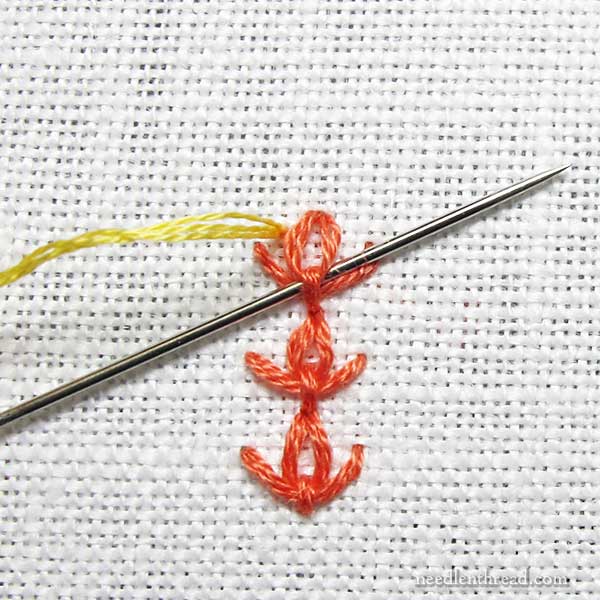
I’m just going to slip a bit of yellow in here, the same way I worked the first slip stitch, by passing under the anchor stitch and taking the needle and thread to the back opposite where I emerged.
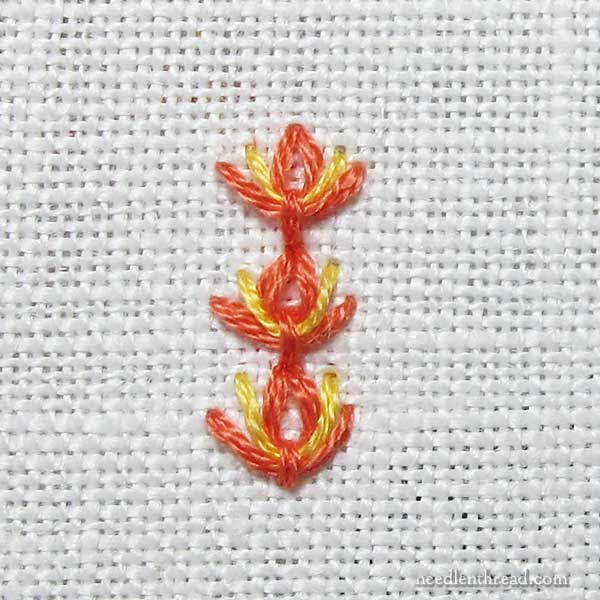
Here you have the three stitches, slipped with yellow.
And we could leave it there, but…
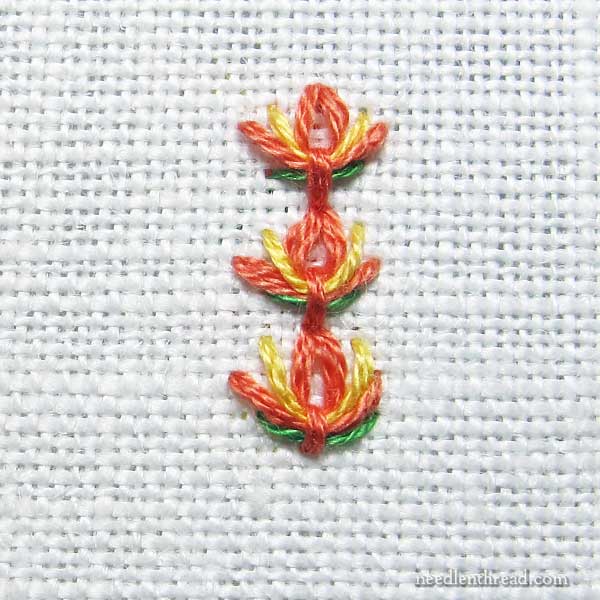
…why not add a tiny touch of green at the base of each, to give it a floral note. I used two strands of green, to keep the green slipped stitches a bit more subtle.
And, yes, we could stop there.
But I wanted a little depth of color in the middle of the tulips, so…
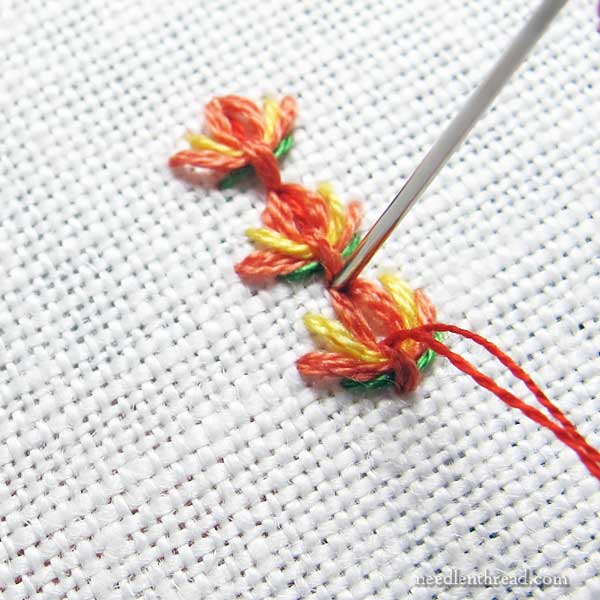
…I backstitched in red (two strands) in the center of each detached chain, bringing my needle to the front at the top of the anchor stitch and taking the needle and thread to the back at the tip of the tulip, and working down the line.
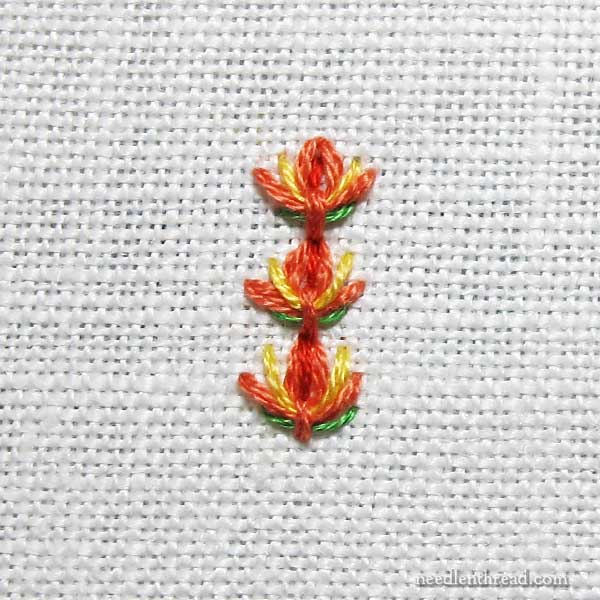
Perhaps this isn’t the best color combination. The red doesn’t show up that well and the yellow is a bit lost. Good excuse for me to play with the stitch a bit more!
But now it’s your turn to try it – what will you do with it?
You could enhance the flower look by working another slip of green in there, smaller, pointing downwards. You could also get really fancy and work a small bullion stitch in the middle of each chain.
You could try the stitch with a twisted chain stitch for the starter stitch, to give it a bit more of a flip at the tip of the tulip shape.
You could stray from the tulip look and tip the slipped stitches with French knots, to create a fancier, fuller border or line.
Like I said, lots of possibilities! I don’t think I’m quite finished playing with this particular stitch, come to the think of it. While writing up this tutorial, I’ve had about ten ideas that would be fun to try.
Woe is me – I think they call this problem Stitch Addiction!
Looking for more embroidery stitch tutorials?
If you’re looking for more hand embroidery stitching tutorials, you’ll find heaps of them right here on Needle ‘n Thread. In the How-to Video index, you’ll find over 75 video tutorials for embroidery stitches; and in the Stitch Fun Index, you’ll find almost an equal number of step-by-step photo tutorials for fun stitch combinations and explorations.
And I’m always happy to take requests, if you have a particular stitch or technique you’d like to see demonstrated in a tutorial. Feel free to drop me a line or to leave a comment. I’ll add it to the list and do my best to work up a demonstration for you.
Enjoy the weekend!

